How To Apply Heat Transfer Vinyl With An Iron
by Alice Davis
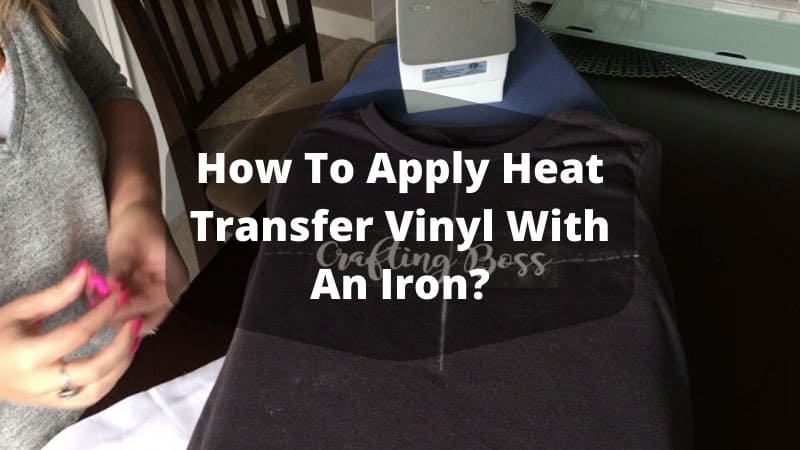
A crafter once pulled a freshly pressed tee from the ironing board, peeled back the carrier sheet slowly, and watched half the design lift right off with it — a result of too much heat and not enough dwell time applied uniformly across the design area. That kind of outcome is exactly what pushes most beginners to finally learn how to apply heat transfer vinyl with an iron the right way, using deliberate method rather than instinct alone. The process is genuinely accessible once the core variables — heat, pressure, and peel method — are well understood and consistently executed on every project. For a broader look at HTV projects and materials, the heat press and vinyl section at PalmGear covers everything from beginner film types to professional-grade production workflows.
Contents
- Essential Supplies for Iron-On HTV Application
- How to Apply Heat Transfer Vinyl with an Iron: The Heat, Pressure, and Timing System
- Choosing Iron-On HTV: Best Fabrics and When to Skip It
- Pro Techniques That Separate Good Results from Great Ones
- Application Errors That Destroy Designs Before They Set
- Iron-On HTV in Practice: Apparel, Bags, and Craft Projects
- Frequently Asked Questions
Essential Supplies for Iron-On HTV Application
Getting consistently clean results when applying heat transfer vinyl starts with assembling the right tools before the iron ever touches the material. Most failures in HTV projects trace back to inadequate preparation rather than poor technique during the actual pressing step itself.
The HTV Material
Heat transfer vinyl is a polyurethane-based film with a heat-activated adhesive layer bonded to a clear carrier sheet, and selecting the correct film type is critical for iron-on success. The most common categories include:
- Standard smooth HTV — The benchmark choice for cotton and cotton-blend garments; available in hundreds of colors and cuts cleanly with minimal blade pressure.
- Glitter HTV — Requires higher heat and longer dwell time; the textured surface tolerates minor pressure inconsistencies better than smooth films do.
- Stretch HTV — Formulated specifically for spandex, lycra, and athletic fabrics; uses a meaningfully lower temperature threshold than standard polyurethane films.
- Foil HTV — Demands precise, even pressure and absolutely no steam; even small moisture pockets cause delamination along the seam edges.
- Flocked HTV — Produces a velvet-like raised texture; notoriously pressure-sensitive and benefits most from a dedicated heat press rather than a household iron.
Supporting Tools and Surfaces
A well-assembled toolkit eliminates most of the variables that produce inconsistent results across repeated applications. Every productive HTV workspace includes these core items:
- Household iron with steam fully disabled — Steam ports create uneven pressure zones and introduce moisture that degrades adhesive bonding at the substrate interface.
- Teflon sheet or parchment paper — Protects the HTV surface from direct iron contact and distributes heat more evenly across the entire design footprint.
- Hard, firm pressing surface — A wooden ironing board covered with a thin cotton pad works adequately; a firm craft mat or portable pressing board delivers more consistent downward pressure.
- Fine-tipped weeding tool — A precision hook or craft knife for removing negative vinyl from around design elements after the cutting step is complete.
- Cutting machine or sharp scissors — A dedicated vinyl cutter produces clean, complex shapes with consistent blade depth; scissors handle simple geometric cuts reliably. Crafters deciding between these options can review PalmGear's detailed breakdown of whether a vinyl cutter is necessary for heat press work before making an equipment investment.
How to Apply Heat Transfer Vinyl with an Iron: The Heat, Pressure, and Timing System
The three variables governing every iron-on HTV application — temperature, pressure, and dwell time — function as an interdependent system where a deficit in one cannot be compensated by increasing another without introducing new failure points. Understanding this relationship is what separates durable, wash-fast applications from designs that peel at the edges after the third laundry cycle.
Iron Temperature Settings by Fabric Type
Standard household irons operate from roughly 250°F at the lowest setting to over 450°F at the maximum cotton position, and most HTV manufacturers specify application temperatures between 305°F and 320°F for standard smooth films. The table below maps common fabric categories to recommended starting temperatures and peel protocols:
| Fabric Type | Recommended Temp (°F) | Iron Setting | Peel Method |
|---|---|---|---|
| 100% Cotton | 305–320°F | Cotton / High | Hot or warm peel |
| Cotton-Poly Blend (50/50) | 285–305°F | Synthetic / Medium-High | Cold peel |
| 100% Polyester | 270–285°F | Synthetic / Medium | Cold peel |
| Spandex / Lycra / Stretch | 255–270°F | Silk / Low-Medium | Cold peel |
| Denim | 320–340°F | Cotton / Max | Hot peel |
| Canvas / Tote Fabric | 305–320°F | Cotton / High | Hot or warm peel |
Polyester substrates carry a specific risk of dye migration — the fabric's pigment bleeds upward into the HTV adhesive layer at elevated temperatures, creating a discolored halo beneath the design that is permanent. Using a Teflon sheet barrier and staying within the lower temperature band reduces this risk substantially on synthetic materials.
Pressure and Dwell Time Technique

Household irons apply less uniform pressure than a dedicated heat press, which means deliberate technique matters far more when working with consumer-grade equipment. The recommended step sequence for iron-on HTV application is:
- Pre-heat the iron for at least five minutes at the target temperature to ensure the soleplate is uniformly hot from edge to edge across the full pressing surface.
- Pre-press the garment for 10–15 seconds to drive out residual moisture and flatten seams that would otherwise create uneven pressure points under the design.
- Position the cut and weeded HTV design face-down on the substrate with the carrier sheet facing up toward the iron's soleplate.
- Lay a Teflon sheet or sheet of parchment paper over the carrier to protect the film from direct soleplate contact and distribute heat more evenly.
- Apply firm, steady downward pressure for 10–15 seconds per section, moving methodically across the design in a grid pattern without sliding or dragging.
- Flip the garment and press from the reverse side for an additional 10–15 seconds to fully activate the adhesive from the underside of the fabric layer.
- Allow the design to cool completely before peeling the carrier sheet, unless the HTV is specifically labeled as a hot-peel formulation by the manufacturer.
Always include a reverse-side press as a mandatory second pass — this step alone dramatically improves adhesion on thick substrates like denim and fleece, where heat penetration from the front surface is insufficient for full adhesive activation.
Choosing Iron-On HTV: Best Fabrics and When to Skip It
Heat transfer vinyl applied with a household iron performs exceptionally well on the right substrates and fails predictably on the wrong ones, making fabric identification one of the most important pre-project skills in the crafter's toolkit. The substrate's fiber content, weave density, and surface treatment all influence how well the HTV adhesive bonds and how long that bond holds through repeated laundering cycles.
Ideal Fabrics for Iron-On HTV
The following fabric categories produce the most consistent and durable results with standard iron-on application, according to Wikipedia's overview of iron-on transfer technology and widely documented craft industry testing:
- 100% cotton — The benchmark substrate for HTV; natural fibers accept heat readily and the adhesive bonds firmly without any risk of melting or surface distortion.
- Cotton-polyester blends (50/50 to 80/20 cotton-heavy) — Widely available in T-shirt blanks and craft items; performs reliably with slightly reduced temperatures and a mandatory cold peel protocol.
- Canvas and duck cloth — Dense weave provides an excellent bonding surface for tote bags, hats, and accessories where long-term durability is the primary performance requirement.
- Flat-surface fleece (low-pile only) — Accepts HTV well on smooth fleece; high-loft or fluffy fleece creates air pockets that prevent full adhesion across the design footprint.
- Denim — Handles elevated iron temperatures reliably and produces long-lasting bonds, though the textured weave surface requires extended dwell time for complete adhesive penetration.
Surfaces That Resist Reliable Bonding
Certain materials present adhesive challenges that standard iron-on HTV cannot reliably overcome without specialized film formulations or equipment upgrades beyond a household iron:
- 100% polyester activewear with moisture-wicking treatment — The surface finish actively resists adhesive bonding and causes premature peeling at design edges, often within the first three wash cycles.
- Nylon — Melts or warps at temperatures required for standard HTV adhesion; low-temperature stretch HTV is the only viable option and still carries a meaningful risk of surface damage.
- Waterproof or DWR-coated fabrics — The durable water-repellent surface treatment creates an impenetrable barrier between the adhesive layer and the underlying fiber structure.
- Heavily textured or ribbed knits — Air gaps between the vinyl and high-relief substrate surfaces create lift initiation points that expand with each subsequent wash cycle.
- Leather and faux leather — Requires specialized adhesive HTV formulations and a controlled press; household iron temperatures cause surface bubbling or permanent heat damage to both material types.
Pro Techniques That Separate Good Results from Great Ones
Experienced HTV crafters develop a set of repeatable preparation habits that eliminate the variability that troubles occasional users, producing results that hold up to repeated washing even with consumer-grade equipment. The difference between adequate and excellent outcomes lies almost entirely in the steps taken before the iron makes contact with the substrate surface.
Pre-Pressing and Design Preparation
- Pre-press the blank garment — Press the substrate for 10–15 seconds before placing the HTV to drive out residual moisture and flatten seam ridges that would otherwise create uneven pressure points beneath the design.
- Mirror the design before cutting — HTV is placed adhesive-side down, which means the design must be cut in reverse so it reads correctly once applied; skipping this step ruins the entire piece.
- Weed completely before pressing — Remove all negative vinyl including the small interior islands inside letters like O, P, D, and B before pressing; trapped backing creates permanent air bubbles beneath the design.
- Align with precision tools — Use a ruler or alignment grid to position the design accurately before pressing; HTV bonds permanently on first contact with sufficient heat, leaving no opportunity for repositioning.
- Cover with Teflon on every press — Even when the carrier sheet appears thick enough to protect the design, direct soleplate contact risks scorching and creates uneven heat distribution across the film surface.
Layering Multiple HTV Colors
Multi-color designs require a sequenced layering approach that protects previously pressed layers while fully activating each new one in turn. The correct workflow for layered HTV is:
- Press the bottom layer at full recommended temperature for the substrate and peel the carrier once the film has cooled completely to room temperature.
- Position the second color precisely over the first, using registration marks or the carrier sheet edge as an alignment reference before pressing.
- Reduce pressing time by 20–30% for each subsequent layer to avoid over-heating the already-bonded vinyl sitting directly beneath the active pressing area.
- Cover all previously applied layers with a Teflon sheet during every subsequent press to diffuse heat and shield existing adhesive bonds from cumulative thermal stress.
- Avoid pressing any single area more than three times total, as repeated heat exposure degrades adhesive integrity in the lower layers and causes edge lifting during washing.
Crafters who are building a repeatable production workflow around iron-on HTV — whether for custom gifts or small-batch fulfillment — may find it useful to review how much profit a T-shirt business makes in a year to understand where iron-on methods fit within a commercially viable production model.
Application Errors That Destroy Designs Before They Set

The most common HTV failures are entirely preventable and stem from a small, repeatable set of mistakes that most beginners make in roughly the same sequence. Recognizing these patterns before starting a project saves wasted materials, ruined blanks, and the frustration of watching a finished design peel away after the first wash.
Heat and Timing Mistakes
- Using steam during application — Steam moisture is the single most destructive variable in iron-on HTV work; it causes instant adhesive contamination and produces bubbling that becomes permanent once the film cools and sets.
- Sliding the iron instead of pressing — A sliding motion stretches the HTV film, distorts design geometry, and prevents uniform dwell time from being achieved across the full design surface area.
- Peeling too early on cold-peel films — Pulling the carrier sheet before the adhesive has cooled completely locks in stress fractures across the bond interface and triggers partial delamination after the first laundering cycle.
- Insufficient dwell time on dense fills — Large solid-fill areas and dense design elements require longer pressing time than fine lines; applying uniform short dwell across a complex design leaves the center areas under-bonded.
- Over-pressing — Excessive heat and dwell time causes the adhesive to bleed beyond design edges, creating a permanent glossy halo on the garment surface that cannot be removed after bonding occurs.
Cutting and Weeding Errors
- Cutting through the carrier sheet — Blade depth must penetrate the vinyl film layer only; cuts that reach through the carrier create lifting points and compromise the structural integrity of the carrier during placement.
- Incomplete weeding before pressing — Any remaining negative vinyl that contacts the substrate during pressing bonds permanently and cannot be removed without damaging the underlying fabric permanently.
- Forgetting to mirror the design — Text, logos, and asymmetric elements must be cut in mirror image before pressing; this is consistently the most common single-step error among crafters first learning how to apply heat transfer vinyl with an iron.
- Working with dull or worn blades — Dull cutting blades produce ragged, torn edges that fail to adhere cleanly along design perimeters and create peeling initiation points that worsen with repeated washing and wearing.
Iron-On HTV in Practice: Apparel, Bags, and Craft Projects
Understanding technique becomes most actionable when connected to specific project types and the unique challenges each substrate category presents. Experienced crafters develop project-specific pressing protocols rather than applying a single universal workflow across every material and design combination they encounter.
T-Shirt and Hoodie Projects
T-shirts represent the most forgiving substrate for iron-on HTV and serve as the standard starting point for crafters developing consistent technique. The step sequence for a standard adult cotton T-shirt project is:
- Insert a firm piece of cardboard or a pressing board inside the shirt to create a stable surface and prevent the back fabric layer from bonding to the front during pressing.
- Pre-press the chest area at full cotton temperature for 10 seconds to remove moisture and eliminate any fabric wrinkles from the pressing zone.
- Center the weeded design using a ruler measured from the neckline seam, then secure alignment with removable chalk marks or heat-resistant tape at the corners.
- Press in 15-second intervals, working from the center of the design outward toward the edges to avoid trapping air pockets beneath the film perimeter.
- Flip the shirt and press from the reverse side for 15 seconds, then allow to cool fully to room temperature before peeling the carrier sheet.
Hoodies present additional complexity due to their thick fleece construction and the chest pocket seam running across the primary decoration zone. The standard adjustment is to increase dwell time to 20 seconds per section and place a small pressing pillow beneath the chest panel to lift the flat fabric surface above the pocket seam for uniform contact.
Beyond Apparel: Totes, Pillows, and Décor
Iron-on HTV adheres reliably on a wide range of non-apparel substrates when pressing technique is adapted to the specific surface characteristics of each item type:
- Canvas tote bags — Insert a firm pressing board inside the bag before pressing to prevent the HTV from bonding through both fabric layers simultaneously, which ruins the bag's interior surface permanently.
- Throw pillowcases — Standard cotton pillowcases accept HTV cleanly; insert a pressing board inside and follow the full standard cotton protocol including a reverse-side press for maximum adhesion durability.
- Aprons — Heavy canvas aprons are excellent for custom gifting and personalization projects; their dense weave requires the same elevated dwell time as denim to achieve full adhesive penetration.
- Flat-brim hats — Structured hats with flat panels accept iron-on HTV well when pressed on a flat surface; curved brim sections require a specialized hat press attachment for reliable edge adhesion.
- Smooth unfinished wood — Specialized hard-surface HTV formulations bond to smooth, unfinished wood with a household iron, opening up signage, frames, and home décor projects to crafters beyond the apparel category.
Frequently Asked Questions
Can heat transfer vinyl be applied successfully with a regular household iron?
A standard household iron applies HTV successfully on cotton and cotton-blend fabrics when steam is fully disabled, firm downward pressure is maintained consistently for 10–15 seconds per section, and the correct temperature setting is matched to the specific substrate type being used. Results are durable and wash-fast when the full application protocol — including a reverse-side press and a complete cool-down before carrier peel — is followed on every project.
Why does HTV peel off after washing even when it looked good after pressing?
Post-laundry peeling is a reliable indicator of under-pressing during application, meaning the adhesive was not fully activated due to insufficient temperature, inadequate downward pressure, or dwell time that was too short to penetrate the substrate fibers completely. Adding a mandatory reverse-side press and ensuring the film cools fully before carrier sheet removal both substantially improve wash durability on finished projects.
What iron temperature is correct for applying HTV on polyester fabric?
Polyester substrates require a reduced application temperature of 270–285°F to prevent dye migration and avoid distortion of the synthetic fiber structure, which corresponds to the synthetic or medium iron setting on most consumer appliances. Cold peel protocol is mandatory on polyester, and a Teflon sheet barrier provides essential protection against direct heat damage to the fabric surface during pressing.
Does HTV always need to be mirrored before cutting the design?
All HTV designs must be cut in mirror image because the vinyl is applied adhesive-side down against the substrate surface, then peeled to reveal the correct face-up orientation once bonded. Any text, logo, or asymmetric graphic element will appear permanently reversed on the finished garment if the mirror step is skipped before the cutting machine executes the design file.
Final Thoughts
Mastering how to apply heat transfer vinyl with an iron is a skill that compounds quickly — the fundamentals covered here deliver clean, durable results from the very first project, and each subsequent application builds the material intuition that separates consistent producers from occasional crafters. The next step is to pick a substrate, assemble the correct supplies, and run a test press on a scrap piece of fabric before committing to a finished blank. Readers looking to go deeper on film selection, cutting machine workflows, and scaling beyond single-piece production can explore the full heat press and vinyl resource library at PalmGear for comprehensive guides covering every stage of the craft.


About Alice Davis
Alice Davis is a crafts educator and DIY enthusiast based in Long Beach, California. She spent six years teaching textile design and applied arts at a community college, where she introduced students to everything from basic sewing techniques to vinyl cutting machines and heat press printing as practical, production-ready tools. That classroom experience means she has put more sewing machines, embroidery setups, Cricut systems, and heat press units through real project work than most reviewers ever will. At PalmGear, she covers sewing machines and embroidery tools, vinyl cutters, heat press gear, Cricut accessories, and T-shirt printing guides.
You can get FREE Gifts. Or latest Free phones here.
Disable Ad block to reveal all the info. Once done, hit a button below