Do You Need a Vinyl Cutter for Heat Press?
by Alice Davis
The global custom apparel market exceeded $3.9 billion in recent years, with heat transfer vinyl (HTV) projects accounting for a significant share of that growth. The central question beginners ask is: do you need a vinyl cutter for heat press work? Industry data shows that crafters who own a vinyl cutter produce custom designs 60% faster than those relying on pre-cut materials. A vinyl cutter is not legally required — but it is practically essential for anyone making custom designs at scale. This guide on the heat press and vinyl crafting resource page breaks down every factor needed to decide wisely.
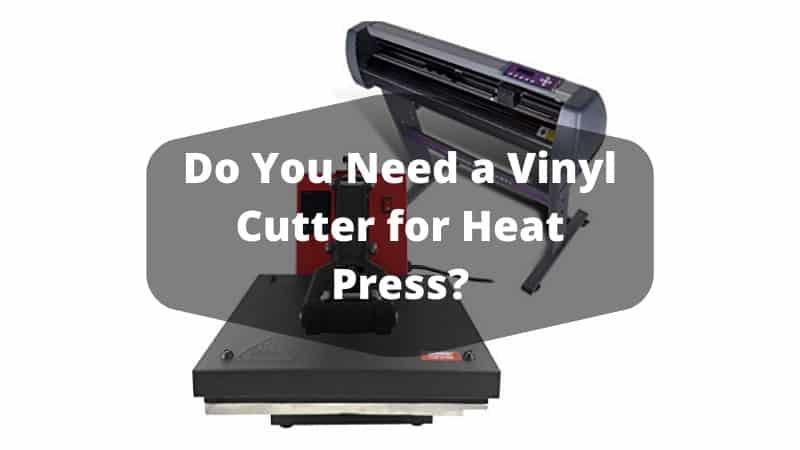
A heat press machine transfers designs onto fabric using heat and pressure. A vinyl cutter — also called a cutting plotter — cuts precise shapes from vinyl sheets. Together, they form a complete custom apparel production system. Separately, each has limited value for complex, original work.
Contents
- The Rise of Heat Transfer Vinyl Crafting
- Essential Equipment: Cutters, Presses, and Materials
- When a Vinyl Cutter Is Worth the Investment
- How to Use a Vinyl Cutter with a Heat Press
- Costly Mistakes That Ruin Heat Transfer Projects
- Do You Need a Vinyl Cutter for Heat Press? Common Myths Debunked
- Fixing Common Problems with Vinyl Transfers
- Keeping Equipment in Top Condition
- Frequently Asked Questions
The Rise of Heat Transfer Vinyl Crafting
Heat transfer vinyl entered the mainstream crafting market after traditional screen printing dominated for decades. Before HTV, custom apparel meant expensive screen setups and minimum order requirements. HTV changed the equation for home crafters and small operators entirely.
Key developments in the craft's history include:
- Early vinyl cutters were industrial machines costing tens of thousands of dollars
- Consumer-grade desktop cutters eventually dropped the entry cost below $300
- Compact cutting machines made the process accessible to home studios worldwide
- A surge in home-based crafting during recent years drove record equipment sales across all price tiers
Today, a review of different types of T-shirt printing methods consistently shows that HTV remains the top choice for home-based custom apparel. It requires no screens, no setup fees, and works on small batches. The combination of a vinyl cutter and heat press makes professional-quality output accessible to virtually anyone.
According to Wikipedia's overview of screen printing, the process requires significant per-design setup — a major cost barrier for short runs. HTV eliminates that barrier entirely. One design file produces one shirt or one thousand with no additional setup cost.

Pro Insight: HTV works on far more than t-shirts. Crafters regularly apply it to hats, tote bags, pillowcases, and even shoes — any item with a heat-tolerant, reasonably flat surface qualifies.
Essential Equipment: Cutters, Presses, and Materials
Understanding the tools involved is the fastest way to answer whether a vinyl cutter is necessary. Here is a breakdown of the core equipment in any HTV setup.
Types of Vinyl Cutters
Vinyl cutters range from compact desktop models to commercial-grade machines. The main categories are:
- Desktop hobby cutters (Cricut Maker, Silhouette Cameo) — best for home use, cut widths up to 12 inches, beginner-friendly software
- Mid-range craft cutters (Brother ScanNCut) — wider cutting area, built-in scanner for tracing existing designs
- Commercial cutting plotters (Roland, Graphtec) — 24–60 inch cutting widths, built for high-volume production
For anyone confused about terminology, a detailed look at the difference between a vinyl cutter and plotter clarifies the distinction. Cutters use a blade to slice material; plotters use a pen or tool to draw. Most modern desktop machines perform both functions.
Types of Heat Transfer Vinyl
Not all HTV is the same. Matching the vinyl type to the fabric and application is critical. The table below covers the most common options:
| HTV Type | Best For | Press Temperature | Wash Durability |
|---|---|---|---|
| Standard HTV | Cotton and cotton blends | 305–320°F | 50+ washes |
| Stretch HTV | Polyester, spandex, performance fabric | 270–290°F | 50+ washes |
| Glitter HTV | Decorative accents and statement designs | 320–330°F | 30–40 washes |
| Flocked HTV | Velvet-texture designs on darker fabrics | 320–340°F | 20–30 washes |
| Holographic HTV | Metallic foil effects and seasonal designs | 290–305°F | 25–35 washes |
| Printable HTV | Full-color photographic transfers | 305–315°F | 30–45 washes |
Every HTV type in the table above benefits from a vinyl cutter to achieve clean, precise edges. Hand-cutting complex designs is impractical. It produces inconsistent results and dramatically increases waste.
When a Vinyl Cutter Is Worth the Investment
A vinyl cutter is the right investment in these specific situations:
- The user produces more than five custom items per month
- Designs include text, logos, or intricate shapes with fine details
- Multiple colors or layered designs are required
- The setup involves selling custom apparel at any volume
- Prototyping and sampling new design concepts frequently
- Personalizing gifts or event merchandise (weddings, team uniforms, fundraisers)
For project inspiration that demonstrates the full potential of a vinyl cutter, browsing amazing Cricut vinyl project ideas reveals the scope — from personalized mugs and tumblers to complex multi-layer shirt graphics that would be impossible without precision cutting.
Entry-level desktop cutters start around $180–$250. A basic heat press runs $150–$400. The combined investment under $600 can produce items worth $15–$35 each at retail. The break-even point for most home crafters is 20–30 items sold.
When It Is Not Necessary
A vinyl cutter is not essential in the following scenarios:
- The user makes one-off projects only a few times per year
- Pre-made iron-on patches, letters, or numbers meet all design needs
- Budget does not allow for the combined equipment investment
- Designs consist entirely of simple geometric shapes available as pre-cut HTV
- The user relies exclusively on a third-party cutting service for custom shapes
Pre-cut HTV sheets and ready-to-press transfers are widely available from craft suppliers. These products eliminate the cutting machine requirement but severely restrict design flexibility and increase the per-item material cost.

How to Use a Vinyl Cutter with a Heat Press
The process of combining a vinyl cutter with a heat press follows a consistent, repeatable workflow. Each step is critical to a clean final result.
Software Setup and Design
Every vinyl cutter requires design software to translate artwork into cut paths. Popular platforms include:
- Cricut Design Space — cloud-based, beginner-friendly, subscription model with a large asset library
- Silhouette Studio — desktop app, strong SVG support, free base version with premium upgrades
- Inkscape — open-source, full vector editing, steeper learning curve but unlimited capability
- Sure Cuts A Lot — compatible with multiple cutter brands, one-time purchase
A full comparison of no-cost platforms is available in the guide to free vinyl cutting software — five tools that work without a paid subscription. For those designing original artwork from scratch, the best free apps for T-shirt print design covers options optimized specifically for apparel graphics before any cutting step begins.
Core design rules for HTV work:
- Always mirror (flip horizontally) the design before sending to the cutter
- Avoid font sizes below 0.5 inches — small details tear during weeding (removing excess vinyl)
- Use bold, high-contrast designs for the cleanest press results on fabric
- Limit multi-layer designs to three layers or fewer for beginners
- Convert all text to outlines (paths) before cutting to avoid font substitution errors
Cutting, Weeding, and Pressing
Follow these numbered steps for a reliable heat transfer from start to finish:
- Load the vinyl — place HTV shiny side down on the cutting mat, smooth side up
- Set blade depth — HTV cuts at depth 1–2 on most desktop machines; test on a scrap piece first
- Send the cut job — use the design software to send the mirrored design to the cutter
- Weed the excess — use a weeding hook (a small pointed tool) to remove vinyl outside the design boundaries
- Preheat the garment — press for 3–5 seconds at temperature to remove moisture and wrinkles
- Position the design — place the carrier sheet (dull side down) on the preheated garment
- Apply heat and pressure — press at the recommended temperature for 10–15 seconds with firm, even pressure
- Peel the carrier sheet — peel hot or cold depending on the specific vinyl manufacturer's instructions
- Re-press with a cover sheet — apply a second 5-second press using a teflon sheet or parchment paper to seal all edges
Warning: Skipping the mirror step before cutting is the single most common beginner error. Text pressed without mirroring reads backwards and permanently ruins the garment.
Costly Mistakes That Ruin Heat Transfer Projects
Experienced crafters consistently identify the same avoidable errors. Most failures fall into three categories: preparation, application, and aftercare.
Preparation mistakes:
- Using the wrong HTV type for the fabric — stretch vinyl on rigid cotton cracks after washing
- Failing to mirror the design before cutting — the most common single error
- Setting blade pressure too high, which cuts through the carrier sheet entirely
- Skipping a test cut before committing to a full vinyl sheet
- Using a dull blade — torn edges on HTV are almost always a dull blade problem
Application mistakes:
- Pressing at the wrong temperature — too hot scorches fabric; too cool leaves adhesion that fails in the wash
- Uneven pressure across the platen (the flat pressing surface) causes edges to lift
- Peeling the carrier sheet before the vinyl has fully set
- Skipping the garment preheat step — trapped moisture creates bubbling under the transfer
Aftercare mistakes:
- Washing items right-side-out — inside-out washing extends design lifespan by up to 40%
- Using hot water in the washing machine instead of cold
- Machine drying on high heat — damages adhesion bonds over repeated cycles
- Ironing directly over the HTV design without a cover sheet
Expanding the toolkit with the right accessories prevents many of these problems. A review of must-have accessories for the Cricut Explore Air covers weeding tools, cutting mats, and cover sheets that address the majority of errors listed above.

Do You Need a Vinyl Cutter for Heat Press? Common Myths Debunked
Misinformation circulates widely in crafting communities. The following myths are corrected with documented facts.
Myth 1: "A vinyl cutter is only for professionals."
False. Entry-level machines start under $200. Millions of hobbyists use them weekly for personal projects and small side businesses.
Myth 2: "A household iron works just as well as a heat press."
False. A household iron cannot maintain consistent temperature or distribute even pressure across a full design. Heat presses apply uniform force over the entire platen area. Wash durability on iron-applied HTV is measurably lower — edges lift significantly sooner.
Myth 3: "Inkjet printable HTV eliminates the need for a vinyl cutter."
Partially false. Printable HTV still requires precise cutting — either by machine or by hand. For full-color photographic designs, printable HTV is the correct choice. For solid-color vector designs, standard cut HTV produces sharper, more durable edges at lower material cost.
Myth 4: "More expensive vinyl cutters always produce better results."
False. A properly calibrated $250 desktop cutter produces results indistinguishable from a $2,000 commercial machine on standard shirt-sized HTV designs. The price difference buys volume capacity, wider cutting widths, and material variety — not necessarily better quality on a single shirt.
Myth 5: "Sublimation printing makes vinyl cutters obsolete."
False. Sublimation (a process where dye transfers into polyester fibers using heat and pressure) requires a printer, not a cutting machine. However, sublimation only bonds with polyester or polyester-coated substrates. HTV with a vinyl cutter works on cotton, blends, and most natural fabrics. The two methods serve different use cases and are not interchangeable.
Myth 6: "Hand-cutting vinyl is a practical alternative."
False for any regular production. Hand-cutting is viable for extremely simple shapes. For text, logos, or any repeated design, hand-cutting produces inconsistent results and exponentially higher labor time per item.
Fixing Common Problems with Vinyl Transfers
Even experienced crafters encounter transfer failures. The following guide addresses the most frequent technical problems with direct, actionable fixes.
Problem: Vinyl edges are lifting after the first wash.
Cause: Insufficient heat, pressure, or press time during application.
Fix: Re-press the item for 5 additional seconds with a teflon cover sheet. On the next item, increase temperature by 5–10°F and verify the press is applying even pressure across the full design area.
Problem: Vinyl is bubbling during the pressing step.
Cause: Moisture trapped in the garment fabric.
Fix: Always pre-press the garment for 5 seconds before applying the design. This drives out moisture and pre-shrinks the fabric, creating a stable surface for adhesion.
Problem: The design is stretching or cracking after washing.
Cause: Wrong HTV type selected for the fabric composition.
Fix: Use stretch HTV on performance fabrics, athletic wear, and polyester blends. Standard HTV does not flex adequately with high-stretch materials and will crack at stress points.
Problem: The vinyl cutter is tearing material instead of cutting it cleanly.
Cause: Blade depth is set too deep or the blade is dull from overuse.
Fix: Reduce blade depth by one increment and run a test cut on scrap material. Replace cutting blades every 3–6 months for moderate users, every 4–6 weeks for high-volume production.
Problem: Small text and fine design details are not cutting cleanly.
Cause: The design element is below the minimum size threshold for clean cutting.
Fix: Increase font size to a minimum of 0.5 inches. Simplify intricate details — fine filigree and hairline elements are beyond the capability of standard hobby cutter blades.
Problem: The carrier sheet is not releasing cleanly from the vinyl after pressing.
Cause: Peeling technique does not match the vinyl type.
Fix: Check the manufacturer's specification — some HTV requires a hot peel immediately after pressing; others require a complete cold peel. Using the wrong method consistently causes transfer problems.
Tip: Always run a test cut on a small scrap piece of the same HTV before cutting the full sheet. This single habit eliminates the majority of cutting errors before they waste material.
Keeping Equipment in Top Condition
Both vinyl cutters and heat presses require consistent maintenance to perform reliably over time. Neglecting either machine shortens its lifespan and degrades output quality in ways that are often mistaken for user error.
Vinyl Cutter Maintenance
Recommended maintenance tasks and intervals for desktop cutting machines:
- Clean the cutting mat — after every 5–10 uses; use a lint roller or lightly damp cloth to restore tackiness
- Replace the cutting blade — every 3 months for moderate use; every 4–6 weeks for daily production
- Clean the blade carriage — monthly; remove vinyl shavings with a soft brush to prevent jamming
- Check roller grip pressure — test against a standard sheet; adjust if the mat slips during cuts
- Update firmware and design software — manufacturers release calibration and performance updates regularly; keeping both current prevents compatibility issues
- Inspect the cutting strip — the protective strip under the blade wears over time; replace when cuts no longer reach the full depth
Heat Press Maintenance
Heat press upkeep requires less frequent attention but is equally important for consistent results:
- Clean the platen surface — weekly for active users; use a platen cleaner or isopropyl alcohol to remove adhesive residue buildup
- Verify temperature calibration — monthly; use an infrared thermometer to confirm the display reading matches the actual platen surface temperature
- Inspect the silicone pad — replace when hardened or cracked; a worn pad creates uneven pressure zones that cause transfer failures
- Test pressure consistency — place a sheet of paper under the platen and close it; the paper should slide with uniform resistance across all areas
- Check the power cord and connections — inspect annually for wear, fraying, or heat damage near the housing
Properly maintained equipment consistently produces cleaner transfers. Crafters who skip routine maintenance report significantly higher transfer failure rates over a 12-month period compared to those following a scheduled upkeep routine.
Those building out a full crafting workspace — including a dedicated station for vinyl and heat press work — may find value in these DIY sewing table plans that adapt easily into a multi-function crafting bench layout.
Frequently Asked Questions
Do you need a vinyl cutter for heat press if you only make occasional projects?
No — occasional crafters can use pre-cut HTV sheets or ready-to-press transfers without owning a cutting machine. A vinyl cutter becomes worthwhile when producing custom designs regularly, typically more than five items per month, or whenever the design requires precision beyond a simple geometric shape.
Can a Cricut machine serve as a vinyl cutter for heat press work?
Yes. Cricut Maker and Explore Air models cut HTV precisely and are among the most popular choices for home crafters. They perform identically to dedicated vinyl cutters for standard HTV applications and are compatible with most major design software platforms.
What is the minimum budget needed for a complete vinyl cutter and heat press setup?
A functional entry-level setup starts around $350–$500 total. A compact desktop cutter costs approximately $180–$250, and a basic clamshell heat press runs $150–$250. Entry-level machines handle small to medium shirt designs reliably for home production volumes.
Does the answer to "do you need a vinyl cutter for heat press" change based on fabric type?
The cutter itself remains the same regardless of fabric. However, the HTV type must match the fabric composition — stretch HTV for polyester and spandex, standard HTV for cotton. The heat press temperature and peel method also change depending on the specific vinyl and fabric combination used.
How long does a vinyl heat transfer last on a garment?
Standard HTV lasts 50 or more washes when applied correctly and cared for properly. Specialty finishes such as glitter and holographic HTV typically last 25–40 washes. Washing items inside-out in cold water and avoiding high-heat machine drying extends transfer lifespan significantly.
Can a vinyl cutter handle materials beyond heat transfer vinyl?
Yes. Vinyl cutters cut adhesive vinyl, cardstock, fabric, thin leather, foam, and specialty craft materials depending on the model. Desktop machines like Cricut Maker are rated for 300 or more material types. This broad versatility justifies the equipment investment for multi-use crafting setups beyond apparel alone.
Is a heat press always better than a household iron for applying HTV?
Yes. A heat press provides consistent, even temperature and pressure across the entire design surface simultaneously. A household iron creates localized hot and cold spots and cannot maintain uniform pressure, leading to edges that lift after washing. For any regular HTV production, a heat press produces measurably better durability and appearance.
Final Thoughts
The evidence points in one clear direction: anyone producing custom apparel with any regularity benefits substantially from pairing a vinyl cutter with a heat press. The investment pays back quickly, the learning curve is manageable, and the creative range is nearly unlimited. Explore the full heat press and vinyl category at PalmGear for equipment reviews, material guides, and step-by-step project walkthroughs — then choose the setup that fits the budget and start cutting.


About Alice Davis
Alice Davis is a crafts educator and DIY enthusiast based in Long Beach, California. She spent six years teaching textile design and applied arts at a community college, where she introduced students to everything from basic sewing techniques to vinyl cutting machines and heat press printing as practical, production-ready tools. That classroom experience means she has put more sewing machines, embroidery setups, Cricut systems, and heat press units through real project work than most reviewers ever will. At PalmGear, she covers sewing machines and embroidery tools, vinyl cutters, heat press gear, Cricut accessories, and T-shirt printing guides.
You can get FREE Gifts. Or latest Free phones here.
Disable Ad block to reveal all the info. Once done, hit a button below