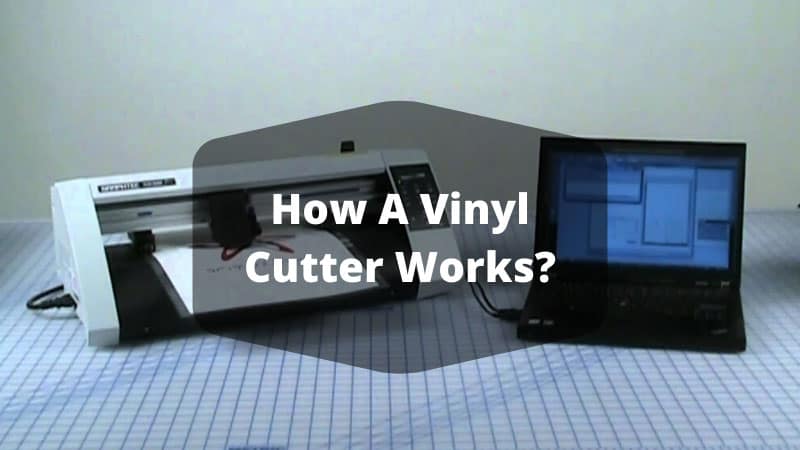
How Does a Vinyl Cutter Work?
by Alice Davis
Vinyl cutting machines now power a global market worth over $1.5 billion, spanning home craft studios and professional sign shops on every continent. Understanding how a vinyl cutter works is the starting point for anyone who wants consistent, precise results from this technology — whether the goal is a single custom decal or a full production run of heat transfer apparel. The machine operates on a deceptively clean principle: a computer-controlled carbide blade follows a digital vector path across vinyl material, cutting shapes and letterforms with mechanical accuracy. It never cuts all the way through the material. The blade penetrates only the vinyl layer, leaving the backing paper intact so the cut piece can be weeded and applied cleanly. For anyone serious about entering the heat press and vinyl craft space, grasping this foundational mechanic separates good results from wasted rolls of expensive material.
The blade itself moves along two axes — X (left to right across the media) and Y (forward and back as the media feeds through the rollers). The cutting head raises and lowers at specific coordinates determined by the design software, and the combination of those three movements — X position, Y position, and blade up or down — produces every cut shape the machine is capable of making. Speed, pressure, blade depth, and material type all interact to determine whether the final cut is clean or compromised. These variables are what separate a well-tuned machine from one that produces torn corners and ragged edges.
Contents
What Vinyl Cutters Are Actually Built For
A vinyl cutter is a purpose-built tool, and understanding its intended applications prevents buyers from purchasing the wrong machine for their actual workload. The use case determines nearly every specification that matters: cutting force, media width, motor type, and software compatibility. Matching the machine to the work is more important than brand loyalty or price tag alone.
Craft and DIY Applications
Home users represent the largest segment of vinyl cutter buyers worldwide, and their typical projects sit well within the capabilities of entry-level desktop machines. Common DIY applications include:
- Custom wall decals, window lettering, and room signage
- Personalized mugs, tumblers, and glassware using adhesive vinyl
- Iron-on heat transfer vinyl (HTV) for T-shirts, hoodies, and canvas bags
- Paint stencils for wood furniture, canvas art, and home décor
- Scrapbooking cutouts, card-making shapes, and paper craft elements
- Custom labels, bumper stickers, and laptop decals
These projects typically require cutting forces under 200 grams and work perfectly well within a 12-inch cutting width. Desktop cutters handle this range without strain. Anyone pairing a vinyl cutter with a heat press for apparel projects should review whether a vinyl cutter is actually necessary for heat press work before purchasing both pieces of equipment together.
Small Business and Commercial Work
Professional environments demand more from a vinyl cutter — higher volume, wider media, faster throughput, and tighter tolerances on complex detail work. Commercial applications where vinyl cutters are indispensable include:
- Vehicle graphics, door decals, and full-panel wraps for business fleets
- Retail window graphics, banners, and point-of-purchase signage
- Custom apparel production at volume for events, sports teams, and merchandise
- Architectural vinyl for office branding, wayfinding, and wall graphics
- Promotional products, branded merchandise, and trade show materials
According to Wikipedia's overview of vinyl cutting technology, commercial machines handle media widths exceeding 60 inches and cutting forces above 500 grams — a fundamentally different class of tool from desktop units, despite sharing the same underlying operating principle.

Desktop vs. Commercial: Choosing the Right Machine
The gap between a desktop cutter and a commercial plotter is wider than most buyers expect, and purchasing the wrong tier is one of the most costly mistakes in the vinyl crafting world. Too small a machine breaks under commercial workloads; too large a machine wastes capital on capabilities a home crafter will never need.
When a Desktop Cutter Is the Right Call
A desktop vinyl cutter — machines like the Cricut Maker, Silhouette Cameo, or Brother ScanNCut — fits the need under these specific conditions:
- Weekly finished piece output stays under 20–30 items
- Projects use material widths of 12 inches or less
- Workspace is limited to a desk or small tabletop
- The machine budget sits under $500
- Design complexity is moderate, without ultra-fine detail below 1mm stroke width
- The operator is new to vinyl cutting and benefits from beginner-friendly software
Desktop cutters also handle materials beyond standard vinyl — cardstock, leather, balsa wood, and fabric with the right blade attachments — making them genuinely versatile tools for mixed-media craft work.
When to Step Up to a Commercial Machine
Several clear triggers indicate when a desktop cutter has reached the limits of its usefulness:
- Weekly output exceeds 50–100 finished pieces and speed becomes a bottleneck
- Wide-format work — vehicle graphics, large banners — requires 24-inch or wider media
- Servo motor precision is necessary for fine detail that stepper motors cannot consistently deliver
- The machine runs 6–8 hours daily; commercial builds handle sustained duty cycles that desktop units cannot
- Contour cutting around printed designs is a regular production requirement
Running a desktop cutter at commercial production volume is a reliable way to burn out the motor and void the warranty within months — commercial machines pay for themselves quickly when the workload genuinely justifies the investment.

How a Vinyl Cutter Works Into Any Budget
Machine price is only the starting point of the real cost calculation. Blades, software licenses, vinyl material, transfer tape, weeding tools, and replacement parts accumulate quickly — and buyers who plan only for the sticker price consistently underestimate the true entry cost by 30–50%.
Entry-Level and Hobbyist Machines
Entry-level cutters in the $150–$400 range include the most popular brands in home vinyl crafting. These machines ship with basic software and a starter blade, but consumable costs add up fast. Replacement blades run $10–$30 per set depending on type, and a quality roll of adhesive vinyl costs $20–$40. Most users go through two to four rolls per month during active project periods.
Mid-Range and Professional Models
Mid-range cutters ($400–$1,500) offer wider carriages, stronger motors, and broader software compatibility. Commercial-grade machines from Roland, Graphtec, and USCutter begin around $1,500 and scale to $5,000 or more for production-class units. The table below breaks down the four main cost tiers:
| Category | Price Range | Cutting Width | Best For | Example Models |
|---|---|---|---|---|
| Entry-Level / Hobbyist | $150 – $400 | Up to 12" | Home crafts, personal projects | Cricut Joy, Silhouette Cameo 4 |
| Mid-Range | $400 – $1,000 | 12" – 24" | Part-time business, higher volume | USCutter Titan 2, Graphtec CE7000 |
| Professional / Semi-Commercial | $1,000 – $2,500 | 24" – 36" | Small sign shops, custom apparel | Roland GS-24, Graphtec FC9000 |
| Commercial / Production | $2,500 – $5,000+ | 36" – 60"+ | Full-time production, vehicle wraps | Roland CAMM-1 GR2, Summa S2 D |
Software cost surprises most new buyers. Dedicated cutting platforms like FlexiSIGN or Signlab add hundreds of dollars to the setup. Several capable options exist at no cost, however — a roundup of free vinyl cutting software tools available right now is worth reviewing before committing to a paid platform.
Mistakes That Waste Vinyl and Ruin Projects
Technical knowledge of how a vinyl cutter works means little if the machine is misconfigured on every job. The majority of failed cuts trace back to a small set of repeatable errors — blade depth miscalibration, pressure settings that ignore material differences, and file format problems that the machine cannot resolve on its own.
Blade Depth and Pressure Errors
Incorrect blade depth is the single most common cause of ruined cuts, and it shows up in two distinct failure modes:
- Too deep: The blade cuts through the vinyl and the backing paper simultaneously, making clean weeding impossible and destroying the carrier sheet
- Too shallow: The blade fails to fully penetrate the vinyl layer, leaving sections joined that tear and distort during weeding
The correct depth for standard adhesive vinyl places the blade tip just barely past the carrier — roughly equivalent to the thickness of a standard credit card. Cutting pressure compounds the problem when set incorrectly: excessive pressure wears the blade and scores the backing, while insufficient pressure produces ragged entry and exit points on curved paths.
Additional blade-related errors that consistently damage projects include:
- Using a dull blade and compensating with higher pressure — this approach never produces a clean cut
- Skipping test cuts when switching material types or brands — every vinyl formulation responds differently
- Using a standard blade on thicker craft vinyl or flock — these materials require a deep-cut blade with a different angle
- Failing to check for blade holder contamination — vinyl adhesive builds up in the holder and affects depth consistency
File Format and Software Mistakes
A vinyl cutter reads vector paths, not pixel-based images. Sending a JPEG or PNG directly to cutting software produces meaningless output because the machine has no contour path to follow. Every design must exist as a true vector file — SVG, EPS, AI, or DXF — before the software can generate usable blade instructions.
- Trace raster images in Inkscape or Adobe Illustrator and export as SVG or EPS before sending to the cutter
- Weld or union overlapping shapes before exporting — the cutter will cut every path twice if shapes overlap without being merged
- Verify document scale and DPI settings match the intended output dimensions — a mismatch between screen size and cut size wastes material and time
- Enable overcut or blade offset compensation in the software — without it, corners on tight angles often fail to cut fully through

Quick Wins for Better Cutting Results
Most of the improvement available to vinyl cutter operators comes from a handful of adjustments that require no new equipment and take only minutes to implement. These are not advanced techniques. They are foundational habits that distinguish operators who get consistent output from those who blame the machine for preventable errors.
Calibration and Test Cut Protocol
Calibrating the machine before introducing any new material type is a non-negotiable discipline. The calibration sequence runs as follows:
- Set blade depth manually so only the very tip extends beyond the blade holder cap
- Load the material and run a 1-inch square test cut on an unused corner of the sheet
- Attempt to weed the square — it should lift cleanly without disturbing surrounding vinyl
- Flip the cut square over and inspect the backing paper for a faint, shallow score line
- If the backing is cut through, reduce blade depth; if the square tears during weeding, increase pressure in 5-gram increments
- Run a second test cut to confirm settings before loading the full design
This six-step sequence takes under three minutes and eliminates the most common causes of ruined cuts across every material type and machine brand in the market.
Software and Material Adjustments
Beyond calibration, these targeted adjustments consistently improve output quality without requiring hardware changes or advanced technical knowledge:
- Mirror heat transfer vinyl designs before cutting — HTV applies face-down from the carrier, so right-reading designs produce reversed results on fabric
- Store vinyl rolls horizontally in a cool, dry location — heat and humidity cause vinyl to shrink and lose adhesive strength before the first cut
- Replace blades proactively when cutting glitter vinyl, flock, or sandblast resist — these abrasive materials dull blades three to four times faster than smooth vinyl
- Use application tape with appropriate tack for the vinyl type — low-tack tape for delicate matte finishes, standard tack for outdoor cast vinyl
- Set cutting speed conservatively on intricate designs — slower speeds maintain blade control on tight inside corners and fine serifs
Anyone uncertain about which software tools are compatible with their machine — or how a vinyl cutter's software requirements differ from those of a flatbed plotter — should review the key technical differences between a vinyl cutter and a plotter before committing to a software platform.
Real Projects That Show How a Vinyl Cutter Works
Abstract explanations of how a vinyl cutter works become concrete when examined through actual project workflows. The two categories below represent the highest-volume applications for vinyl cutters at both the hobbyist and professional level — and each illustrates a distinct aspect of the machine's capabilities.
Signage and Vehicle Decals
Sign cutting is the original application of vinyl cutter technology and remains one of the highest-margin uses in professional shops today. A standard vehicle door decal project follows this workflow:
- Prepare a vector logo or lettering file in cutting software and set the correct output dimensions
- Load cast vinyl onto the cutter — cast vinyl conforms to curved surfaces more reliably than calendered vinyl on vehicle applications
- Set cutting speed between 200–400mm/s and confirm pressure with a test cut on a corner scrap
- Run the full cut, weed the excess vinyl carefully, and apply transfer tape in overlapping sections for large pieces
- Install using the wet method on complex curved panels, or the dry method on flat glass surfaces
An entry-level 24-inch cutter produces a professional door decal in under 10 minutes including setup and weeding. A production sign shop might cut 60–80 vehicle decals in a single shift — output that would be physically impossible to replicate by hand at consistent quality and tolerances.
Apparel and Heat Transfer Vinyl
Heat transfer vinyl projects demonstrate how a vinyl cutter works within the apparel decoration workflow — a process that pairs cutting precision with controlled heat application. The HTV workflow differs from adhesive vinyl work in several important ways:
- HTV is always cut mirrored, since it presses face-down from the carrier sheet onto the fabric
- Cutting pressure for HTV is typically lower than for adhesive vinyl — the material cuts cleanly at lighter settings
- Fine details below 1mm stroke width are not reliably weedable from most HTV materials and should be avoided in design files
- Layered HTV designs require cutting each color separately, weeding each layer, and pressing in sequence from bottom to top
- Heat press temperature, dwell time, and pressure all affect final adhesion — the cutter's output quality is only as good as the press step that follows
Custom apparel production using HTV is one of the most accessible small-business applications for a vinyl cutter, requiring minimal startup capital and producing high-margin output when the workflow is dialed in correctly.
Frequently Asked Questions
What materials can a vinyl cutter cut besides vinyl?
Most vinyl cutters handle a range of thin sheet materials including heat transfer vinyl, cardstock, craft foam, flock, printable vinyl, and adhesive-backed paper. Higher-end desktop machines like the Cricut Maker cut leather, balsa wood, and fabric with specialized blade attachments. The machine's maximum cutting force is the determining factor — most hobbyist cutters max out around 210 grams, while commercial machines exceed 500 grams and handle substantially thicker and more abrasive materials consistently.
How long does a vinyl cutter blade typically last?
Blade lifespan depends heavily on material type, pressure settings, and usage volume. For standard adhesive vinyl, a quality blade typically delivers 8–15 hours of active cutting before performance degrades enough to affect cut quality noticeably. Abrasive materials like glitter vinyl, sandblast resist, and flock can dull a blade in 2–4 hours of use. Replacing blades proactively — before cut quality deteriorates — is the professional approach and prevents costly material waste from bad cuts at the worst possible moment.
Does a vinyl cutter require dedicated software, or will any design program work?
A vinyl cutter requires cutting software that can convert vector design files into precise blade path instructions the machine can execute. Some machines include proprietary software (Cricut Design Space, Silhouette Studio), while others use third-party platforms like Sure Cuts A Lot, Inkscape with a cutting plugin, or professional tools like FlexiSIGN. The software must be compatible with the specific machine's driver and communication protocol — not all cutting software works with all cutter brands, so verifying compatibility before purchasing either the machine or the software is essential.
Final Thoughts
Mastering how a vinyl cutter works is a process that builds quickly once the fundamentals of blade depth, pressure, and vector file preparation are internalized — and the best way to build that foundation is to start cutting immediately on inexpensive practice material rather than waiting for the perfect project. Readers ready to move forward should pick one machine that matches their actual output volume, download a compatible free cutting software trial, and run at least ten calibration test cuts before touching any project vinyl. That hands-on investment in the setup process pays back on every single job that follows.


About Alice Davis
Alice Davis is a crafts educator and DIY enthusiast based in Long Beach, California. She spent six years teaching textile design and applied arts at a community college, where she introduced students to everything from basic sewing techniques to vinyl cutting machines and heat press printing as practical, production-ready tools. That classroom experience means she has put more sewing machines, embroidery setups, Cricut systems, and heat press units through real project work than most reviewers ever will. At PalmGear, she covers sewing machines and embroidery tools, vinyl cutters, heat press gear, Cricut accessories, and T-shirt printing guides.
You can get FREE Gifts. Or latest Free phones here.
Disable Ad block to reveal all the info. Once done, hit a button below