Cricut Vinyl Project Ideas: Things You Can Make
by Alice Davis
More than 6 million Cricut machines have been sold in the United States alone, and the single biggest reason people buy one is vinyl crafting. If you've been searching for amazing cricut vinyl project ideas, you've landed in exactly the right place. Vinyl is affordable, beginner-friendly, and versatile enough to keep even experienced makers busy for years. Whether you want to personalize a coffee mug, freshen up your living room wall, or launch a small side business from your kitchen table, the heat press and vinyl world has more room to grow than most people realize. This guide covers everything: the right materials, a clear step-by-step workflow, 13 solid project ideas, honest pros and cons, the mistakes that ruin projects, and the myths that waste your time and money.
Contents
- Why the Cricut Machine Changed DIY Crafting Forever
- Essential Tools and Materials for Vinyl Projects
- How to Make Your First Vinyl Project: Step-by-Step
- Amazing Cricut Vinyl Project Ideas to Try Right Now
- The Real Pros and Cons of Cricut Vinyl Crafting
- Mistakes That Kill Good Vinyl Projects
- Cricut Vinyl Myths That Need to Die
Why the Cricut Machine Changed DIY Crafting Forever
From Scrapbooking Rooms to Real Businesses
Cricut started as a niche scrapbooking tool aimed at hobbyists who wanted cleaner paper cuts. That's not what it is anymore. Today, people run legitimate side businesses — and some full-time operations — from a single Cricut machine and a few rolls of vinyl. The machine's precision, capable of cuts as fine as 0.1mm, means you can produce professional-looking results without any prior design training or expensive equipment.
The barrier to entry is genuinely low. A Cricut Explore 3 or Joy costs less than a decent printer. The learning curve is measured in hours, not weeks. And the supply cost per finished project is often under five dollars. That combination is hard to beat in any hobby or small business context.
If you've ever debated buying a refurbished craft machine to save money, that same logic applies here. Refurbished Cricut machines are widely available and work identically for standard vinyl projects — a smart way to cut startup costs in half.
According to Wikipedia's overview of die cutting, electronic die-cutting machines represent a major leap in consumer crafting — what once required expensive industrial plotters now sits on a kitchen table and costs the same as a smartphone.
Where Vinyl Fits Into the Picture
Vinyl is the material that turned Cricut into a household name. It cuts cleanly, adheres firmly, and comes in hundreds of colors, finishes, and specialty textures. The two main categories you'll work with are:
- Adhesive vinyl — sticks to hard surfaces like mugs, walls, laptops, signs, and glass
- Heat transfer vinyl (HTV) — bonds to fabric using heat; used for shirts, bags, pillow covers, and hats
Both types work with all current Cricut machines. Blade pressure and speed settings differ between them, so selecting the correct material in Design Space before cutting isn't optional — it's the difference between a clean cut and a mangled sheet.
Essential Tools and Materials for Vinyl Projects
Vinyl Types Explained
Buying the wrong type of vinyl is one of the fastest ways to waste money and ruin a project before it starts. Here's a clear breakdown of what each type does and when to use it:
| Vinyl Type | Best For | Application Method | Durability |
|---|---|---|---|
| Permanent Adhesive | Mugs, outdoor signs, car decals | Transfer tape + squeegee | 3–8 years outdoors |
| Removable Adhesive | Walls, windows, temporary labels | Transfer tape + squeegee | 6–12 months |
| Heat Transfer Vinyl (HTV) | Fabric: shirts, pillows, tote bags | Heat press or iron | 50+ wash cycles |
| Holographic / Glitter | Gifts, party décor, accessories | Transfer tape or heat (type-dependent) | Moderate |
| Printable Vinyl | Full-color stickers, custom labels | Inkjet printer first, then Cricut cuts | 1–3 years indoors |
Stick to established brands — Oracal, Siser, and Cricut's own line. Off-brand vinyl from unknown suppliers warps during cutting, has inconsistent adhesion, and fades outdoors within months. It's not worth saving two dollars a roll.
The Accessories That Actually Matter
Your Cricut machine is just the starting point. These accessories make the difference between frustrating results and clean, professional-looking finishes:
- Weeding tool — removes excess vinyl from around your cut design; get a hook-tip style
- Transfer tape — moves adhesive vinyl from its paper backing to your surface without losing alignment
- Cutting mat — holds vinyl flat during cutting; replace when it loses tack or your cuts will drift
- Brayer or squeegee — eliminates air bubbles during application; a credit card works in a pinch but a proper brayer is better
- Heat press — required for any serious HTV work; consistent temperature and pressure is non-negotiable
- Rubbing alcohol + lint-free cloth — surface prep before every adhesive vinyl application
For a complete rundown of what to pair with your machine, read through this guide on must-have accessories for the Cricut Explore Air — worth reading before you place any supply orders. And if you're serious about HTV work, check out the best heat press machines for home and small business; consistent temperature and even pressure directly determine whether your vinyl bonds for 50+ washes or peels after the first one.
Pro Tip: Always do a test cut on a small scrap of vinyl before committing your full sheet. Five seconds of testing saves you from wasting a $12 specialty roll on a bad pressure setting.
How to Make Your First Vinyl Project: Step-by-Step
Designing Your Cut File
Design happens in Cricut Design Space, the free browser-based software that controls your machine. If you prefer working with more advanced tools or want to work offline, there are excellent free vinyl cutting software options that export SVG files you can import directly into Design Space.
Follow these steps to build your design correctly from the start:
- Open Cricut Design Space and start a new project
- Upload your image as an SVG (preferred) or PNG with background removed
- Set canvas dimensions to match your blank — measure it first
- Mirror your design if cutting HTV — this is critical; skip it and your text is backwards on the finished garment
- Select the correct material setting for your vinyl type
- Use the "Attach" function to lock multi-layer designs in place on the mat
- Preview the cut layout before sending — check that nothing is cropped or shifted
Cutting, Weeding, and Applying
Once your design is ready, the machine takes over. Here's the complete physical workflow from raw vinyl to finished project:
- Load vinyl onto your mat — shiny side down for adhesive vinyl; matte side down for HTV
- Insert the mat into the machine and press the flashing Load button
- Press the Go button — the Cricut cuts automatically; don't interrupt mid-cut
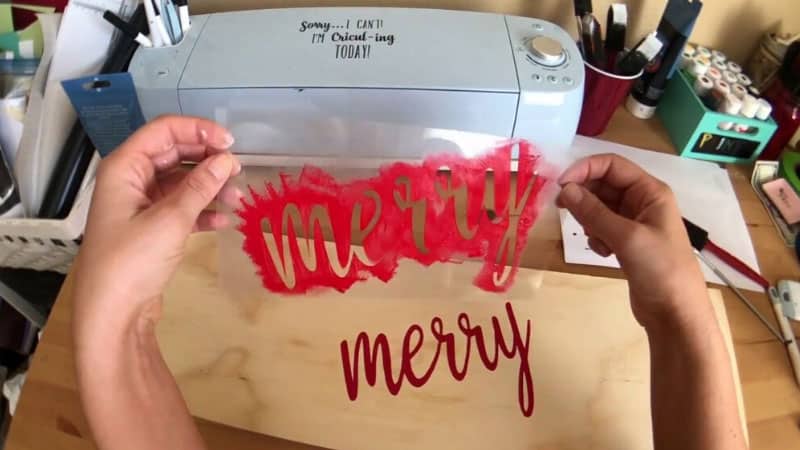
- Weed your design — remove all excess vinyl from around your cut lines using the weeding tool; work from the inside out on complex designs
- For adhesive vinyl: apply transfer tape over your design, rub firmly with your brayer, peel the backing away slowly, position on your surface, rub again, then peel the tape at a 45-degree angle
- For HTV: position design shiny-side-down on fabric, press at the temperature and time specified for your vinyl brand, let it cool before peeling the carrier sheet
Warning: Don't skip the 45-degree peel angle on transfer tape. Peeling straight up is the leading cause of vinyl lifting off the surface mid-transfer — especially on curved items like mugs.
Amazing Cricut Vinyl Project Ideas to Try Right Now

Here are 13 amazing cricut vinyl project ideas arranged from simplest to most advanced. Start at the top if you're new, and work down as your skills build.
Home Décor Projects
- Wall quotes and sayings — removable vinyl on painted walls looks sharp and leaves no residue when you want a change; perfect for rental spaces
- Farmhouse-style wood signs — cut white vinyl onto a painted board for a clean, minimalist look that sells consistently at craft fairs
- Seasonal window decals — removable vinyl on glass; swap them out with the holidays and store them flat for reuse
- Pantry label sets — permanent vinyl on glass jars; a coordinated label set transforms a cluttered pantry in under an hour
- Light switch plate covers — tiny project, fast to make, high visual impact; great for using up vinyl scraps
Personalized Gifts

- Custom coffee mugs — permanent adhesive vinyl on ceramic; hand-wash to preserve the vinyl long-term; one of the most-gifted items makers produce
- Monogrammed tumblers — high perceived value, low material cost, and fast to produce in batches; a staple of any Etsy shop
- Personalized cutting boards — apply vinyl to the back panel only, never the cutting surface; a food-safe gift that looks custom and expensive

- Custom throw pillows — HTV on pillowcases; layered designs with multiple colors look striking and hold up reliably through washing cycles
- Photo quote frames — vinyl text applied directly to glass or acrylic; a minimalist gift that's quick to make and genuinely impressive to receive
If you enjoy mixing crafts, handmade tassels using embroidery thread pair beautifully with vinyl-decorated items — add them to a monogrammed bag or a custom pillow for a finished, layered look.
Wearables and Accessories

- Custom t-shirts — HTV on 100% cotton or a cotton-blend; start with a single-color design before attempting layered multi-color work
- Tote bags — inexpensive canvas bags become high-value personalized items with a single vinyl design; great for gifting and selling
- Smartphone covers — adhesive vinyl on hard plastic cases; intricate designs scale down well because vinyl cuts cleanly at small sizes
- Hats and caps — HTV on structured hats requires a hat press attachment for even contact; flat irons and regular presses fail on the curved brim
The Real Pros and Cons of Cricut Vinyl Crafting
No tool is perfect. Here's an honest breakdown of what you're getting into before you spend a dollar:
- Pro: Low startup cost — basic adhesive vinyl projects need only the machine, a mat, vinyl, and transfer tape
- Pro: Fast results — most projects finish in under an hour from design to completed item
- Pro: Scalable for batches — you can cut dozens of identical designs in a single session without losing quality
- Pro: Strong resale market — personalized gifts and home décor sell consistently; the Etsy market for custom vinyl work is large and active
- Pro: Wide material compatibility — vinyl sticks to glass, ceramic, metal, wood, fabric, acrylic, and more
- Con: Design Space learning curve — the software has quirks, especially around layers and the Attach function, that take a few hours to internalize
- Con: Material waste during early projects — expect to ruin a few sheets while you dial in your blade settings and workflow
- Con: HTV requires precise heat — too hot scorches the fabric or destroys the vinyl texture; too cool means peeling after the first wash
- Con: Intricate weeding takes time — designs with fine details add 20 to 40 minutes to your workflow; factor that in when pricing your time
Mistakes That Kill Good Vinyl Projects
Design and File Errors
- Not mirroring HTV before cutting — your text will be backwards on the finished garment; this mistake is irreversible once applied
- Using low-resolution raster images — blurry JPGs produce jagged, unusable cuts; always use SVG vector files when possible
- Skipping the Attach step — without attaching layers, Design Space rearranges them randomly on the mat; your multi-piece design falls apart
- Wrong material setting — cutting permanent vinyl on HTV settings almost always results in incomplete cuts that tear when weeded
- Designs that are too intricate for the material — fine-line details smaller than 1/4 inch rarely weed cleanly in standard vinyl; simplify or switch to a specialty blade
Application and Surface Failures
- Applying vinyl to dirty or oily surfaces — skin oils and dust prevent adhesion; clean every surface with rubbing alcohol and a lint-free cloth before applying
- Rushing the transfer tape removal — peel slowly at a 45-degree angle; fast peeling at a steep angle lifts the vinyl right off the surface
- Using a household iron for HTV instead of a heat press — irons have hot spots and deliver uneven pressure; the result is inconsistent bonding that fails at the edges
- Skipping a test wash before gifting HTV items — always wash once and inspect before the item leaves your hands; catches adhesion failures before they embarrass you
- Layering incompatible vinyl brands — different HTV brands activate at different temperatures; layering them risks over-bonding the bottom layer while the top layer stays loose
Cricut Vinyl Myths That Need to Die
There's a lot of bad advice floating around crafting communities. These are the myths you should stop believing right now:
- Myth: "You need the most expensive Cricut model." False. The Cricut Explore 3 handles the vast majority of amazing cricut vinyl project ideas without any limitations. The Maker's extra cutting force matters for thick leather and basswood — not for vinyl. Don't spend the extra money unless you specifically need those materials.
- Myth: "Cheap off-brand vinyl is just as good." It isn't. Bargain-bin vinyl from unknown suppliers warps during cutting, has inconsistent adhesion, and fades outdoors within months. The savings per roll are not worth the ruined projects. Stick with Oracal, Siser, or Cricut's house brand.
- Myth: "You can reuse transfer tape multiple times." Technically yes, but it loses tack quickly. Reused transfer tape is a primary cause of misaligned designs and partial vinyl lifts. Buy in rolls and use fresh tape per project — it's inexpensive enough to not be worth reusing.
- Myth: "A household iron works fine for HTV." It works sometimes, on simple single-color designs, pressed onto flat fabric. Once you move to curved surfaces, structured hats, or designs requiring even pressure across a large area, a household iron fails consistently. A dedicated heat press is the right tool for the job.
- Myth: "Design Space requires a paid subscription to use." The free tier is genuinely functional for most makers. You only need a subscription to access Cricut's built-in image and font library. Uploading your own SVG files is always free, always will be, and gives you access to better designs than the subscription library anyway.
Insider Take: The most interesting work in vinyl crafting comes from makers who skip Cricut's bundled designs entirely and upload custom SVGs from independent designers. That's where creative range actually opens up — and where your work starts looking like yours instead of everyone else's.
The best vinyl project is the one you actually finish — pick one idea from this list, commit to it completely, and let the machine do what it was built to do.


About Alice Davis
Alice Davis is a crafts educator and DIY enthusiast based in Long Beach, California. She spent six years teaching textile design and applied arts at a community college, where she introduced students to everything from basic sewing techniques to vinyl cutting machines and heat press printing as practical, production-ready tools. That classroom experience means she has put more sewing machines, embroidery setups, Cricut systems, and heat press units through real project work than most reviewers ever will. At PalmGear, she covers sewing machines and embroidery tools, vinyl cutters, heat press gear, Cricut accessories, and T-shirt printing guides.
You can get FREE Gifts. Or latest Free phones here.
Disable Ad block to reveal all the info. Once done, hit a button below