What Are the Right Steps for a Sublimation Mug Heat Transfer?
by Alice Davis
Getting whats the right step for a sublimation mug heat transfer right comes down to four core actions: print, wrap, press, and reveal. That sequence is the foundation of every successful sublimation mug project. Execute each phase correctly and the result is a full-color, photographic-quality image that becomes a permanent part of the mug itself — not sitting on top of it.
Sublimation works by converting solid dye into gas under heat and pressure. That gas penetrates a polymer coating on the mug's surface and locks in permanently when the mug cools. No adhesive, no vinyl layer, no laminate — just dye and polymer fused at a molecular level. That is what gives sublimation its well-earned reputation for wash resistance and vibrant color retention.
For crafters already comfortable with heat press and vinyl projects, mug sublimation is a natural expansion of the same skill set. The equipment overlaps, the learning curve is manageable, and the output quality is genuinely professional. The critical difference from vinyl decoration is permanence: a sublimation transfer becomes part of the substrate, so the image cannot peel or crack under normal use.
Contents
- The Science Behind Sublimation Mug Printing
- Whats the Right Step for a Sublimation Mug Heat Transfer, Start to Finish
- Pro Tips for Consistent Results
- Beginner Setup vs. Advanced Workflow
- Sublimation Mug Transfers: Pros and Cons
- Mug Decoration Methods Compared
- Building a Reliable Long-Term Sublimation Workflow
- Frequently Asked Questions
The Science Behind Sublimation Mug Printing
Sublimation — formally defined as dye-sublimation printing — is a chemical process where solid dye converts directly into gas under applied heat, bypassing the liquid phase entirely. That gaseous dye embeds into the open pores of a polymer coating on the mug's surface. When the mug cools, those pores contract and trap the dye permanently inside. The result is an image that is technically inside the coating, not on top of it.
Why the Mug Coating Matters
Not every mug accepts sublimation. The substrate must carry a polymer coating — usually described in product listings as "sublimation-ready" or "coated." Standard uncoated ceramic will not absorb sublimation dye regardless of temperature or press time. Even among coated mugs, coating quality varies significantly. Thin or inconsistent coatings produce dull, undersaturated colors and fade after repeated washing. A quality blank mug from a reputable supplier has a uniform coating rated for the 375–400°F press temperatures this process demands.
White mugs are the default choice for sublimation because sublimation dye is transparent. The mug's base color shows through the ink wherever the design is not saturated. White maximizes color pop and accuracy. Light gray mugs shift color tones slightly but still produce acceptable results. Dark mugs are fundamentally incompatible with standard sublimation — the dye cannot override a dark substrate without specialized equipment far outside the scope of typical home or small-business setups.
Equipment Overview
- Mug heat press — a cylindrical clamp press designed specifically for curved mug surfaces, not a flat platen press
- Sublimation printer — an inkjet printer loaded with sublimation-specific ink, such as converted Epson EcoTank models
- Sublimation transfer paper — engineered for maximum dye release; standard photo paper will not perform the same function
- Sublimation-coated blank mugs — 11 oz or 15 oz white polymer-coated ceramic are the industry standard
- Heat-resistant tape — secures the printed paper to the mug without leaving residue
- Protective gloves — mugs exit the press at 375–400°F and require careful handling
Pro Tip: Always test a new batch of blank mugs with a calibration print before committing to a production run — coating quality varies by supplier, even on identically listed products.
Whats the Right Step for a Sublimation Mug Heat Transfer, Start to Finish
Understanding whats the right step for a sublimation mug heat transfer means treating the process as a sequence, not a shortcut. Each step builds on the previous one. Rushing or skipping any phase introduces defects that cannot be corrected after pressing.

Step 1: Design Preparation
A standard 11 oz mug wrap measures approximately 8.5 inches wide by 3.8 inches tall. Most designers work in Adobe Illustrator, Photoshop, or Canva. Color mode must be set to RGB — CMYK profiles do not translate accurately through sublimation ink, and the output will look unexpectedly dull if left in CMYK. White areas in the design are transparent in sublimation, so any region left white will show the mug's base color. Plan the design accordingly.
One common source of confusion: mirroring is not required for mug sublimation. The printed paper wraps face-down against the mug's exterior surface, and the orientation transfers correctly without flipping. This differs from some flat heat transfer vinyl processes and catches beginners off guard.
Step 2: Printing on Sublimation Paper
Print the finalized design on sublimation paper using the highest quality setting available on the sublimation printer. After the print exits the printer, allow it to dry for at least 60 seconds before handling. Fresh sublimation ink smears easily, and a smeared print produces a blurred transfer. Handle the printed sheet by its edges only — skin oils transferred to the printed surface can affect dye adhesion in those areas.
Step 3: Wrapping and Securing the Mug
Position the printed design face-down against the mug's curved surface. The top edge of the design should sit approximately 0.25 inches below the mug's rim to prevent ink from transferring onto the lip area. Wrap the paper snugly, making sure there are no gaps, wrinkles, or air pockets between the paper and the mug surface. Secure both the leading and trailing edges with short strips of heat-resistant tape — three to four strips per side is standard practice. Tape must not cross the printable area, as it creates pressure variations that leave visible marks in the transfer.
Warning: Air pockets and loose wrapping are the primary causes of ghosting — a blurry double-image effect around design edges that cannot be corrected after pressing.
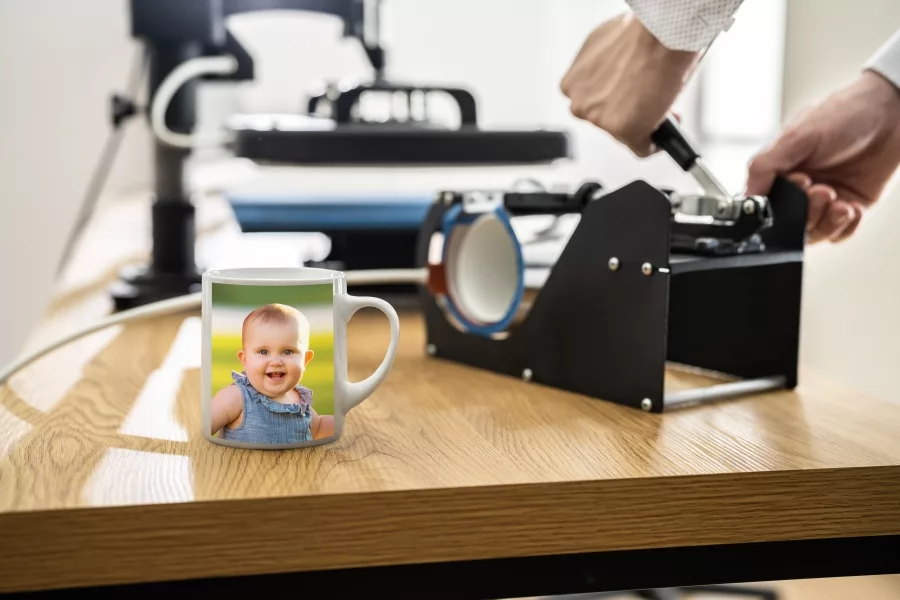
Step 4: Heat Pressing
Preheat the mug press to 375–400°F (190–204°C) and allow it to fully reach temperature before inserting any mug. Standard press time for an 11 oz mug is 180–240 seconds depending on the press model and ink brand. Slide the wrapped mug into the press clamp and tighten to firm, even pressure. The clamp should hold the paper flush against the mug's entire surface — not so tight it distorts the mug, but tight enough to eliminate any movement. Set the timer and do not open the press early.

Step 5: Removing and Revealing
Put on heat-resistant gloves before opening the press. Remove the mug and peel the sublimation paper away immediately — while the mug is still hot. This step is non-negotiable. If the paper is allowed to cool against the mug, it can re-adhere and cause a secondary ghost image to form in the areas that contacted it during cooling. Peel fast, peel clean. Set the finished mug on a heat-safe mat and allow it to cool completely before evaluating color accuracy and detail.

Pro Tips for Consistent Results
The five-step sequence above covers the fundamentals. These additional techniques are what separate hobbyist-level output from professional-grade consistency.
Color Management
- Run a color test print on sublimation paper and press it onto a spare mug before starting any production batch
- Sublimation colors appear muted and undersaturated on paper — they intensify dramatically after pressing; do not over-saturate the digital file to compensate
- Use ICC color profiles specific to the ink and paper combination being used for accurate on-screen color prediction
- Photograph finished mugs under consistent lighting to build a reliable reference library for client approvals
Press Calibration
Mug press thermostats drift over time and with repeated use. The displayed temperature and the actual surface temperature diverge — sometimes by 10–15°F. Use a handheld infrared thermometer or contact thermocouple to verify actual mug surface temperature independently of the press display. A 10°F discrepancy changes color intensity and saturation noticeably across an entire batch. Anyone exploring complementary heat transfer crafts will find the best vinyl cutting machine guide covers press calibration principles that apply equally across heat-based decoration processes.
Pressure evenness across the mug surface is equally important. If the press clamp grips harder on one side than the other, colors will shift and fade unevenly around the mug circumference. A test mug with a solid-color gradient design reveals pressure inconsistencies clearly before they ruin a production run.
Paper and Ink Selection
Sublimation paper is not interchangeable. Fast-release papers transfer dye quickly and suit shorter press times. Slow-release papers tolerate longer press windows without color washout. Matching paper type to press time is a variable many beginners overlook until they encounter inconsistent batches. Similarly, sublimation ink brand significantly impacts color gamut — third-party inks vary widely in brightness, gamut width, and long-term wash stability. For related material selection guidance across heat-based crafts, the heat transfer vinyl buying guide provides a useful framework for evaluating consumable quality that applies broadly.
Beginner Setup vs. Advanced Workflow
Starting Out: The Minimal Viable Setup
A functional beginner sublimation mug setup requires four core pieces of equipment: a converted Epson EcoTank printer loaded with sublimation ink, a dedicated mug clamp heat press, a supply of sublimation-coated blank mugs, and quality sublimation transfer paper. Total entry cost for this setup typically falls between $300 and $500 depending on press brand and printer model. Design software can be free (Canva) or low-cost (Affinity Designer). Most beginners produce acceptable results within the first session once the press time and temperature settings are dialed in.
Scaling Up: Professional-Level Workflow
Advanced sublimation operations invest in wider-format printers that accommodate 13-inch or larger print areas, dual-element mug presses that handle two mugs simultaneously, and Raster Image Processor (RIP) software for calibrated, consistent color output across hundreds of units. At this level, production rates of 10–20 mugs per hour become achievable. Color management with a spectrophotometer eliminates the guesswork from every new ink or paper combination.
- Wide-format printers — larger print areas for panoramic wraps or oversized mug designs
- Dual-element presses — press two mugs at once and double throughput without additional labor
- RIP software — professional color accuracy and batch printing queues
- Bulk blank sourcing — per-unit mug cost drops substantially at 500+ unit orders
Insight: Most home decorators outgrow a beginner setup within six months — planning an upgrade path before purchasing initial equipment avoids redundant spending on equipment that gets replaced quickly.
Sublimation Mug Transfers: Pros and Cons
Advantages
- Permanent durability — the image is embedded in the coating, not applied on top of it; it will not peel, crack, or chip
- Full-color photographic quality — gradients, photographs, and fine detail reproduce accurately
- Wash resistance — most sublimation mugs are dishwasher-safe on the top rack under normal conditions
- Low per-unit material cost at scale — once equipment is amortized, per-mug material cost typically falls below $2
- No weeding required — unlike vinyl decal application, there is no cutting or weeding step in the sublimation process
- Fast turnaround — a single mug goes from blank to finished in under five minutes once the press reaches temperature
Limitations
- White and light mugs only — dark substrates are incompatible without specialized white-ink underbase equipment
- Polymer coating required — standard uncoated ceramic mugs will not accept sublimation dye regardless of press settings
- No true white ink — white design areas are transparent; the mug's base color shows through
- Equipment investment required upfront — a functional setup costs $300–$500 minimum before consumables
- Temperature sensitivity — a ±10°F variance in press temperature produces visible color shifts across a batch
Mug Decoration Methods Compared
Users choosing a mug decoration method should understand how sublimation compares to the alternatives across the dimensions that matter most: color capability, durability, equipment cost, and substrate flexibility.
Side-by-Side Breakdown
| Method | Color Range | Durability | Equipment Cost | Coating Required | Photo Quality |
|---|---|---|---|---|---|
| Sublimation | Full color / photographic | Excellent | $300–$500 | Yes (polymer) | Yes |
| Vinyl decal (HTV) | Spot colors only | Good (peels over time) | $150–$350 | No | No |
| Screen printing | Spot colors | Very good | $500–$2,000+ | No | Limited |
| UV DTF (direct-to-film) | Full color | Good | $2,000+ | No | Yes |
| Laser engraving | Monochrome | Excellent | $400–$1,500 | No | No |
For full-color, photographic-quality output at an affordable entry point, sublimation has no practical competition in the under-$500 equipment range. Vinyl decals cost less to start but cannot reproduce gradients or photographic detail, and they eventually lift at edges with repeated washing. Laser engraving produces permanent results but is limited to single-color monochrome output. UV DTF matches sublimation's color capability but requires a significantly higher equipment investment and produces a raised surface feel rather than an embedded image.
Building a Reliable Long-Term Sublimation Workflow
Consistency Systems
Professional decorators document every production variable: press temperature, press time, ink brand, paper brand, and mug supplier batch number. When output quality shifts — and it will shift as consumables change — having a production log makes it straightforward to isolate which variable changed. A simple printed log sheet or spreadsheet handles this with almost no overhead. Without records, diagnosing quality problems becomes guesswork.
Building a sample library of pressed mugs — one from each new blank supplier, ink batch, and paper brand — provides a physical reference for color and quality comparisons over time. This practice is particularly valuable when onboarding new clients who need to approve color standards before production begins.
Sourcing Quality Blanks
Blank mug quality is the single variable most beginners underestimate. Budget blanks from unreliable sources use thin or inconsistent coatings that produce dull colors and fade after repeated washing — undermining the core durability advantage that makes sublimation worth pursuing in the first place. Established suppliers maintain consistent polymer coating thickness and publish recommended press parameters that remove uncertainty from the process. Order sample packs from any new supplier before committing to bulk quantities, and run a full press test on each new batch before client production begins.
Equipment Maintenance
Mug presses require periodic inspection to perform reliably. The heating element and internal thermostat should be tested every 500–1,000 press cycles. The rubber grip pad inside the press clamp degrades with heavy use — when it no longer holds even pressure across the mug surface, it must be replaced. Sublimation printers need consistent maintenance too: nozzle check prints should be run weekly, and any printer sitting idle for more than seven days requires a purging cycle to prevent ink from drying and clogging the print heads. Neglecting printer maintenance is the fastest path to wasted sublimation paper and ruined blanks.
Frequently Asked Questions
What temperature and time settings are correct for a sublimation mug heat press?
The standard settings for an 11 oz sublimation mug are 375–400°F (190–204°C) for 180–240 seconds. These ranges cover most mug presses and blank suppliers. Always verify the actual surface temperature with an independent thermometer, as press thermostats drift over time. New blank suppliers or ink brands may require slight adjustments — run a test mug before committing to production settings.
Can a regular flat heat press be used for mug sublimation?
No. A flat platen press cannot apply even pressure to a curved mug surface. The result is uneven contact, which produces inconsistent color transfer — darkest where the paper touches and faded or blank where it gaps. A dedicated cylindrical mug press is required for consistent, professional results on standard mugs. Specialty flat-press mug attachments exist but perform inconsistently compared to purpose-built mug presses.
Why does the image appear faded or washed out after pressing?
Faded results typically come from one of three causes: press temperature set too low, press time too short, or a low-quality mug coating that cannot absorb sufficient dye. Verify temperature with an independent thermometer, extend press time by 15–30 seconds, and test with a different mug blank from a reputable supplier. Sublimation paper quality and ink brand also affect saturation — cheap consumables consistently underperform relative to professional-grade materials.
How long does a sublimation transfer last on a mug?
A properly sublimated mug on a quality coated blank lasts for years of regular use under normal conditions. The dye is embedded in the polymer coating, not sitting on the surface, so it cannot peel or chip. Most sublimation mugs are top-rack dishwasher-safe, though hand washing extends the coating's life further. The main threat to longevity is an inferior polymer coating on budget blanks — investing in quality blanks from the start protects the durability advantage sublimation offers.
The right step for a sublimation mug heat transfer is not any single technique — it is the discipline to execute every step in sequence, every time, without shortcuts.


About Alice Davis
Alice Davis is a crafts educator and DIY enthusiast based in Long Beach, California. She spent six years teaching textile design and applied arts at a community college, where she introduced students to everything from basic sewing techniques to vinyl cutting machines and heat press printing as practical, production-ready tools. That classroom experience means she has put more sewing machines, embroidery setups, Cricut systems, and heat press units through real project work than most reviewers ever will. At PalmGear, she covers sewing machines and embroidery tools, vinyl cutters, heat press gear, Cricut accessories, and T-shirt printing guides.
You can get FREE Gifts. Or latest Free phones here.
Disable Ad block to reveal all the info. Once done, hit a button below