How To Seal Vinyl On a Mug
by Alice Davis
Ever wondered why a beautifully crafted vinyl mug looks perfect on day one but starts peeling after a few trips through the dishwasher? The answer — and the fix — comes down to one critical step that most beginners skip entirely. Learning how to seal vinyl on a mug correctly is the difference between a decoration that lasts years and one that flakes off in weeks. The good news: with the right materials and a solid technique, sealing vinyl on drinkware is straightforward, repeatable, and well within reach for any crafter working out of a home studio.
Whether the goal is selling custom mugs at a craft fair or personalizing a gift for someone special, proper sealing turns a fragile vinyl application into a durable, washable finished product. This guide covers everything from choosing the right sealer to troubleshooting the most common failure points, pulling from real-world experience in the heat press and vinyl craft space.

Contents
- Why Sealing Vinyl on Mugs Actually Matters
- Choosing the Right Sealer for the Job
- Sealers Compared: Strengths and Trade-offs
- How to Seal Vinyl on a Mug: The Full Process
- Shortcuts That Save Time Without Cutting Corners
- When Things Go Wrong: Common Sealing Failures
- Frequently Asked Questions
- Final Thoughts
Why Sealing Vinyl on Mugs Actually Matters
Vinyl Adhesion Basics on Ceramic
Pressure-sensitive adhesive vinyl bonds to smooth ceramic through a mechanical and chemical grip that works well under normal handling conditions. The adhesive layer, however, was never designed to withstand repeated thermal cycling, detergent chemistry, or prolonged moisture exposure — all of which happen every time a mug goes through a dishwasher cycle. Understanding how adhesives bond to substrates explains why an unprotected vinyl decal, no matter how firmly pressed, will eventually surrender to water and heat. The ceramic surface also has microscopic pores that trap soap residue over time, degrading the adhesive bond from underneath rather than from the edges.
The Dishwasher Problem
Dishwashers combine three elements that are hostile to unprotected vinyl: high heat (typically 130–170°F during the wash cycle), aggressive alkaline detergents, and high-pressure water jets directed at every surface. Even when a mug is hand-washed, the repeated wet-dry cycles cause microscopic expansion and contraction at the vinyl-ceramic interface that gradually lifts adhesion from the edges inward. Sealing creates a continuous barrier that locks the vinyl in place and prevents water infiltration from reaching the adhesive layer, dramatically extending the useful life of the decoration.
Choosing the Right Sealer for the Job
Mod Podge Dishwasher Safe
Mod Podge Dishwasher Safe is the go-to choice for casual crafters and small-batch production alike. It dries clear, applies easily with a foam brush or sponge applicator, and the dedicated "dishwasher safe" formula (distinct from the standard Mod Podge product) holds up to low-rack dishwasher cycles when cured correctly. The key distinction is the 28-day full cure window — mugs sealed with this product need four weeks of air curing before they can be considered truly dishwasher-resistant, and most people skip this step entirely. Multiple thin coats, with adequate drying time between each application, produce a far more durable result than a single heavy coat.
Epoxy Resin Coating
Two-part epoxy resin delivers the most durable seal available for vinyl-on-ceramic applications. Products like ArtResin or EnviroTex Lite create a hard, glassy coating that is chemically resistant, thermally stable, and nearly impervious to dishwasher detergent. The trade-off is complexity: epoxy requires precise mixing ratios, a temperature-controlled workspace, and a leveling period during which the piece must remain perfectly horizontal to prevent drips. Epoxy is the preferred choice for mugs intended for daily commercial use or gifts that will receive heavy washing cycles without careful handling.
Spray Sealers
Spray sealers like Krylon or Rust-Oleum clear acrylic coatings offer convenience and speed. They work best as a protective layer over vinyl that will be hand-washed only, since spray coatings lack the chemical crosslinking density of brush-applied or epoxy sealers. Multiple light passes from 10–12 inches produce a more uniform coat than a single heavy application, which tends to create drip patterns on curved mug surfaces. Spray sealers are a solid option for decorative mugs that sit on shelves more than they go through the sink.
Sealers Compared: Strengths and Trade-offs
Selecting a sealer involves balancing durability, application difficulty, cure time, and intended use. The table below summarizes the key variables across the three main categories:
| Sealer Type | Dishwasher Safe? | Cure Time | Application Skill | Best For |
|---|---|---|---|---|
| Mod Podge Dishwasher Safe | Yes (after 28 days) | 28 days full cure | Beginner | Gifts, occasional washing |
| Two-Part Epoxy Resin | Yes (full cycle) | 24–72 hours | Intermediate | Commercial mugs, daily use |
| Spray Acrylic Sealer | Hand-wash only | 1–2 hours | Beginner | Decorative or display mugs |
| Polyurethane Brush-On | Hand-wash only | 24 hours | Intermediate | Rustic or matte finishes |
Crafters who have explored the broader question of HTV vs sublimation for drinkware applications will recognize that sublimation-coated mugs skip the sealing step entirely — the dye infuses into the coating rather than sitting on top of it. For standard pressure-sensitive vinyl, however, sealing is non-negotiable for any mug intended to see regular washing.
How to Seal Vinyl on a Mug: The Full Process
Prep the Surface
Surface preparation determines how well both the vinyl and the sealer bond to the ceramic. Wiping the mug thoroughly with isopropyl alcohol (at least 70%, preferably 91%) removes oils, manufacturing residues, and fingerprints that would otherwise create adhesion failures. Allowing the alcohol to fully evaporate before applying vinyl — typically two to three minutes at room temperature — ensures the surface is completely dry and chemically neutral. Skipping this step is the single most common reason vinyl lifts prematurely even before sealing begins.
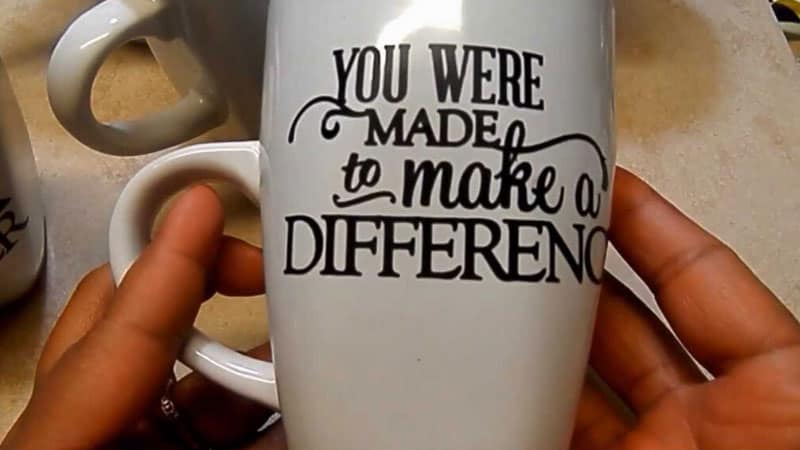
Apply and Weed the Vinyl
Before sealing, the vinyl design must be correctly applied and fully adhered. Proper vinyl weeding technique removes all excess material cleanly, leaving crisp edges that lie flat against the mug surface. Transfer tape carries the weeded design from the liner to the mug, and firm burnishing with a squeegee or craft stick presses every edge into contact with the ceramic. Pay particular attention to tight curves and small letterforms, where edge lifting is most likely to occur if burnishing pressure is insufficient. Understanding the types of vinyl being used matters here — glitter and textured vinyl have more surface relief and may require additional sealer coats to achieve full encapsulation.

Apply the Sealer
For Mod Podge Dishwasher Safe, a foam brush or sponge applicator produces the most even coat. Working in thin, smooth strokes from top to bottom across the vinyl and extending 3–5mm onto the bare ceramic on all sides creates a continuous seal. Thin coats dry in 20–30 minutes; applying a second coat before the first has fully dried traps moisture and leads to cloudiness. Three to four coats total is the standard recommendation, with the final coat covering the full design area as well as a generous overlap onto the surrounding ceramic. For epoxy, follow manufacturer mixing instructions exactly and apply with a dedicated silicone brush or gloved fingertip, rotating the mug on a turntable during the leveling period to distribute the resin evenly before it sets.
Curing and Final Inspection
Curing is where patience directly translates to durability. Mod Podge achieves its full dishwasher-safe properties after 28 days of air curing at room temperature — not after the surface feels dry to the touch, which happens within hours. Epoxy resin reaches full hardness in 24–72 hours depending on ambient temperature, and warmer environments (65–75°F) accelerate the crosslinking reaction. After curing, inspect the edges of every vinyl element under good lighting: any lifted corners or visible seams indicate areas that may need a touch-up coat before the mug goes into regular use.
Pro tip: Always cure sealed mugs horizontally on a wire rack — setting them upright during curing causes sealer to pool at the base edge, creating an uneven finish that's difficult to correct after the fact.
Shortcuts That Save Time Without Cutting Corners
A few well-tested shortcuts make the sealing process faster without sacrificing quality:
- Batch sealing: Seal 6–10 mugs in a single session rather than one at a time — setup and cleanup time drops dramatically per unit.
- Lazy Susan turntable: A simple kitchen turntable allows smooth rotation during sealer application, eliminating brush streaks on curved surfaces.
- Foam daubers over flat brushes: Foam applicators deposit sealer more evenly on curved ceramic than standard paintbrushes, which tend to drag and leave stroke marks.
- Timer between coats: Setting a 30-minute timer between coats prevents under-dried layer stacking without requiring constant manual checks.
- Tape the lip and base: Masking tape around the rim and base prevents accidental sealer buildup in areas that contact lips or table surfaces.
Crafters who have worked through similar surface-prep challenges for making vinyl letters adhere to wood will find the mug sealing workflow surprisingly similar — clean surface, firm application, multiple sealer coats, and adequate cure time are the universal constants regardless of substrate. Those who also work with sublimation paper and heat press setups will appreciate that sealed vinyl mugs require no specialized press equipment, making the technique accessible even in minimal studio setups.
When Things Go Wrong: Common Sealing Failures
Bubbling and Cloudiness
Bubbles and a milky, cloudy finish in the sealer coat almost always trace back to one of two causes: applying coats too thickly or sealing over a surface that hasn't fully dried. Thick Mod Podge applications trap water vapor during drying, which creates the characteristic whitish haze that sometimes clears on its own and sometimes becomes permanent. The fix is sanding lightly with 400-grit wet/dry sandpaper between coats once fully dry, then applying a fresh thin coat. For epoxy, bubbles from mixing can be popped with a brief pass of a heat gun or torch held 6–8 inches from the surface within the first 10 minutes after application.
Peeling Edges
Edge lifting after sealing indicates either insufficient burnishing during the vinyl application phase or sealer that didn't extend far enough beyond the vinyl perimeter to lock down the edges. Once the sealer has cured, lifting edges can be tacked back down with a small amount of E6000 adhesive or a drop of super glue gel applied with a toothpick, followed by a fresh sealer coat over the repaired area. Prevention is more effective than repair: always extend sealer 5–8mm past all vinyl edges onto bare ceramic on every coat.
Yellowing Over Time
Some polyurethane and non-UV-stable acrylic sealers develop a yellow tint over months of exposure to light and heat. This is especially visible over white or light-colored vinyl. Selecting UV-stable formulations of Mod Podge or epoxy resin prevents yellowing from the outset. For epoxy users, ArtResin's UV-resistant formula is a well-regarded choice specifically because it remains optically clear under prolonged light exposure, whereas many hardware-store epoxies are formulated for structural rather than aesthetic applications and yellow noticeably within a year.
Frequently Asked Questions
Does vinyl on mugs really need to be sealed?
Yes — pressure-sensitive adhesive vinyl is not inherently waterproof or detergent-resistant. Without a sealer, repeated washing causes the adhesive to fail at the edges and work inward, eventually causing the entire design to lift. Sealing encapsulates the vinyl and creates a moisture barrier that extends the decoration's life significantly.
Can a regular Mod Podge be used instead of the dishwasher-safe formula?
Standard Mod Podge formulas are not rated for dishwasher exposure and will cloud, peel, or dissolve when exposed to hot water and detergent. Only the dedicated Dishwasher Safe Mod Podge formula provides the chemical crosslinking needed for repeated wash cycles, and only after the full 28-day cure period.
How many coats of sealer are needed on a vinyl mug?
Three to four thin coats is the standard recommendation for Mod Podge Dishwasher Safe. Each coat must be fully dry before the next is applied. More coats increase protection, but only if they are thin and well-applied — thick coats trap moisture and create bubbling or cloudiness rather than adding durability.
Is epoxy resin safe to use on mugs people will drink from?
Food-safe epoxy resin formulas exist and are appropriate for the exterior of mugs. Resin should never be applied to the interior drinking surface, the rim, or any area that contacts the user's mouth or the beverage. Keeping all sealer applications on the exterior design area and well below the rim is standard practice for drinkable-use mugs.
How long does sealed vinyl on a mug last?
With proper sealing and hand-washing, sealed vinyl can last two to five years without significant degradation. Dishwasher-washed mugs sealed with fully cured Mod Podge Dishwasher Safe typically hold up for one to two years of regular machine washing before showing wear at the edges. Epoxy-sealed mugs generally outlast other sealing methods under dishwasher conditions.
What vinyl type works best on mugs before sealing?
Permanent adhesive vinyl (such as Oracal 651 or equivalent) is the correct choice for mugs, as it is rated for outdoor and wet-environment use before sealing is applied. Removable vinyl (Oracal 631) lacks sufficient initial adhesion for curved ceramic surfaces and will lift regardless of the sealer applied over it.
Can a heat press be used to seal vinyl onto a mug?
A mug press (a cylindrical heat press accessory) can activate heat transfer vinyl on curved mug surfaces, but standard pressure-sensitive vinyl does not require heat for adhesion. For pressure-sensitive vinyl on mugs, mechanical pressing and burnishing during application — followed by a liquid or spray sealer — is the correct workflow. A mug press is only relevant when working with HTV rather than adhesive vinyl.
Is it possible to seal vinyl on a mug that has already started peeling?
Partially lifting vinyl can be resealed, but the results are less reliable than starting fresh. The lifting section should be pressed back down firmly with a squeegee and allowed to re-adhere, then a sealer coat applied over the entire design including a wide border onto the bare ceramic. If the adhesive has already degraded significantly, removing the design and starting over with fresh vinyl produces a better result than attempting to seal a compromised application.
Final Thoughts
Knowing how to seal vinyl on a mug properly transforms a craft project from a fragile novelty into a durable, gift-worthy product — and the technique is well within reach once the right materials and cure times are respected. Pick the sealer that matches the mug's intended use, apply it in thin patient coats, and give it the full cure window it needs. Head over to the heat press and vinyl section on PalmGear for more guides on taking vinyl craft work to the next level, from material selection through finished product.


About Alice Davis
Alice Davis is a crafts educator and DIY enthusiast based in Long Beach, California. She spent six years teaching textile design and applied arts at a community college, where she introduced students to everything from basic sewing techniques to vinyl cutting machines and heat press printing as practical, production-ready tools. That classroom experience means she has put more sewing machines, embroidery setups, Cricut systems, and heat press units through real project work than most reviewers ever will. At PalmGear, she covers sewing machines and embroidery tools, vinyl cutters, heat press gear, Cricut accessories, and T-shirt printing guides.
You can get FREE Gifts. Or latest Free phones here.
Disable Ad block to reveal all the info. Once done, hit a button below