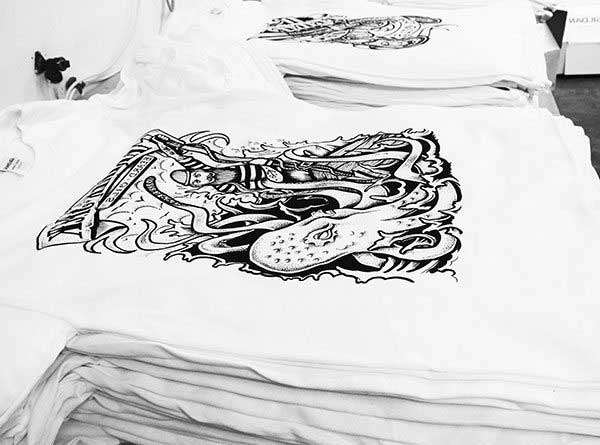
How to Screen Print T-Shirts at Home: A Beginner's Guide
by Alice Davis
Can screen printing at home actually produce professional-grade results, or is the process simply too technical for non-commercial setups? Our team has tested this extensively, and the answer is an unqualified yes — learning how to screen print t shirts at home is entirely achievable with the right equipment, the right emulsion chemistry, and a methodical approach to each stage of the workflow. The process draws on screen printing technology rooted in early 20th-century commercial textile production, but modern photopolymer emulsion kits and aluminum mesh frames have made home-scale setups genuinely viable and affordable. For anyone already invested in custom apparel and textile work, our full heat press and vinyl section covers the broader landscape of transfer methods alongside screen printing.

Contents
Method Matchup: How Screen Printing Compares to Other Techniques
When our team evaluates custom apparel methods for home production, screen printing ranks at the top for bold, opaque, multi-wash-durable results on cotton and cotton-blend fabrics. The comparison below captures the most meaningful distinctions between the four dominant home printing approaches, so anyone selecting a method can make an informed commitment rather than a frustrated course-correction later.
| Method | Typical Setup Cost | Wash Durability | Best Substrate | Color Complexity | Min Practical Run |
|---|---|---|---|---|---|
| Screen Printing | $80–$250 | Excellent (80+ washes) | 100% Cotton | 1–4 spot colors | 6–12 shirts |
| DTF Printing | $300–$800 (film + printer) | Very Good (50+ washes) | Any fabric | Full CMYK unlimited | 1 shirt |
| Heat Transfer Vinyl (HTV) | $100–$400 (cutter + press) | Good (40+ washes) | Cotton / Poly blends | Layered solids | 1 shirt |
| Sublimation | $200–$500 (printer + press) | Excellent — dye embedded | High-polyester only | Full photographic | 1 shirt |
Screen printing holds a decisive advantage in ink opacity on dark fabrics and per-unit cost on runs of twelve or more identical shirts, which is why our team defaults to it for batch production work. For smaller single-piece runs or photographic artwork with gradients and color blends, DTF or sublimation offer better economics and fewer setup steps. Our detailed breakdown of DTF printing vs. HTV covers those trade-offs thoroughly for anyone still deciding between methods.
When Screen Printing Is the Right Choice
Screen printing delivers its best economics and output quality in a specific set of conditions that our team has validated across dozens of home print runs:
- Runs of six or more identical shirts, where screen setup time amortizes quickly across each unit
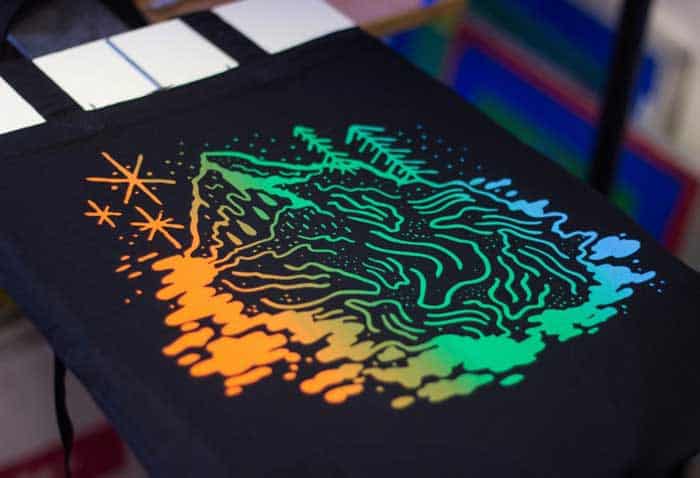
- Bold single- or two-color vector designs with clean edges and no halftone gradients
- Dark-fabric applications demanding ink opacity that HTV and sublimation cannot match
- Cotton garments where sublimation dye migration would discolor the print during curing
Our pick: For any batch of 10 or more shirts with a bold logo design, screen printing is the only home method our team recommends without reservation — the durability and ink vibrancy justify every minute of screen preparation time.
The Complete Process for How to Screen Print T-Shirts at Home
The process breaks into five distinct stages, each with specific failure points that separate clean results from ruined garments and wasted ink. Our team works through these in strict sequence, with no shortcuts taken between stages.
Step 1 — Preparing and Printing Artwork
Artwork must be high-contrast black-on-white output at a minimum of 300 DPI, printed onto transparency film using an inkjet or laser printer set to maximum ink density for complete UV opacity. Thin lines under 2pt stroke weight and fine halftone dots below 55 lpi are problematic on standard 110-mesh screens, so our team avoids them entirely for home production runs.
Step 2 — Coating the Screen with Photo Emulsion
Applying photopolymer emulsion with a squeegee scoop coater in a single consistent pass on both sides of the mesh produces a smooth, pinhole-free coating that will hold fine detail through the exposure and washout stages. The coated screen must cure in a light-safe, warm environment for a minimum of two hours — our team prefers overnight drying for maximum emulsion hardness before UV exposure begins.
Warning: Even brief ambient light exposure during screen handling after coating will fog the emulsion and destroy stencil detail — always work under yellow safelight or in a completely dark room from coating through washout.
Step 3 — Exposure and Washout
Exposure time varies by emulsion brand, UV light source wattage, and mesh count, but a 250W UV lamp positioned twelve inches from the screen for 10–15 minutes is our standard starting point for Diazo-sensitized emulsion on 110-mesh polyester. After exposure, washing with a standard garden hose or handheld shower head in subdued light reveals the open stencil cleanly, with sharp, hard edges intact when exposure time was correct.
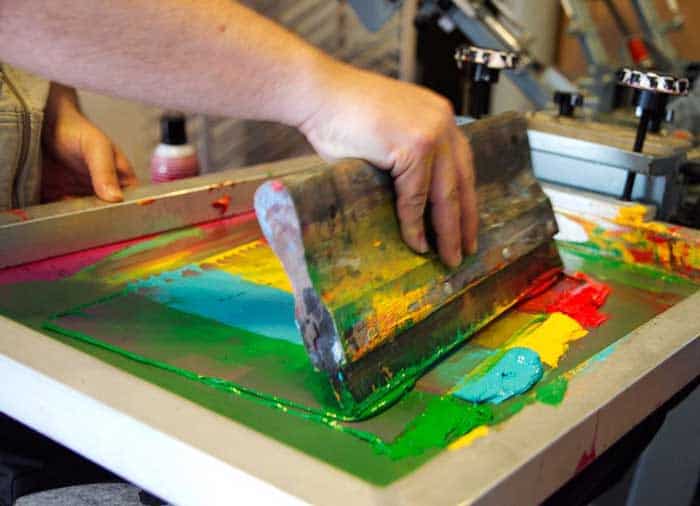
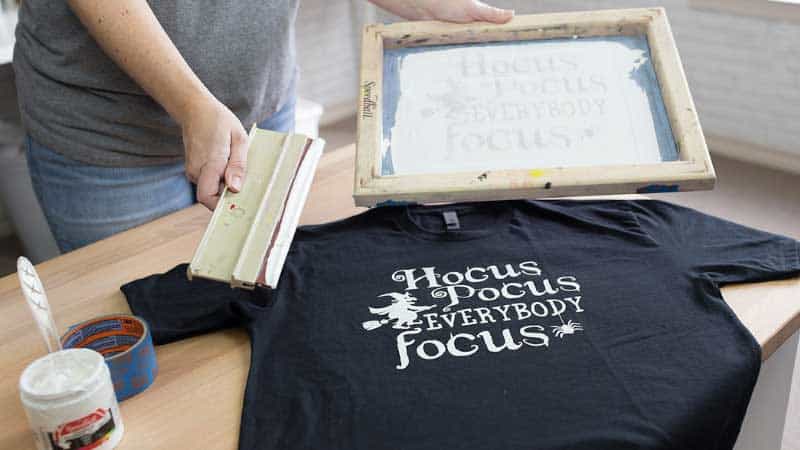
Step 4 — Inking and Pulling the Print
Plastisol ink loaded behind the stencil at a 45-degree squeegee angle, pulled across with firm and even downward pressure in a single decisive stroke, produces consistent ink deposition across the full print area. Our team never double-strokes on the first pull — the correct two-step sequence is flood stroke first, then print stroke, which prevents over-saturation, ink bleed under the stencil edges, and mesh clogging mid-run.
Step 5 — Curing the Ink
Plastisol ink requires reaching 320°F (160°C) throughout the full ink layer for a complete cross-link cure and wash-durable bond with the cotton fiber. A conveyor dryer is the professional standard, but home setups achieve reliable cure results using a heat gun in slow, continuous circular motion held 2–3 inches above the print surface for 45–60 seconds, confirmed with an infrared thermometer reading at the ink surface.
Entry-Level Kits vs. Fully Equipped Home Studios
What a Beginner Setup Actually Provides
Entry-level kits include a single aluminum frame with 110-mesh polyester screen, a small container of Diazo photo emulsion, and one or two rubber squeegees — adequate for single-color prints on light-colored garments using clean, bold artwork. Anyone expecting to print multi-color designs or dark-base underprinted work with a starter kit will encounter the limitations immediately and find the results frustrating rather than encouraging.
Advanced Home Studio Components
A properly equipped home studio adds several components that starter kits omit entirely and that our team considers non-negotiable for consistent, repeatable quality:
- A dedicated UV exposure unit with built-in timer, which eliminates exposure guesswork and produces consistent stencil hardness across every screen
- Multiple aluminum frames for multi-color registration work, ideally in matching mesh counts for predictable ink deposit
- A flash cure unit or spot dryer for inter-color drying in multi-color runs without disturbing garment registration
- Standard plastisol inks in PMS-matched colors rather than the generic starter inks supplied in beginner kits
- A printing platen with off-contact adjustment screws to dial in the correct gap between screen and garment surface
Understanding how the fabric itself behaves under ink and heat matters enormously at this level — our breakdown of how a 100% cotton t-shirt is made explains why yarn twist, weave structure, and fabric weight directly affect ink absorption depth and finished print hand-feel.
Pro insight: Our team's single best equipment upgrade from starter to intermediate level is a proper UV exposure unit — it eliminates the most common failure point in home screen printing and pays for itself within the first ten screens reclaimed.
Critical Errors That Ruin Prints Before They're Dry
Emulsion and Exposure Errors
Under-exposing the screen is the most common technical failure in home screen printing workflows, producing emulsion that washes away prematurely during printing and allows ink to bleed through unexposed mesh areas into the garment. Our team runs exposure test strips with every new emulsion batch or unfamiliar light source before committing to any production quantity.
- Insufficient emulsion coating thickness — less than two complete passes — creates pinholes that read as scattered ink dots outside the design boundary
- Handling coated screens under ambient household lighting before exposure fogs the photopolymer layer and destroys fine detail irreversibly
- Washing with high-pressure spray directly against the exposed stencil removes fine detail from the open areas before ink ever touches the garment
Ink Application and Curing Failures
Plastisol ink that is too cold — below 65°F (18°C) — becomes stiff and resists even firm squeegee pressure, producing patchy, thin, uneven coverage across the print area. Our team stores plastisol at room temperature and stirs thoroughly before use, and this single habit eliminates the majority of viscosity-related print defects encountered in home production. The sublimation and heat press workflow handles ink chemistry and curing very differently, which is worth understanding when deciding which process to commit to for a given project type.
Screen Care and Print Longevity
Reclaiming and Storing Screens
Screen reclaiming — chemically removing hardened emulsion after a completed print run — requires emulsion remover applied liberally to both sides of the mesh, a five-minute dwell time, and thorough pressure washing until the mesh is visually clear. Our team reclaims screens within 24 hours of any production run to prevent emulsion from fully hardening in the mesh weave, which would render the frame unusable for future work without costly re-meshing.
Washing and Caring for Screen Printed Garments
Properly cured plastisol prints are among the most wash-durable results achievable from any home printing method — our team has tested garments through 80-plus wash cycles with negligible visible fading when ink reached full cure temperature. For anyone looking at options after a printed garment has outlived its design, the guide on reusing torn cotton t-shirts covers practical repurposing approaches for fabric that still has life beyond the print.
- Cold water wash, inside-out, on a gentle cycle to minimize mechanical abrasion against the ink surface
- Air dry or low-heat tumble dry — high heat in the dryer accelerates ink layer micro-cracking over repeated cycles
- No chlorine bleach, which attacks plastisol chemistry and degrades adhesion at the ink-to-fiber bond
- Iron on reverse side only, never directly on the print face, to avoid surface melting or adhesion to the iron soleplate
Common Screen Printing Myths, Corrected
Myth: Home Screen Printing Requires Expensive Equipment
The persistent belief that screen printing demands commercial-grade equipment to produce usable results is factually incorrect and discourages capable home crafters unnecessarily from starting. A $150–200 investment in quality aluminum-frame mesh screens, Diazo emulsion, and standard plastisol ink produces professional single-color prints that are indistinguishable from commercial shop output — the equipment ceiling for solid results is genuinely low, and our team recommends starting there without hesitation.
Myth: Multi-Color Prints Are Too Complex for Home Setups
Multi-color screen printing at home is more demanding than single-color work, primarily because of registration — aligning each successive color layer precisely requires a registration jig or a basic printing press with alignment pins to hold consistent position across the run. Our team has produced clean two-color and three-color home prints using a DIY registration system built from plywood and hinge clamps for under $30 in materials, which demonstrates that precision is achievable without professional press equipment.
Myth: Screen Printing Works Equally Well on Any Fabric
Synthetic fabrics with high polyester content present a genuine problem for plastisol printing due to dye migration — the heat required to cure plastisol causes polyester dyes to bleed upward into the ink layer, producing a washed-out or discolored print that no amount of post-processing corrects. Our team defaults to 100% cotton or high-cotton-blend garments and uses dye-blocking white base coats when polyester content in the fabric cannot be avoided for the job.
Key Takeaways
- Learning how to screen print t shirts at home delivers durable, professional-quality results when emulsion coating, UV exposure, and plastisol curing are each executed correctly and in the right sequence.
- Entry-level kits are adequate for single-color work on light-colored cotton garments, but anyone serious about consistent quality needs a UV exposure unit, proper PMS-matched plastisol inks, and a dedicated cure solution.
- The most common print failures in home screen printing trace directly to under-exposed emulsion, cold ink, and incomplete curing — none of which are equipment limitations, all of which are process corrections.
- Cotton and high-cotton-blend garments are the correct substrate for home screen printing, with dye-blocking base coats required whenever high-polyester fabrics cannot be substituted.


About Alice Davis
Alice Davis is a crafts educator and DIY enthusiast based in Long Beach, California. She spent six years teaching textile design and applied arts at a community college, where she introduced students to everything from basic sewing techniques to vinyl cutting machines and heat press printing as practical, production-ready tools. That classroom experience means she has put more sewing machines, embroidery setups, Cricut systems, and heat press units through real project work than most reviewers ever will. At PalmGear, she covers sewing machines and embroidery tools, vinyl cutters, heat press gear, Cricut accessories, and T-shirt printing guides.
You can get FREE Gifts. Or latest Free phones here.
Disable Ad block to reveal all the info. Once done, hit a button below