RV Gear ›
How to Fix Shrunken RV Window Seals
by Jake Mercer
When rv window seals keep shrinking, the fix is straightforward: clean the frame, apply a compatible EPDM or butyl sealant, and address the root cause — UV exposure, temperature cycling, or age-hardened rubber. Ignoring it turns a $15 repair into water damage that costs hundreds.
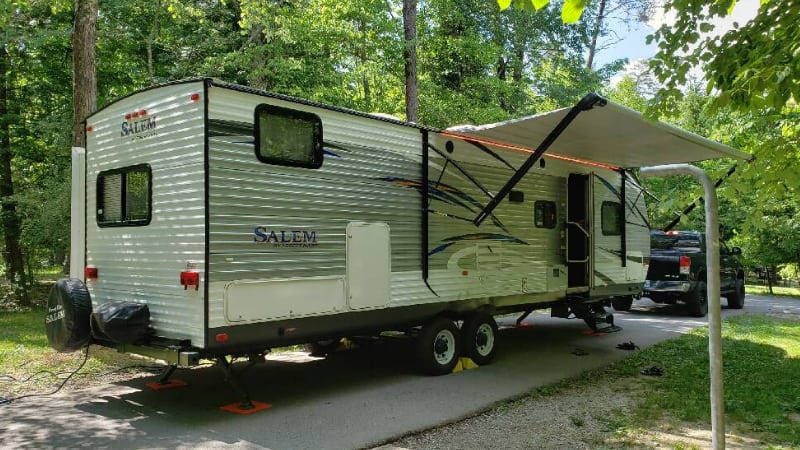
RV windows take a beating. Every road mile flexes the frame. Every summer bakes the rubber. Every winter freeze-thaw cycle works the seal loose. If you're finding gaps, cracked edges, or condensation between panes, your seals have already started to fail. Here's how to diagnose it, fix it, and keep it from happening again — across the full life of your rig. Check our RV gear guides for more maintenance deep dives.

Contents
When Your RV Window Seals Need Attention — and When They Don't
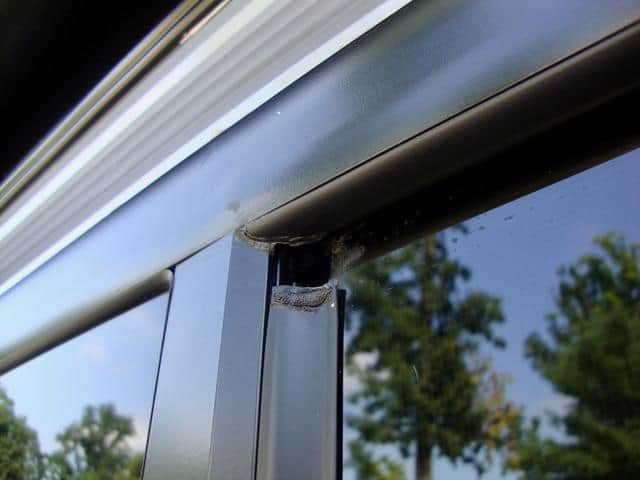
Clear Signs of Seal Failure
RV window seals keep shrinking for one of three reasons: UV degradation, ozone cracking, or thermal cycling. All three produce the same result — a seal that no longer fills the gap between glass and frame. Here's what that looks like in practice:
- Visible gaps between the rubber seal and the window frame, especially at corners
- Condensation or water streaks on the interior wall below the window
- Drafts you can feel with your hand along the window perimeter at highway speed
- Seal that looks shiny, cracked, or brittle rather than matte and flexible
- Seal that pulls away cleanly from the frame with minimal pressure — no adhesion left
- Musty smell near the window — moisture intrusion that's already reached the wall cavity
When the Seal Isn't the Problem
Not every leak traces back to the window seal. Eliminate these before you start pulling rubber:
- Roof seams above the window — water travels down and exits at the window. Check your roof first. See our guide on RV rubber roof repair for a full walkthrough.
- AC unit drain pan overflow — drips can run down the wall and pool at the window frame. Related: RV air conditioner leaks when it rains.
- Slide-out seal failure — if your window is near a slide, the slide seals may be the actual culprit. Check RV slide-out operation and troubleshooting for diagnostic steps.
- Condensation, not infiltration — interior humidity hitting cold glass. Install a hygrometer and run your vent fan before assuming the seal is bad.
Pro tip: Run a garden hose over the window from above while someone watches the interior. If water appears within 30 seconds, the seal is the culprit. If it takes minutes, look at the roof or slide.
How to Fix Shrunken RV Window Seals Step by Step
Tools and Materials
- Plastic pry tool or putty knife (metal damages aluminum frames)
- Isopropyl alcohol (90%+) and lint-free cloths
- EPDM rubber seal replacement strip OR butyl tape (3/8" or 1/2" wide)
- Dicor self-leveling lap sealant (for topside seams) or Geocel 2300 (for vertical joints)
- Single-edge razor blade for trimming
- Heat gun or hair dryer (optional — improves adhesion in cold weather)
- Painter's tape for masking clean lines

The Repair Process
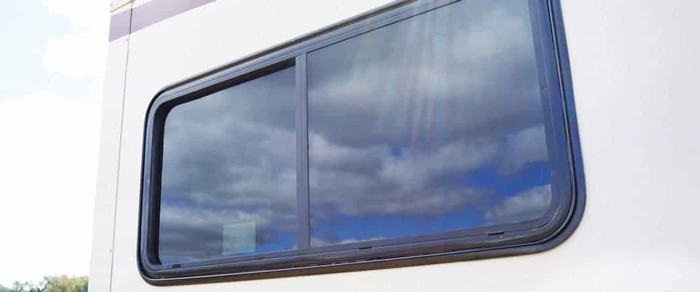
- Remove the old seal. Use the plastic pry tool to work under the edge. Pull slowly. On aluminum-framed windows (Hehr, Elixir, Kinro), the seal sits in a channel — slide it out rather than tear it.
- Clean the channel thoroughly. Wipe with isopropyl alcohol. Remove all old butyl residue — a razor blade scrapes it cleanly without scratching aluminum. Let it dry completely. Five minutes minimum.
- Measure and cut the replacement seal. Cut 2–3% longer than the channel perimeter. The slight compression eliminates corner gaps — the most common place leaks restart.
- Pre-warm the frame in cold weather. Below 60°F, butyl tape stays stiff and won't seat properly. Two minutes with a heat gun at 6 inches changes that.
- Press the new seal into the channel. Start at a bottom corner, work around the perimeter. Use your thumb to push it fully seated — no gaps, no lifted edges.
- Apply lap sealant at the corners. A thin bead of Geocel 2300 at each corner joint seals the splice point where shrinkage always starts first.
- Test before you reassemble. Spray the window with a hose. Wait 60 seconds. Any water inside means the seal isn't fully seated.
Routine Maintenance That Prevents Shrinking
Cleaning and Conditioning
Rubber degrades faster when it dries out. UV radiation plus road grime accelerates the process. A simple conditioning schedule extends seal life by years.
- Clean seals quarterly with mild soap and water. Skip petroleum-based cleaners — they accelerate rubber drying.
- Apply a silicone-based rubber conditioner (303 Aerospace Protectant or equivalent) after cleaning. It restores plasticizers that migration and UV strip out.
- Never use Armor All on EPDM seals. The petroleum distillates cause exactly the kind of swelling-then-shrinking cycle you're trying to prevent.
- Keep windows clean — road film holds moisture against the seal perimeter and accelerates oxidation at the adhesion point.
Seasonal Inspection Checklist
Do this twice a year — before and after storage season:
- Run a fingernail along the full seal perimeter. Any section that flexes away from the frame needs attention.
- Check corners for hardening or cracking — these fail first due to stress concentration.
- Look for white calcium deposits on the interior wall below the window — a sign of slow historic leakage.
- Open and close each window. The latch should require light pressure. Heavy pressure means the frame has shifted or the seal has swollen unevenly.
- Inspect the exterior flange sealant bead. Reapply Dicor anywhere you see separation, crazing, or color change to gray/brown.
According to NHTSA vehicle safety recall data, water infiltration through failed seals is one of the leading contributors to structural delamination in recreational vehicles — a problem that starts small and becomes a frame issue.
Cost Breakdown: DIY vs. Professional Repair
DIY Material Costs
| Item | Typical Cost | Coverage | Notes |
|---|---|---|---|
| EPDM seal replacement strip (25 ft roll) | $12–$18 | 3–4 windows | Match profile to existing channel depth |
| Butyl tape (3/8" × 30 ft) | $8–$14 | 5–6 windows | Good for flat-frame windows |
| Dicor self-leveling lap sealant (tube) | $10–$15 | 8–10 windows | Topside seams only |
| Geocel 2300 (cartridge) | $14–$20 | 6–8 windows | Vertical and corner joints |
| 303 Aerospace Protectant (32 oz) | $18–$25 | Full rig, 2+ years | Quarterly application |
| Full DIY kit (all windows) | $45–$75 | All windows | One-time investment |
Shop Labor Costs
- Single window reseal: $75–$150 labor + materials
- Full rig (8–12 windows): $600–$1,400 at an RV service center
- Water damage remediation if you waited too long: $800–$4,000+ depending on wall cavity damage
The math is clear. A $50 DIY kit applied early beats a $1,200 shop bill applied late. The only time you bring in a shop is when the window frame itself has corroded or warped — that requires frame replacement, not just seal replacement.
Long-Term Strategy for Seal Longevity
Choosing the Right Seal Material
Not all replacement seals are equal. Match the material to your environment and use case:
- EPDM (ethylene propylene diene monomer) — the standard choice. Excellent UV resistance, handles –40°F to 250°F, holds its shape across thermal cycles. Use this for most RV windows.
- Butyl tape — aggressive tack, great for flat-flange applications and as a bedding compound under frame flanges. Stays pliable but doesn't spring back like EPDM.
- Silicone foam tape — good for slide-out wiper seals, not for window glazing channels. Too soft for compression loads at highway speed.
- Thermoplastic rubber (TPR/TPV) — found on some newer factory seals. Better ozone resistance than standard EPDM. Available as aftermarket replacement strips from Hehr and Vented Industries.
Avoid generic hardware-store weatherstripping. It uses lower-grade rubber with minimal UV stabilizers and will shrink again within one season of sun exposure.
When to Upgrade the Entire Window Assembly
Sometimes the seal isn't the ceiling — the window itself is. Replace the full assembly when:
- The aluminum frame shows white oxidation or black pitting that won't clean off
- The dual-pane glazing has failed (fog between panes that doesn't clear)
- The frame has bowed more than 1/8" across its span from frame flex
- You've resealed the same window more than twice in three seasons
- The latch mechanism is cracked or the crank gear has stripped
Replacement windows for Hehr, Kinro, and Elixir frames run $80–$300 per unit depending on size and glazing type. That's still well below the cost of water damage remediation.
Frequently Asked Questions
Why do RV window seals keep shrinking even after I replace them?
The most common cause is using the wrong replacement material. Generic hardware-store foam tape or low-grade rubber lacks UV stabilizers and degrades within one outdoor season. Use EPDM or butyl-based seals rated for automotive or RV use, and apply a silicone-based conditioner like 303 Aerospace Protectant twice a year to slow plasticizer migration.
Can I use silicone caulk instead of a rubber seal strip?
Not as a primary seal in the glazing channel. Silicone caulk doesn't compress and rebound the way a rubber seal does, and it bonds poorly to aluminum without a primer. Use it only as a supplemental bead at the exterior flange joint — never as a replacement for the channel seal itself.
How long should RV window seals last?
With proper conditioning, quality EPDM seals last 5–10 years in moderate climates. In high-UV environments (desert Southwest, high altitude), expect 3–5 years before signs of hardening appear. Seal life drops sharply if you skip the quarterly conditioning routine or store the RV without UV-protective window covers.
Is it normal for the seal to look slightly wavy after installation?
Slight waviness at corners is normal and disappears within 24–48 hours as the rubber relaxes and conforms to the channel. Persistent gaps at corners, however, indicate the seal profile doesn't match the channel depth — you need a thicker or wider replacement strip.
Do I need to remove the window to replace the seal?
For most Hehr and Kinro-style RV windows, no. The glazing seal sits in an accessible channel around the exterior perimeter and can be replaced in place. Only remove the window if the frame flange sealant underneath has failed — that requires pulling the entire unit to re-bed the flange properly.
A $15 seal replaced today is the only thing standing between your window frame and a $3,000 wall repair tomorrow — act before the rubber does the math for you.


About Jake Mercer
Jake Mercer spent twelve years behind the wheel as a long-haul trucker, covering routes across the continental United States and logging well over a million miles. That career gave him an unusually thorough education in CB radio equipment — he has tested base station antennas, magnetic mounts, coax cables, and handheld units in real-world conditions where reliable communication actually matters. After leaving trucking, Jake transitioned to full-time RV travel and has since put hundreds of RV accessories through their paces across national parks, boondocking sites, and full-hookup campgrounds from Montana to Florida. At PalmGear, he covers RV gear and accessories, CB radios, shortwave receivers, and handheld radio equipment.
You can get FREE Gifts. Or latest Free phones here.
Disable Ad block to reveal all the info. Once done, hit a button below