RV Gear ›
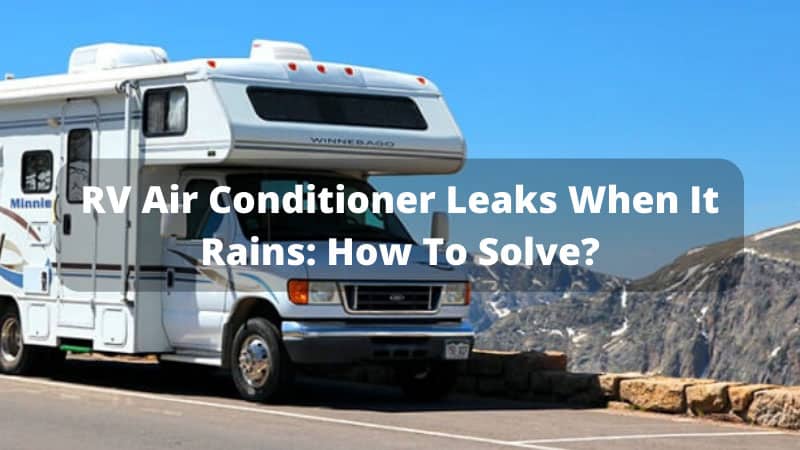
RV Air Conditioner Leaks When It Rains: How To Fix It
by Jake Mercer
Last summer, a friend pulled his Class C into a campsite during a heavy downpour, stepped inside expecting dry shelter, and found water pooling directly beneath the AC unit. He'd brushed off the drip for two trips, convinced it was harmless. It wasn't. If your rv air conditioner leaks when it rains, that's not normal behavior you have to accept — it's a diagnosable problem with well-understood fixes, and ignoring it accelerates mold growth, ceiling delamination, and repairs that cost ten times more than early intervention. The good news is that most causes trace back to a handful of failure points you can address yourself in a single afternoon. For the full toolkit, check out our RV gear guide covering everything from maintenance essentials to upgrade accessories.
Contents
What's Really Behind That Drip: Diagnosing the Root Cause
Before you grab a tube of sealant and start coating everything in sight, you need to pinpoint where the water is actually entering. Rain leaks in RV air conditioners almost always trace back to one of two primary failure points, and treating the wrong one wastes both your time and your money on a fix that accomplishes nothing.

The AC Unit Gasket
The foam gasket sandwiched between the AC unit's base pan and your RV roof is your primary rain barrier. UV exposure, temperature cycling, and constant highway vibration compress, crack, and destroy this gasket over time, stripping away its sealing ability. When rain water runs along the roofline and hits a compromised gasket, it channels straight through the ceiling opening and into your living space. Inspecting this gasket is your first diagnostic step: pull the shroud, look at the base perimeter, and check for visible gaps, crumbling foam, or dark discoloration.
- Most OEM gaskets degrade noticeably within five to seven years of regular use
- Replacement foam gaskets run $10–$25 at most RV supply stores
- Inspect after any trip longer than 500 miles, since vibration accelerates wear significantly
- Press firmly around the entire base — any give indicates compression failure
Clogged Condensate Drain Lines
Your AC unit generates condensate moisture as it cools the air, and that moisture is supposed to exit through dedicated drain holes in the unit housing. When those channels clog with dust, debris, insect nests, or algae growth, condensate backs up and overflows into your ceiling cavity. This particular issue shows up as dripping even during light rain or humid weather, not exclusively during heavy downpours. Clear the drain holes with a thin wire or a short blast of compressed air, and you'll often solve the entire problem in under ten minutes without touching the roof at all.
If you've dealt with other RV appliance quirks like an RV refrigerator that stops cooling while the freezer keeps running, you already understand how RV systems misbehave in ways that seem mysterious until you find the actual root cause — the same diagnostic-first approach applies here.
Clearing Up the Myths Surrounding RV Roof Leaks

Bad information on RV forums sends owners chasing the wrong fixes for months. Before you spend a dollar on repairs, make sure you're not operating on one of these stubborn misconceptions.
The "It's Just Condensation" Myth
Normal condensation drips from interior AC coils into the drip pan — that's by design, and it happens regardless of weather outside. What's not normal is water appearing at the edges of the ceiling plate, along the roofline walls, or in a puddling pattern that tracks directly with rainfall intensity outdoors. True condensation is weather-independent; a structural rain leak intensifies every time precipitation increases. If your rv air conditioner leaks specifically when it rains and the dripping eases once the storm passes, you're dealing with a structural intrusion, not an internal moisture issue.
A quick diagnostic rule: if the dripping tracks perfectly with rainfall but stops on dry humid days when the AC runs hard, the problem is outside your rig, not inside the unit — check your roof sealant and gasket before anything else.
The Sealant Lasts Forever Myth
Many RV owners apply roof sealant once after purchase and assume the job is permanently done. According to standard RV construction and maintenance guidelines, most roof sealants require inspection and reapplication every one to two years, particularly in climates with freeze-thaw cycles or intense sun exposure. EPDM and TPO roof membranes are genuinely durable, but the sealant at every penetration point — AC mounting bolts, drain channels, antenna mounts — degrades on its own schedule completely independent of the membrane beneath it.
What the Repair Actually Costs: A Realistic Breakdown

DIY Parts and Materials
If you're comfortable getting on the roof for an hour, the DIY route is genuinely affordable. Most rain leak repairs land between $20 and $150 in materials, depending on how widespread the sealant degradation is and whether you need a new gasket. Self-leveling lap sealant — Dicor is the industry standard for EPDM roofs — runs about $10–$15 per tube, and you'll typically need two to three tubes to reseal the entire AC surround properly.
| Repair Item | Estimated DIY Cost | How Often Needed |
|---|---|---|
| Foam AC gasket replacement | $10–$25 | Every 5–7 years |
| Self-leveling lap sealant (2–3 tubes) | $25–$45 | Annually or as needed |
| Butyl tape for base reseal | $15–$30 | With gasket replacement |
| EPDM roof patch tape | $30–$80 | Only if membrane is cracked |
| Professional inspection (optional baseline) | $75–$150 | Every two years |
Professional Repair Pricing
When damage extends beyond the gasket and sealant — delaminated interior walls, rotted roof substrate, or cracked membrane — professional repair costs escalate quickly. RV service centers charge $85–$150 per hour for labor, and a full roof reseal with substrate inspection runs $500–$1,500 depending on roof size and overall condition. If you've allowed an rv air conditioner leak to persist across multiple seasons, interior ceiling panel replacement adds another $200–$600 to that estimate. Addressing it in the first season always costs significantly less than addressing it in the third.
While you're auditing your RV's maintenance status, browse our complete RV accessories list — there are several weatherproofing and inspection tools worth keeping permanently in your storage bay.
When to Fix It Yourself and When to Walk Away
Repairs You Can Confidently Handle Solo
You're in solid DIY territory when the leak is recent, localized to the AC unit area, and you see no ceiling delamination or soft spots in the roof decking. The repair process follows a clear sequence: remove the AC shroud, inspect the gasket, apply fresh sealant around the entire base and all penetration points, and allow full cure time — typically 24–48 hours — before the roof faces rain again. If you've handled basic home caulking or exterior maintenance, this level of work is well within your ability set.
- Fresh leak with no visible interior damage → DIY with lap sealant and gasket inspection
- Clogged condensate drain → DIY in under 15 minutes with compressed air
- Minor cracking around bolts or seams → Annual DIY maintenance, no special skills required
If your AC also cycles on and off repeatedly alongside the leak, our guide on RV air conditioner keeps turning on and off walks through the overlapping electrical and airflow causes that sometimes accompany water intrusion issues.
Signs You Need a Certified Technician
Call an RV technician when you find soft spots while walking the roof, when interior walls show bubbling or visible separation, or when fresh sealant fails to stop the leak within a single rain event. These symptoms indicate roof substrate rot or membrane failure that requires specialized materials and structural repair — applying a DIY patch over rotted decking creates a false sense of security while water continues penetrating beneath the failed seal.
Mistakes That Turn a Minor Drip Into Major Damage
Using the Wrong Sealant Products
The single most common DIY mistake is reaching for whatever caulk or sealant happens to be in the garage. Standard silicone and latex caulk don't bond to EPDM rubber roofing, lose adhesion quickly under UV exposure, and won't flex through the temperature swings an RV roof endures across seasons. Use only products formulated specifically for your roof material — self-leveling Dicor for flat horizontal surfaces, non-sag Dicor for vertical trim and sidewalls. Using the wrong sealant produces a visible bead that looks correct while water continues infiltrating beneath it, giving you false confidence that the problem is solved.
- Never use on EPDM roofs: standard silicone, latex caulk, roofing tar
- Correct for EPDM horizontal surfaces: Dicor 501LSW self-leveling lap sealant
- Correct for EPDM vertical surfaces: Dicor 505NFL non-sag formula
- Correct for TPO roofs: TPO-compatible liquid roof coating
Skipping the Interior Inspection
After sealing the roof, you're not finished until you've checked the interior ceiling thoroughly for moisture that's already entered the structure. Wet insulation retains moisture for weeks and creates ideal mold conditions — and once black mold establishes itself inside ceiling cavities, remediation costs dwarf anything a timely roof seal would have required. Press gently on ceiling panels near the AC unit and along the full roofline; sponginess or discoloration means you need to open that section, dry it completely, and treat for mold before resealing and reinstalling the panels.
Frequently Asked Questions
Why does my RV air conditioner only leak when it rains heavily?
Heavy rain creates greater water volume and faster runoff across the roof, which overwhelms partially failed gaskets or cracked sealant that might hold up under a light drizzle. The increased hydraulic pressure forces water through gaps that are too small to notice during a routine visual inspection, so the issue only becomes obvious during significant precipitation events.
How do I know if the leak is from the gasket or the roof sealant?
Remove the AC shroud and inspect the foam gasket first — if it's visibly compressed, cracked, or missing sections, that's your primary culprit. If the gasket looks intact, move to the roof surface and check the sealant bead surrounding the entire AC mounting perimeter and all bolt penetrations for cracks, gaps, or areas where the sealant has pulled away from the surface.
Can I drive my RV after applying new sealant?
Wait a minimum of 24 hours after applying self-leveling lap sealant before driving, and avoid rain exposure during that cure window. Driving before full cure causes the sealant to shift and skin over in a distorted position, which reduces adhesion and creates new gaps. If rain is expected, plan your repair for a dry weather window.
How often should I reseal around my RV air conditioner?
Inspect the sealant around your AC unit at least once per year, ideally at the start of camping season and again in the fall before storage. In climates with harsh winters or intense summer UV exposure, plan to apply fresh sealant every one to two years regardless of visible cracking, since UV degradation begins before it becomes visually apparent.
Is a leaking RV air conditioner dangerous to run during rain?
Running the AC while it's leaking isn't immediately dangerous in most cases, but it's inadvisable because the combination of electrical components and water infiltration creates a real risk of component corrosion and short circuits over time. Address the leak before your next camping trip rather than assuming the AC can tolerate ongoing moisture exposure without eventual electrical damage.
Next Steps
- Get on your roof today and remove the AC shroud — inspect the foam gasket along the entire base perimeter for compression, cracking, or visible gaps before you invest in any other fix.
- Clear the condensate drain holes with a thin wire or compressed air, then pour a small amount of water into the drain pan to confirm it exits freely through all channels.
- Purchase the correct sealant for your roof material — Dicor 501LSW for EPDM, TPO-compatible formula for TPO — and apply a fresh bead around the AC base, mounting bolts, and any roof penetrations showing cracking or separation.
- After sealing, inspect the interior ceiling panels near the AC unit for sponginess or discoloration, and allow any wet insulation to dry completely before reinstalling panels or closing up the ceiling.
- Schedule a follow-up roof inspection six months after your repair and add annual resealing to your maintenance calendar so the rv air conditioner leak doesn't return unnoticed next season.


About Jake Mercer
Jake Mercer spent twelve years behind the wheel as a long-haul trucker, covering routes across the continental United States and logging well over a million miles. That career gave him an unusually thorough education in CB radio equipment — he has tested base station antennas, magnetic mounts, coax cables, and handheld units in real-world conditions where reliable communication actually matters. After leaving trucking, Jake transitioned to full-time RV travel and has since put hundreds of RV accessories through their paces across national parks, boondocking sites, and full-hookup campgrounds from Montana to Florida. At PalmGear, he covers RV gear and accessories, CB radios, shortwave receivers, and handheld radio equipment.
You can get FREE Gifts. Or latest Free phones here.
Disable Ad block to reveal all the info. Once done, hit a button below