RV Gear ›
What Does An RV Inverter Do And Why You Need One?
by Jake Mercer
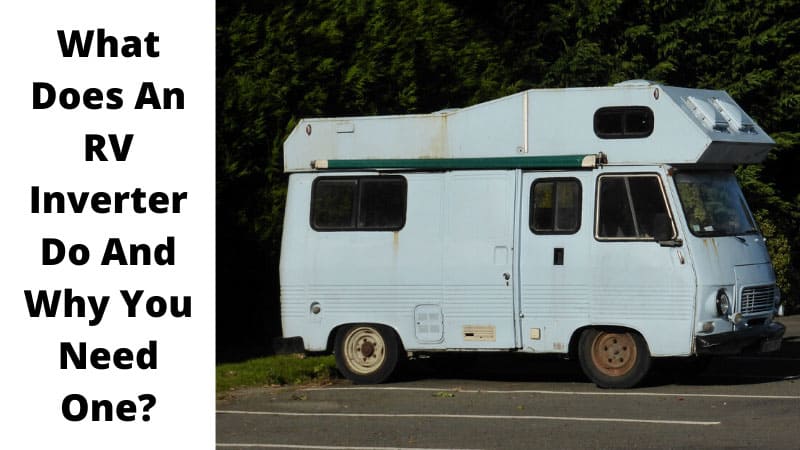
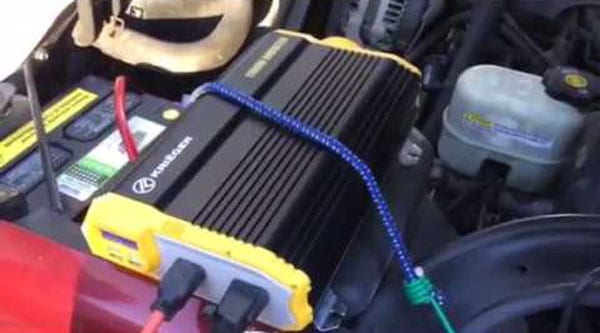
Nearly 11 million households in the U.S. own an RV, and most of them rely on some form of inverter to keep their devices running off-grid. So what does an RV inverter do and why you need one? In simple terms, an inverter converts your RV's 12-volt DC battery power into 120-volt AC power — the same kind that comes out of a wall outlet at home. Without one, you can't run everyday appliances like your coffee maker, laptop charger, or TV when you're boondocking away from shore power. If you're exploring the world of RV gear, understanding inverters is one of the first things you should tackle.
Think of your RV battery as a reservoir. The inverter is the pump that converts that stored energy into a form your household gadgets can actually use. It's the bridge between your battery bank and your morning coffee.
Contents
Common Myths About RV Inverters — Busted
Misinformation about inverters keeps many RVers from using them effectively. Let's clear up the biggest ones.
Myth: Inverters Drain Your Battery Instantly
This is the most common fear. Yes, inverters draw power from your batteries. But the drain depends entirely on what you're running. Here's the reality:
- A 50-watt laptop charger draws roughly 4-5 amps from a 12V battery.
- A 200Ah lithium battery could power that laptop for over 30 hours.
- Most inverters draw only 0.5-2 amps on idle — barely a trickle.
- Modern inverters have eco-mode that cuts idle draw to nearly zero.
The real drain comes from high-draw appliances like space heaters or hair dryers. Run a 1,500-watt heater and you'll flatten a battery bank in under two hours. Stick to moderate loads and your batteries will last all day.
Myth: Bigger Is Always Better
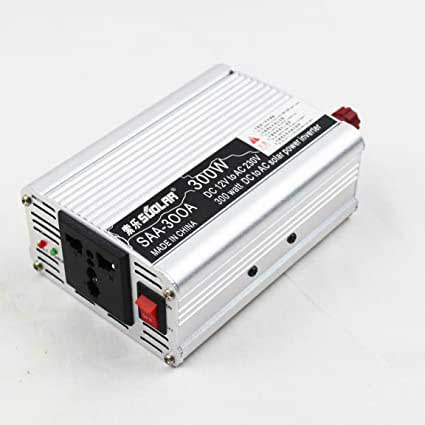
A 3,000-watt inverter sounds impressive. But if you only run a phone charger and a fan, that oversized inverter wastes energy on idle draw. Bigger inverters also cost more, weigh more, and need thicker cables.
Match your inverter to your actual needs. A 1,000-watt pure sine wave inverter handles most RVers' daily loads just fine. You'll save money and battery life.
What Does an RV Inverter Do for Beginners vs. Experienced RVers?
Your inverter needs change as your RV lifestyle evolves. A weekend warrior has different demands than a full-timer working remotely from a national park.
Modified Sine Wave vs. Pure Sine Wave
This is the single most important decision you'll make. Here's the breakdown:
| Feature | Modified Sine Wave (MSW) | Pure Sine Wave (PSW) |
|---|---|---|
| Cost | $50–$150 | $150–$500+ |
| Power quality | Choppy, stepped waveform | Smooth, identical to grid power |
| Safe for sensitive electronics | No — can damage CPAP machines, laptops | Yes — safe for all devices |
| Appliance compatibility | Basic loads (lights, fans, drills) | Everything including medical devices |
| Noise/buzz | Audible hum from some devices | Silent operation |
| Efficiency | 80–85% | 88–93% |
My recommendation: always go pure sine wave. The price gap has shrunk dramatically. A quality 1,000W PSW inverter costs around $150 now. The peace of mind is worth every penny.
Sizing Your Inverter to Your Needs
Add up the wattage of every device you plan to run simultaneously. Then add 20% headroom. Here's a quick guide:
- Weekend camper (600–1,000W): phone charging, LED lights, fan, laptop.
- Extended traveler (1,500–2,000W): add a microwave, TV, small appliances.
- Full-timer (2,000–3,000W): add a residential fridge, multiple workstations, power tools.
If you're also dealing with electrical gremlins in your rig, check out our guide on troubleshooting when your RV is plugged in but has no power. Inverter problems and shore power problems often overlap.
Troubleshooting RV Inverter Issues
Even the best inverters act up sometimes. Here's how to diagnose and fix the most common problems before you call a technician.
Inverter Won't Turn On or Has No Output
Work through this checklist in order:
- Check battery voltage. Most inverters need at least 10.5V to operate. Use a multimeter at the battery terminals.
- Inspect the fuse. A blown inline fuse between battery and inverter is the most common culprit. Replace with the exact same amp rating.
- Check cable connections. Loose or corroded terminals cause voltage drop. Clean them with a wire brush and retighten.
- Look for error codes. Most inverters have LED indicators. Check your manual for what each flash pattern means.
- Test the outlet. Plug in a simple lamp. If the inverter hums but the outlet reads zero, the internal transfer switch may have failed.
Pro tip: Keep a cheap plug-in outlet tester in your RV toolkit. It tells you instantly whether your inverter output is wired correctly — open ground, reversed polarity, or good to go.
Overload Shutdowns
Your inverter shuts off to protect itself when you draw too much power. Common triggers:
- Startup surge: Some appliances draw 3-5x their rated wattage for the first second. Microwaves and compressor fridges are notorious for this.
- Stacking loads: Running a microwave and hair dryer at the same time will overload most inverters under 3,000W.
- Weak batteries: As voltage drops, the inverter draws more amps to maintain output. This triggers overcurrent protection.
The fix is simple. Stagger your high-draw appliances. Run the microwave first, then the coffee maker. Never both at once. Protecting your electrical system is just as important as protecting your inverter — that's why we recommend pairing it with a quality RV surge protector.
Essential Gear for Your RV Inverter Setup
An inverter alone isn't enough. You need the right supporting equipment to make it safe and efficient.
Cables and Fuses
This is where most DIY installs go wrong. Undersized cables cause voltage drop, heat buildup, and fire risk. Follow these rules:
- Keep cable runs short. Under 6 feet from battery to inverter is ideal. Every extra foot adds resistance.
- Use the right gauge. A 1,000W inverter needs 4 AWG cables minimum. A 2,000W unit needs 2/0 AWG. Don't guess — check the manufacturer's specs.
- Install a Class T fuse within 12 inches of the positive battery terminal. This is not optional. It's your fire protection.
- Use copper lugs with heat-shrink covers. Avoid alligator clips for permanent installations.
For a deeper understanding of electrical safety in RVs, the Wikipedia article on power inverters covers the engineering principles behind AC/DC conversion.
Battery Bank Considerations
Your inverter is only as good as your batteries. Here's what matters:
- Lithium (LiFePO4) is the gold standard. You can use 80-100% of the rated capacity. They last 3,000+ cycles and weigh half as much as lead-acid.
- AGM (Absorbed Glass Mat) is the budget option. Only use 50% of capacity to avoid damage. Heavier and shorter-lived, but cheaper upfront.
- Flooded lead-acid requires venting, maintenance, and careful charging. Skip these for inverter use unless you're on a very tight budget.
A good rule of thumb: your battery bank (in amp-hours) should be at least double the continuous draw of your inverter divided by 12. For a 1,000W inverter, that's about 170Ah minimum with lithium.
Keeping Your RV Inverter in Top Shape
Inverters are mostly set-and-forget. But a little routine care extends their life significantly.
Routine Checks
Do these once a month during camping season:
- Inspect connections. Look for corrosion, discoloration, or loose terminals. Tighten to manufacturer specs.
- Clean the vents. Dust and debris block airflow. A clogged inverter runs hot and shuts down sooner. Use compressed air.
- Check the fan. If your inverter has an internal cooling fan, make sure it spins freely. A seized fan means overheating.
- Monitor battery health. Low or imbalanced batteries stress the inverter. Use a battery monitor to track voltage and state of charge.
- Test under load. Plug in a known appliance and verify the output voltage with a multimeter. It should read between 118-122V AC.
Off-Season Storage Tips
If you store your RV for winter, take these steps to protect your inverter:
- Disconnect the battery bank. This prevents parasitic drain and protects both the batteries and inverter.
- Turn the inverter off. Don't leave it in standby. Even eco-mode draws a small amount over months.
- Store in a dry location. Condensation causes corrosion on circuit boards. If your RV sits in a humid area, consider a moisture absorber near the inverter.
- Charge batteries to 50-60% before storage (lithium) or 100% (lead-acid). Check monthly and top off as needed.
Proper storage prevents the most common cause of inverter failure: corroded connections and dead batteries in spring.
Frequently Asked Questions
Can you run an RV inverter while driving?
Yes. Your alternator charges the battery while you drive, so the inverter has a constant power source. This is a great way to keep laptops, phones, and even a small fridge running on road days. Just make sure your alternator can handle the extra load — check your vehicle's manual for its output rating.
Will an RV inverter damage my electronics?
A pure sine wave inverter won't damage anything. It produces the same clean power as your home outlets. A modified sine wave inverter can cause problems with sensitive devices like CPAP machines, variable-speed tools, and some laptop chargers. When in doubt, go pure sine wave.
How long will my batteries last running an inverter?
It depends on your battery capacity and load. A 200Ah lithium battery running a 100-watt load through an inverter lasts roughly 20 hours. Double the load, halve the time. Use this formula: usable amp-hours × 12 ÷ wattage = approximate hours of runtime.
Next Steps
- List every device you plan to run off-grid. Write down each one with its wattage (check the label or manual). Add them up and add 20% — that's your minimum inverter size.
- Buy a pure sine wave inverter rated for your calculated load. Stick with reputable brands like Victron, Renogy, or AIMS Power. Don't cheap out here.
- Audit your battery bank. Make sure you have enough amp-hours to actually power your inverter for the duration you need. Upgrade to lithium if your budget allows it.
- Install with properly sized cables and a Class T fuse. Follow the manufacturer's wiring diagram exactly. If you're not comfortable with electrical work, hire a certified RV technician.
- Test your setup before you hit the road. Run your typical load for a few hours at home. Monitor battery voltage and inverter temperature. Fix any issues while you still have shore power as a backup.


About Jake Mercer
Jake Mercer spent twelve years behind the wheel as a long-haul trucker, covering routes across the continental United States and logging well over a million miles. That career gave him an unusually thorough education in CB radio equipment — he has tested base station antennas, magnetic mounts, coax cables, and handheld units in real-world conditions where reliable communication actually matters. After leaving trucking, Jake transitioned to full-time RV travel and has since put hundreds of RV accessories through their paces across national parks, boondocking sites, and full-hookup campgrounds from Montana to Florida. At PalmGear, he covers RV gear and accessories, CB radios, shortwave receivers, and handheld radio equipment.
You can get FREE Gifts. Or latest Free phones here.
Disable Ad block to reveal all the info. Once done, hit a button below