RV Gear ›
RV Rubber Roof Repair: A Step-by-Step Guide
by Jake Mercer
What's the fastest way to turn a reliable RV into an expensive repair project? Ignore your rubber roof. RV rubber roof repair is one of those jobs that feels optional — right up until water finds its way into your walls, your ceiling joists, and your subfloor. The good news: if you catch damage early, most fixes are a one-afternoon job with under $50 in materials. Wait too long, and you're writing a check for thousands. This guide gives you the process, the products, and the decisions that separate a lasting repair from a band-aid that fails by next rainy season.
Whether you're a weekend warrior or a full-time lifer, your roof is your first line of defense. Browse our RV gear hub for product picks alongside this guide — from roof coatings to inspection tools worth keeping in the bay.

Contents
Fast Fixes for Small Damage
Small cracks, separated seams, and minor punctures are your warning shots. Handle each one in under an hour. Miss them and water works its way under the membrane — the rubber sheet covering your roof — into the wood decking below, and eventually into your ceiling and walls. The damage compounds silently. By the time you see a water stain inside, you're already behind.
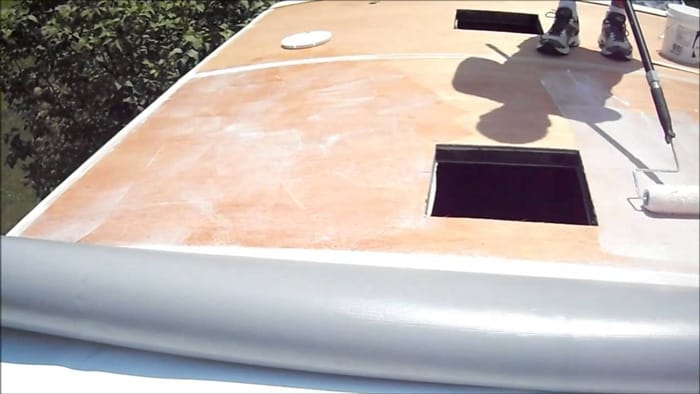
Always Clean Before You Seal
No product — tape, sealant, or liquid coating — sticks properly to a dirty or damp surface. Surface prep kills more repairs than bad products ever will. Before you touch a tube of anything:
- Sweep off loose debris: pine needles, leaves, grit
- Wash the roof with a dedicated EPDM cleaner (EPDM stands for ethylene propylene diene monomer — the rubber used on most RV roofs)
- Let it dry completely — at least 2 hours in full sun, 4 or more hours in shade
- Wipe the specific repair zone with isopropyl alcohol (rubbing alcohol) immediately before applying any product
- Do the alcohol wipe last — airborne dust settles fast
That last alcohol wipe is non-negotiable. Skip it and your adhesion drops by half. Do it and products bond the way they're supposed to.
Using Patch Tape the Right Way
For tears, punctures, and short seam splits, self-fusing patch tape is your best move. EternaBond RoofSeal is the industry standard. It's been tested in every climate and outlasts most sealant products by a decade. Apply it like this:
- Cut the tape at least 2 inches wider than the damage on all sides
- Round the corners with scissors — square corners always peel up first
- Peel the backing slowly while pressing the tape down flat as you go
- Use a seam roller (a wallpaper roller works perfectly) to press out every air pocket
- Run your thumb hard along all four edges to seal them completely
Pro tip: Never stretch patch tape during application. Stretched tape contracts as it cures and will lift at the edges within weeks — leaving you with the same leak plus a bigger repair area.
Applying Lap Sealant Around Seams
Lap sealant — a flexible caulk designed specifically for RV seams — handles the gaps around vents, skylights, AC units, and roof edges. Dicor 501LSW self-leveling lap sealant is the go-to on flat surfaces. For vertical seams, use the non-sag version so it doesn't run.
- Cut the tube tip at a 45-degree angle for a clean, controlled bead
- Apply in one continuous pass — no stops, no restarts
- Feather the edges immediately with a wet finger or plastic spreader
- Do not tool it dry — dry sealant tears instead of smoothing
- On flat surfaces, Dicor self-levels on its own — let it flow slightly before touching it
While you're up there inspecting seams, check your AC unit too. RV air conditioner leaks during rain are often misdiagnosed as roof membrane failures — but the real culprit is dried-out gasket material around the AC housing, not the membrane itself.
The Right Way to Do a Full RV Rubber Roof Repair
When damage covers more than a square foot, or when you find soft spots in the wood decking beneath the membrane, tape and sealant aren't enough. A proper large-area rv rubber roof repair means cutting out the damaged section, addressing any rotted decking, and bonding in a fresh patch of membrane — or recoating the entire roof surface if it's aging across the board.
Tools and Materials You Need
Gather everything before you climb up. Mid-repair supply runs waste time and let dust settle on fresh adhesive.
- EPDM patch material — match the thickness of your existing membrane (usually 45 mil)
- EPDM contact adhesive — water-based for bonding to the membrane, solvent-based for the wood decking
- Dicor lap sealant — self-leveling for flat surfaces, non-sag for vertical
- Seam tape for finishing edges
- Utility knife with fresh blades
- Seam roller
- Stiff-bristle brush for adhesive application
- EPDM cleaner and isopropyl alcohol
- Chalk line for marking cut boundaries
- Knee pads and gloves — you'll spend hours kneeling
For technical specs on EPDM membrane grades and thickness standards, the Wikipedia article on EPDM rubber is a solid reference point before you order materials.
Step-by-Step Repair Process
- Mark the damage. Use chalk to outline the damaged area. Add 3 inches on every side for your actual cut line — you need clean membrane edges to bond to.
- Cut out the damaged section. Score slowly with a fresh utility knife blade. Stop at the membrane — do not cut into the wood decking beneath.
- Inspect the exposed decking. Press it firmly with your knuckles. A solid thunk is good. A soft or spongy feel means rot — replace that wood before you patch anything.
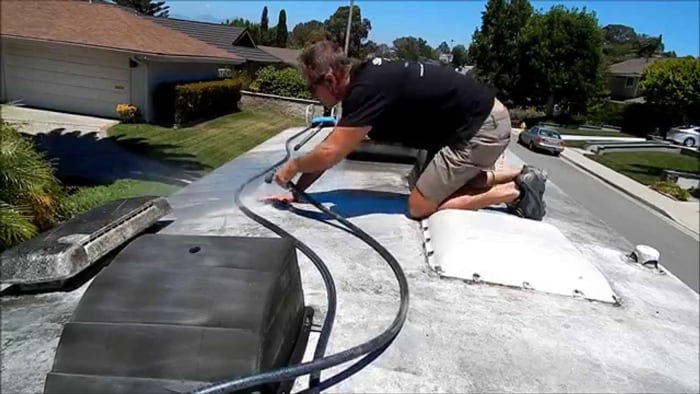
- Sand the decking lightly. 80-grit sandpaper is enough. You're creating texture for adhesion, not reshaping the surface.
- Apply adhesive to the decking. Brush on an even coat. Let it tack up — become sticky but not wet — for 5 to 10 minutes.
- Apply adhesive to the back of your patch. Same process: spread evenly, then wait for tack.
- Position the patch carefully. You get one shot. Contact adhesive bonds the instant the surfaces touch. Start at one edge and lower it in slowly and deliberately.
- Roll the entire surface. Use your seam roller from the center outward to eliminate every trapped air pocket. Do not skip this step.
- Seal all patch edges with lap sealant. Feather it 2 inches beyond the patch perimeter on all sides.
- Apply seam tape over the sealant. Press firmly and roll again. The tape locks the sealant in place and prevents edge lifting.
Warning: If you lay down a large patch unevenly, trapped air pockets will expand in summer heat and bubble the membrane. Those bubbles crack. Roll every square inch thoroughly — take an extra ten minutes and do it right.
Drying and Curing Time
Do not rush the cure. Adhesive and sealant need time before they can handle heat, rain, and road flex.
- Stay completely off the repair for 24 hours minimum
- Keep the roof dry for 48 hours after applying any sealant
- Avoid driving the RV for 48 hours if possible — road vibration stresses fresh bonds
- Full structural cure: 7 to 10 days depending on ambient temperature
- Do not apply a second coat of liquid sealant until the first coat is completely dry to the touch
Your RV accessories kit should always include a waterproof tarp large enough to cover the roof — protecting a fresh repair overnight while it cures is simple insurance against a failed bond.
When to DIY — and When to Walk Away
Most rubber roof repairs are well within DIY range. The materials are accessible, the process is logical, and you don't need specialized equipment beyond what's listed above. But certain types of damage signal structural compromise — and working on those yourself can make things significantly worse.
Damage You Can Handle Yourself
- Cracks or punctures under 6 inches in length
- Dried-out or separated lap sealant around vents, edges, and skylights
- Small seam splits where the membrane edge has lifted
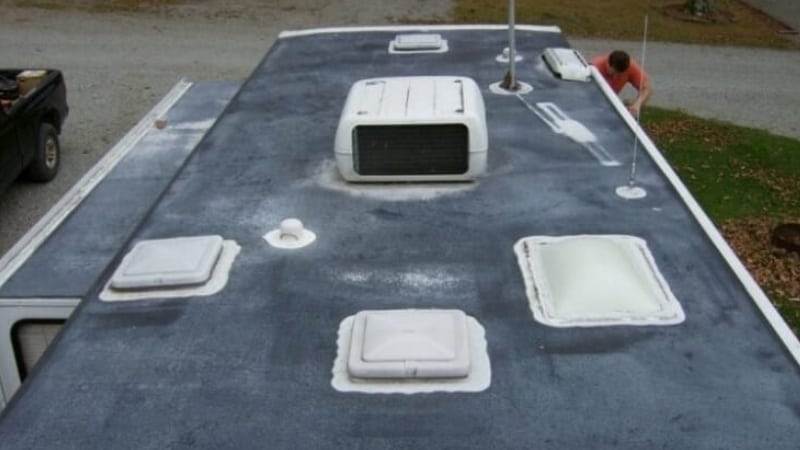
- Surface oxidation or chalking — the white powdery residue that appears on aging EPDM
- Minor bubbling from air pockets in the membrane — cut, re-bond, and re-seal
- Recoating an aging but structurally sound membrane with liquid EPDM coating
If you can do basic home repairs, you can handle these. Rubber roof work is not technically complicated. It's mostly preparation, patience, and using the right product for the specific problem.
Moisture infiltration from a damaged roof doesn't stay on the roof. It migrates. If you've had a leak and now notice electrical quirks, check your wiring — RV plugged in but getting no power is a classic symptom of water-damaged connections that started at a compromised roof seam.
Damage That Needs a Professional
- Soft, spongy decking across multiple sections — the structural wood beneath is rotted and needs replacement
- Delamination of interior ceiling panels — visible bubbling or separation on your ceiling surface
- Mold or mildew smell inside the RV near the roofline — moisture is already inside the wall cavity
- Damage within 12 inches of a roof-mounted AC unit or skylight — the flashing (metal trim at roof penetrations) may need professional re-seating
- Full membrane failure — cracking or crazing across the entire surface, not just isolated areas
Professional full membrane replacement runs $1,500 to $4,500 depending on roof size and labor market. Painful, but far cheaper than letting rot spread through the structural framing. If your rig has been leaking for more than one season, get a professional assessment before attempting DIY repairs — you need to know what you're actually dealing with.
If you're running the RV as a rental or income property, factor repair costs into your projections. Understanding RV park income and expenses puts deferred maintenance costs in sharp perspective. A $150 seam repair today versus a $3,000 membrane replacement next year is not a close call. And while you're evaluating your rig's electrical protection, consider whether you have the right surge protection — a comparison of RV EMS versus surge protectors is worth reading before your next hookup.
Roof Repair Mistakes That Cost You Later
Most botched rubber roof repairs come down to a short, avoidable list. Here's what to stop doing immediately.
Using the Wrong Products
- Petroleum-based sealers. Never use standard silicone caulk, roofing tar, or any petroleum-based product on EPDM rubber. Petroleum degrades the membrane chemically — it softens and destabilizes the rubber rather than sealing it.
- Flex Seal and spray rubber coatings. These products don't bond to EPDM properly. They feel like a fix for a few weeks, then peel up and create a pocket that traps water directly against the membrane.
- Mismatched patch thickness. If your membrane is 45 mil and you patch with 60 mil material, the edge height difference creates a debris-catching ledge that lifts within a season.
- New sealant over old, degraded sealant. Dicor does not bond reliably over dried, oxidized Dicor. Remove the old material first, clean the surface down to bare rubber, then apply fresh product.
Warning: Petroleum-based caulk on an EPDM membrane is the single most expensive mistake you can make. It doesn't just fail to seal — it actively breaks down the membrane, accelerating what would have been a small patch job into a full roof replacement within a season.
Skipping Critical Steps
- Not checking the decking. Patching membrane over rotted wood traps moisture and the rot continues beneath your repair. The patch will fail within months because the substrate beneath it is unstable.
- Working in cold temperatures. Adhesives and sealants need temperatures above 50°F (10°C) to cure correctly. Cold-applied sealant stays tacky instead of curing — it never achieves design strength.
- Rushing the adhesive tack-up window. Contact adhesive applied too wet slides out of position. Applied too dry and it won't bond at all. Touch it — if it pulls slightly but doesn't transfer to your glove, it's ready.
- Leaving patch edges unsealed. A patch with open edges is a funnel for standing water. Seal every millimeter of the perimeter with lap sealant and then cover it with seam tape.
- No regular inspection schedule. Do a full roof walk-through at minimum twice per year — spring before camping season, fall before storage. Add an inspection after any hailstorm, heavy branch impact, or rough off-road driving session.
Once your roof is solid, focus on the fun side of ownership. These RV decorating ideas make the interior feel like a real living space rather than a box on wheels. And if road noise is bothering you, check out tips for RV air conditioner noise reduction — a well-sealed roof often reveals how loud other systems actually are.
Rubber Roof Repair Products Compared
The market is full of products claiming to fix rubber roofs. Most work — when you use them correctly for the right type of damage. Here's a direct comparison of the products that actually deliver.
Product Comparison Table
| Product | Type | Best For | EPDM Safe | Approx. Price | Expected Lifespan |
|---|---|---|---|---|---|
| EternaBond RoofSeal | Self-fusing patch tape | Tears, punctures, short seam splits | Yes | $25–$40 / 25 ft roll | 20+ years |
| Dicor 501LSW Lap Sealant | Self-leveling sealant | Vents, skylights, flat seams | Yes | $8–$12 / tube | 5–10 years |
| Geocel 2320 Tripolymer | Non-sag sealant | Vertical seams, AC unit perimeters | Yes | $10–$15 / tube | 5–8 years |
| Liquid Roof EPDM | Liquid coating | Full-surface recoating, aging membranes | Yes | $80–$130 / gallon | 10–15 years |
| EPDM Coatings RV Roof Coat | Liquid coating | Large-area coverage, widespread crazing | Yes | $60–$100 / gallon | 10–12 years |
| Flex Seal Spray | Aerosol rubberized coating | Emergency temporary use only | No — degrades EPDM long-term | $12–$18 / can | 2–6 months |
Which One Should You Actually Buy
Here is the short version — no hedging:
- Small damage under 6 inches: EternaBond tape with Dicor sealant around the edges. That combination handles the vast majority of field repairs.
- Seam and flashing work: Dicor 501LSW for flat areas. Geocel 2320 for vertical seams where you need the product to stay put while it cures.
- Aging membrane with surface crazing across the whole roof: Liquid Roof or EPDM Coatings applied as a full-surface refresh. One coat restores UV resistance and seals minor surface cracking before it becomes structural.
- Emergency on the road with no other materials: EternaBond tape. Keep a roll in your storage bay at all times. It applies in minutes, holds in rain, and bridges you to a proper repair later.
Cross Flex Seal off your list entirely for anything beyond a true emergency. It is not a roof repair product. It is a delay mechanism that costs you money and membrane integrity if left in place.
Frequently Asked Questions
How often should I inspect my RV rubber roof?
Inspect it at minimum twice per year — spring before your first trip and fall before storage. Add an extra check after any hailstorm, heavy branch impact, or rough off-road session. Catching a $20 crack before it becomes a $2,000 water damage repair is the whole game with rubber roof maintenance.
Can I walk on my RV rubber roof to do repairs?
Yes, but distribute your weight properly. Kneel on a foam pad or a piece of plywood to spread your load across the decking. Walk near the edges and roof support ribs where the structure is strongest. Avoid putting your full body weight on a single point in the center of an unsupported membrane span.
How long does an RV rubber roof repair actually last?
EternaBond tape repairs last 20 or more years when applied correctly to a clean surface. Dicor lap sealant typically needs reapplication every 5 to 10 years depending on UV exposure. Liquid coatings last 10 to 15 years. The biggest variable in all cases is surface preparation — a clean, dry, alcohol-wiped surface doubles the service life of any product.
What is the main cause of RV rubber roof cracking?
UV exposure is the primary culprit. EPDM rubber oxidizes over time, becoming brittle and prone to surface crazing — a network of fine cracks that appears before structural failure. Petroleum contamination, harsh cleaning products, and physical impact from road debris and branches also accelerate breakdown. Annual UV-protective coating extends membrane life by years.
Can I repair my RV rubber roof when it's wet or raining?
No. All adhesives and sealants require a fully dry surface to achieve proper bond strength. Even surface moisture you can't see is enough to prevent correct curing. Wait for a dry weather window of at least 48 hours — apply on a warm, sunny day above 50°F for the best results.
How much does professional RV rubber roof repair cost?
Small professional patch repairs typically run $200 to $600. Full membrane replacement on an average RV costs $1,500 to $4,500 depending on roof square footage and regional labor rates. DIY materials for the same patch repair typically run $30 to $150. The savings are significant if you have an afternoon and the patience to do it right.
What should I use for an emergency roof repair on the road?
Keep a roll of EternaBond RoofSeal tape in your storage bay. It applies directly to a wet or dry surface in a pinch, bonds within minutes, and will hold through rain until you can do a proper repair. It is the single best emergency roof product on the market — nothing else comes close for on-the-road situations.
Your rubber roof doesn't fail all at once — it fails one skipped inspection at a time.


About Jake Mercer
Jake Mercer spent twelve years behind the wheel as a long-haul trucker, covering routes across the continental United States and logging well over a million miles. That career gave him an unusually thorough education in CB radio equipment — he has tested base station antennas, magnetic mounts, coax cables, and handheld units in real-world conditions where reliable communication actually matters. After leaving trucking, Jake transitioned to full-time RV travel and has since put hundreds of RV accessories through their paces across national parks, boondocking sites, and full-hookup campgrounds from Montana to Florida. At PalmGear, he covers RV gear and accessories, CB radios, shortwave receivers, and handheld radio equipment.
You can get FREE Gifts. Or latest Free phones here.
Disable Ad block to reveal all the info. Once done, hit a button below