DIY Sewing Table Plans – How to Build One at Home
by Alice Davis
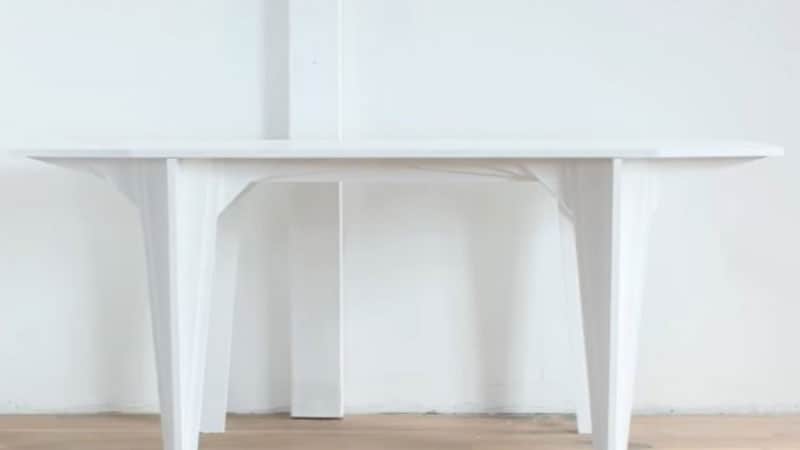
Over 40 million Americans sew recreationally — yet fewer than 12% own a purpose-built sewing table, according to craft industry surveys. That gap is closing fast as more crafters discover diy sewing table plans online and realize a custom workstation costs a fraction of retail alternatives. Your workspace shapes how efficiently you work. A dedicated table keeps fabric flat, organizes notions, and eliminates the back strain that comes from hunching over a kitchen counter. Whether you sew garments, quilts, or craft vinyl projects, a proper table makes a measurable difference in your output quality.
For crafters who also run heat press machines or work with Cricut vinyl tools, a well-designed DIY sewing table can double as a multi-use craft station. Before you buy a single board, you need the right plan. Design depends on your skill level, available space, and total budget. This guide breaks down everything — from materials to long-term functionality. Visit the sewing crafts category for more project ideas.
Contents
The Truth About DIY Sewing Table Builds
What Most Guides Skip Over
Many online tutorials make diy sewing table plans look effortless. The reality is more nuanced. Most beginner guides omit critical details — exact lumber dimensions, leveling requirements, or how to cut a machine well-opening cleanly. That said, a basic sewing table is genuinely achievable for a first-time builder with basic tools.
Common misconceptions about these builds:
- Myth: You need a full workshop. A circular saw, drill, and sandpaper handle most basic plans.
- Myth: It always saves money. Only if you price materials before you start and plan your cuts to minimize waste.
- Myth: One size fits all. Table height, surface area, and machine well depth vary by sewing machine model.
- Myth: Any wood works. MDF is budget-friendly but warps in humidity. Plywood and hardwood last significantly longer.
How Complex Is the Build, Really?
Complexity scales with features. A flat-top table with four legs takes one weekend. A flush-mount machine well with a pneumatic lift system takes a full week, including finish drying time. Start simple. You can always add features in a second phase once you understand how the structure comes together.
Pro Tip: Measure your sewing machine's base footprint before you finalize any dimensions — a poorly sized well opening is one of the most common and costly first-build mistakes.
Breaking Down the Real Costs
Materials Cost Comparison
Retail sewing tables from dedicated furniture brands range from $150 to over $800. A well-executed DIY build typically lands between $50 and $280, depending on wood choice and hardware. Here is a realistic cost breakdown by build tier:
| Component | Budget Build | Mid-Range Build | Premium Build |
|---|---|---|---|
| Tabletop (4×4 sheet) | MDF – $18 | Birch plywood – $42 | Hardwood panel – $95 |
| Legs / Frame lumber | 2×4 pine – $12 | Furniture-grade pine – $28 | Steel hairpin legs – $65 |
| Hardware (screws, brackets) | $8 | $15 | $24 |
| Finish (paint or stain) | $10 | $22 | $40 |
| Storage add-ons | $0 (none) | $22 (drawer kit) | $60 (custom shelving) |
| Estimated Total | $48–$65 | $129–$165 | $284–$360 |
Hidden Expenses to Watch
Your first build will almost certainly include unplanned costs. Factor these in before you purchase anything:
- Tool rental or purchase — A jigsaw for the machine well opening costs $30–$80 if you don't own one.
- Wood waste — Poor measurements mean extra sheets. Buy 10–15% more material than your cut list requires.
- Fasteners and wood glue — Often underestimated. Budget an additional $15–$25.
- Sandpaper progression — You need at least three grits (80, 120, 220) for a surface that won't snag fabric.
If you're also budgeting for a new machine, read the guide on buying a refurbished sewing machine to stretch your craft budget further.
Building for the Long Haul

Design Decisions That Pay Off
Short-term thinking leads to rebuilds. The right design decisions at the start save money and frustration for years. Consider these structural choices before you cut anything:
- Adjustable leveling feet — Cost under $10 total. Prevent rocking on uneven floors without shimming.
- Flush-mount machine well — Lowers your sewing machine to tabletop level. Reduces strain on shoulders and arms measurably during long sessions.
- Reinforced center crossbeam — Prevents the tabletop from sagging under a heavy machine over time.
- Sealed surface finish — Two coats of polyurethane resist scratches and fabric snags for years of regular use.
If your projects often involve t-shirt printing or vinyl work, build in a secondary flat surface at counter height for heat press operations from day one.
Expandability Options
Building expansion capability into your initial design costs little and pays off consistently. The most common upgrades crafters add after initial builds:
- Folding extension wings for cutting large fabric panels flat
- Pegboard back panels for thread, scissors, and notions storage
- Side-mounted power strips with integrated USB ports
- Under-table shelving with 12-inch clearance for standard storage bins
Warning: Do not mount pegboard directly behind a flush-mount machine well — vibration from the machine loosens hooks and drops accessories onto your work area.
Choosing the Right Plan: First Build vs. Experienced Builder
Beginner-Friendly Designs
Your first set of diy sewing table plans should prioritize simplicity. The most successful beginner builds share these characteristics:
- Flat top surface — no machine well cutout required on the first build
- Four-leg frame with corner brackets — eliminates complex joinery entirely
- Pre-cut lumber from a home improvement store — reduces the number of saw cuts you need to make
- Standard 30-inch height — suits most adults without measurement adjustments
Before you build, check the recommended sewing books list — several titles include workspace setup chapters with clear table dimensions and annotated diagrams suitable for beginners.
Advanced Build Features
Experienced builders with woodworking skills can add features that significantly improve daily functionality:
- Pneumatic lift system — Raises and lowers your machine into the well with one hand. Commercially available kits fit most mid-range machines.
- Dadoed drawer slides — Cleaner look than surface-mounted slides; requires a table saw or router.
- Routed LED channel — A recessed strip under the overhang with a dimmer switch eliminates needle-area shadows completely.
- Integrated mat storage slot — A side-panel slot holds cutting mats upright. Useful for crafters who also use Cricut Explore Air accessories at the same station.
Build Smarter: Time-Saving Tricks
Tools That Speed Up the Process
The right tools cut build time in half. Experienced DIY builders consistently recommend:
- Pocket hole jig — Kreg-style jigs create fast, strong frame joints without clamping. A $25 investment that transforms a weekend build.
- Brad nailer — Holds pieces while glue dries without a full set of clamps.
- Random orbital sander — Cuts sanding time to a third compared to hand sanding.
- Router with a flush-trim bit — Essential for a clean, snag-free machine well edge.
Common Mistakes to Avoid
These errors appear consistently in first-build post-mortems. Learn them before you start:
- Skipping the dry-fit step — Always assemble without glue first. Misaligned cuts are far easier to fix before adhesive is involved.
- Underestimating cure time — Wood glue needs 24 hours before stress loading. Paint needs 48 hours before placing heavy objects on the surface.
- Wrong grain orientation — Tabletop planks should run lengthwise to minimize visible seam lines in your primary work area.
- No pilot holes — Driving screws directly into pine or MDF splits the wood reliably. Always drill pilot holes first.
Once your table is complete, explore embroidery companion projects like making tassels with embroidery thread — a natural first project to christen a new workspace.
Best Practices for a Functional Sewing Workspace
Ergonomics and Layout
Ergonomics matter more than aesthetics when you sew for hours at a stretch. Follow these evidence-based guidelines when finalizing your table dimensions and room layout:
- Table height should place the machine needle at elbow level when you are seated. For most adults, that is 28–30 inches.
- Allow at least 24 inches of clear surface to the left of the machine for fabric feeding without bunching.
- Position thread storage at eye level or below — reaching overhead repeatedly during a session causes shoulder fatigue.
- Ensure overhead lighting or a dedicated task lamp eliminates shadows across the needle and presser foot area.
According to ergonomics research, poor workstation setup is a primary driver of repetitive strain injury in craft and hobby environments — preventable with correct initial setup.
Storage Integration
Smart storage transforms a flat surface into a complete system. These additions cost little but deliver consistent daily value:
- One shallow drawer at the front edge — keeps scissors, seam rippers, and pins within reach without searching
- A side-mounted thread rack — holds 20–40 spools vertically using 1/4-inch dowels drilled into a board
- A lower shelf with 12-inch clearance — fits standard plastic storage bins for folded fabric and batting
- A magnetic strip on the left side panel — holds small metal tools and accessories securely without hooks
Frequently Asked Questions
What is the best wood for a DIY sewing table?
Birch plywood is the most widely recommended material. It resists warping, holds screws well, and sands to a smooth surface that won't snag fabric. MDF is cheaper but performs poorly in humid environments. Hardwood panels offer the best durability but significantly increase cost.
How long does it take to build a sewing table from scratch?
A basic flat-top table takes one weekend — roughly 6–10 hours including sanding and one finish coat. A build that includes a flush-mount machine well, drawers, and multiple finish coats typically takes 3–5 days when you factor in glue and paint cure times between steps.
What is the ideal height for a sewing table?
The standard recommendation is 28–30 inches for a seated sewing position. The precise height depends on your chair and body proportions. Your goal is to have the machine needle at elbow height when you are seated upright. Adjustable leveling feet allow fine-tuning after the build is complete.
Can I build a sewing table without power tools?
Yes, with limitations. Home improvement stores will cross-cut lumber to your specified dimensions for a small fee. From there, a hand saw, manual drill, and sandpaper are sufficient for a basic four-leg table. A machine well opening, however, requires a jigsaw — there is no practical hand-tool alternative for that cut.
Should I add a machine well to my first sewing table?
Most experienced builders recommend skipping the machine well on your first build. It adds complexity, requires precise measurements specific to your machine model, and demands a jigsaw. Build a flat-top table first. Add the well in a second build once you understand how your design needs to fit your workflow.
How much does it realistically cost to build a DIY sewing table?
Budget builds using MDF and basic pine framing start around $50. Mid-range builds with birch plywood, a drawer kit, and a quality finish run $130–$165. Premium builds with hardwood, steel legs, and integrated storage can reach $300 or more. Tool costs are additional if you need to purchase or rent a jigsaw or sander.
What is a flush-mount sewing table?
A flush-mount sewing table has a recessed well cut into the surface so the sewing machine bed sits level with the tabletop. This eliminates the slight elevation that standard tables create, allowing fabric to feed flat on all sides of the machine. It significantly reduces shoulder and wrist strain during extended sewing sessions.
How do I cut a clean machine well opening in my tabletop?
Drill a starter hole inside your marked outline, then follow the line with a jigsaw using a fine-tooth blade rated for the wood thickness you are cutting. Cut slightly inside your line, then use a router with a flush-trim bit guided by a template to bring the edge to its final dimension. Sand with 120-grit, then 220-grit for a snag-free finish.
Key Takeaways
- Solid diy sewing table plans start with your machine's exact footprint and your seated elbow height — get those two measurements right before buying any material.
- Budget builds start around $50; mid-range builds with a drawer and quality finish run $130–$165, still well below most retail alternatives.
- Ergonomic table height (28–30 inches), a sealed surface, and proper task lighting are the three upgrades that deliver the most daily benefit for everyday sewers.
- Building expansion capability — extension wings, pegboard panels, lower shelving — into the original design costs little and eliminates the need for a full rebuild as your workspace needs grow.


About Alice Davis
Alice Davis is a crafts educator and DIY enthusiast based in Long Beach, California. She spent six years teaching textile design and applied arts at a community college, where she introduced students to everything from basic sewing techniques to vinyl cutting machines and heat press printing as practical, production-ready tools. That classroom experience means she has put more sewing machines, embroidery setups, Cricut systems, and heat press units through real project work than most reviewers ever will. At PalmGear, she covers sewing machines and embroidery tools, vinyl cutters, heat press gear, Cricut accessories, and T-shirt printing guides.
You can get FREE Gifts. Or latest Free phones here.
Disable Ad block to reveal all the info. Once done, hit a button below