RV Gear ›
How To Convert An RV Water Heater To Tankless
by Jake Mercer
Ever run out of hot water mid-shower at a remote campsite with zero hookups? That sting of cold water hitting your back is exactly what pushes RVers to research how to convert an RV water heater to tankless. The answer is more straightforward than you'd expect: remove the old tank unit, choose the right on-demand model, and install it in the same space — or a better one. Done right, you get unlimited hot water, freed-up storage, and meaningfully lower propane use. This guide covers everything from why the switch makes sense to how to keep your new unit performing for years.
If you're still running the numbers on RV living overall, this breakdown of how much it costs to live in an RV full time puts upgrades like this into real financial context. For more RV accessories and gear picks, browse the RV Gear section here on PalmGear.

Contents
Why RV Owners Are Ditching the Traditional Tank
How a Tank Heater Works in an RV
Most RVs ship from the factory with a 6- or 10-gallon propane tank water heater. The process is simple but wasteful:
- Cold water fills the tank.
- A propane burner heats the stored water to a set temperature — usually around 120°F.
- You draw hot water until the tank empties, then wait 20–30 minutes for a full reheat.
- The burner cycles on and off continuously to maintain temperature, even when no one is using water.
That last point is the silent budget killer. Standby heat loss — energy burned keeping water hot that nobody is using — accounts for a significant slice of your daily propane consumption. According to the U.S. Department of Energy, eliminating standby loss is one of the most impactful ways to cut water-heating energy use. In an RV, where propane is finite and resupply isn't always convenient, that waste is especially painful.
The Real Case for Going Tankless
Tankless water heaters — also called on-demand heaters — fire the burner only when you open a hot tap. The moment you close it, the flame cuts off. The benefits stack up fast:
- Unlimited hot water. The unit heats water as it passes through the heat exchanger (the internal coil that transfers heat to the water). No tank to drain, no waiting.
- Lower propane use. You burn gas only while water flows. If you're tracking propane consumption across your whole rig, see how the numbers compare in our guide on how much propane an RV refrigerator uses — the side-by-side is eye-opening.
- Space savings. Most RV tankless units are physically smaller than the tanks they replace, freeing up cabinet or exterior storage you can actually put to use.
- Longer service life. Tankless units typically last 15–20 years versus 8–12 for traditional tanks.
What You Need Before You Start
Beginner-Friendly Options
Never done RV plumbing before? Start with a direct-replacement kit engineered to drop into the existing exterior cutout on your rig. These are the easiest entry points:
- Girard GSWH-2 — designed to fit most Atwood/Dometic-style openings. Minimal modification required.
- Fogatti InstaShower 10 — widely praised for simple wiring and reliable ignition in varying temperatures.
- Camplux 5L — budget-conscious option, well-suited for single-bathroom rigs with one or two occupants.
Tools you need for a standard beginner install:
- Adjustable wrench and channel-lock pliers
- Teflon tape (yellow gas-rated tape for propane fittings, white for water)
- Propane leak detector solution or spray bottle
- Flathead and Phillips screwdrivers
- Basic 12V electrical tester
Budget 2–4 hours for your first install. Take your time on propane connections specifically — hurrying them is how problems start.
Advanced Setups for Experienced DIYers
If you're already comfortable diagnosing issues like a failing RV water pump or rerouting supply lines, you have more options open to you:
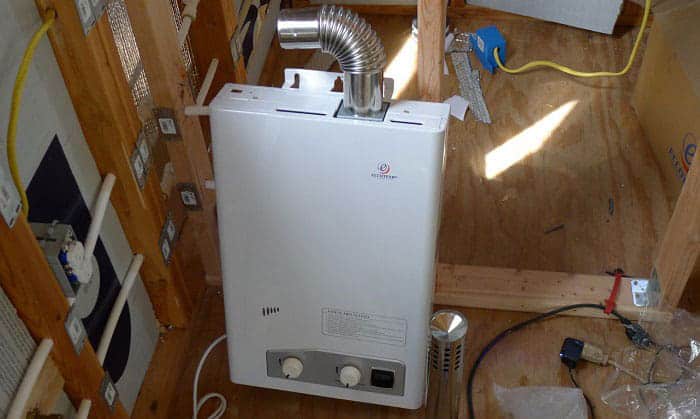
- Rinnai RU Series (indoor-rated). High BTU output, capable of supplying two fixtures simultaneously. Requires a venting modification to the rig's exterior.
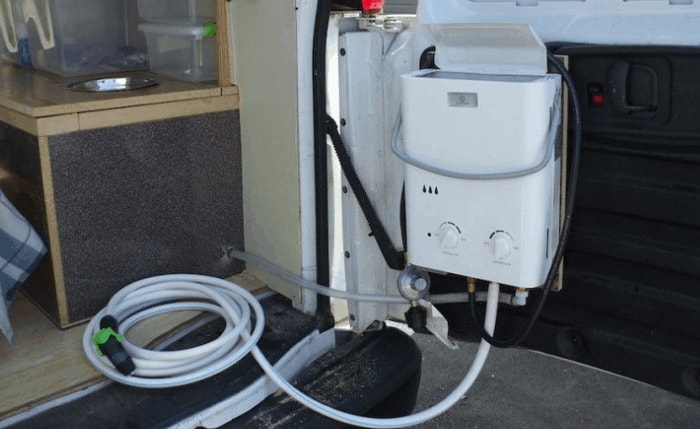
- Eccotemp L10. Outdoor-rated, portable, an excellent fit for off-grid boondockers who need flexibility.
- Full plumbing redesign. Some experienced RVers relocate the heater entirely, running new PEX (cross-linked polyethylene) tubing to optimize hot water delivery throughout the rig.
Advanced installs may also involve:
- Cutting a new exterior access panel
- Running additional 12V wiring for ignition control
- Installing a dedicated propane supply line with the correct regulator
- Adding a thermostatic mixing valve to stabilize output temperature
How to Convert an RV Water Heater to Tankless: Step-by-Step
Selecting the Right Spot
Location is the most consequential decision in this whole project. Get it wrong and every subsequent step fights you.
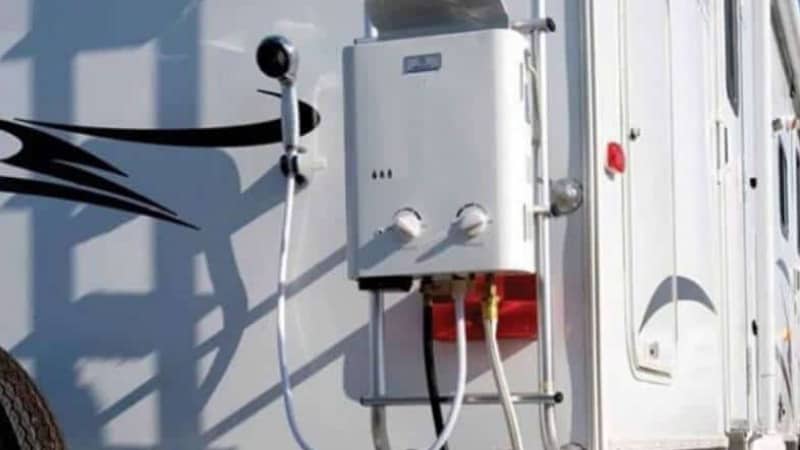
- Use the existing cutout when possible. Direct-fit units are engineered for this. Using the original opening saves hours of fabrication and avoids cutting new holes in your rig's exterior.
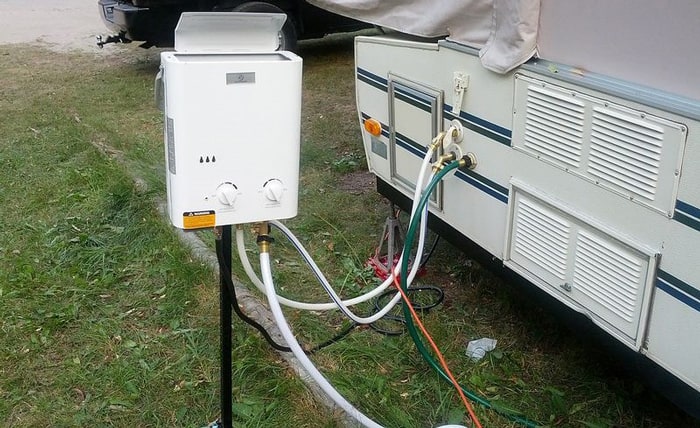
- Outdoor-rated units need open-air access. They must be mounted where combustion air flows freely — never inside a sealed interior cabinet.
- Keep supply line runs short. Every additional foot of pipe between the heater and your shower faucet increases wait time for hot water to arrive.
- Respect clearance requirements. Read your unit's manual before mounting. Most require several inches of clearance on all sides for combustion ventilation and heat dissipation.
Making the Water and Gas Connections
Follow these steps in order. Do not skip the leak check — it takes 30 seconds and prevents disasters.
- Shut off water and propane. Close the main propane valve at the tank. Turn off the water pump and close the city water inlet.
- Drain the old tank. Open a hot tap inside the rig to release pressure, then open the drain valve on the heater tank.
- Disconnect and label water lines. Mark the cold water inlet and hot water outlet before disconnecting — they are identical fittings and easy to swap.
- Disconnect the propane line. Use two wrenches: one to hold the supply fitting steady, one to turn the connection. This prevents twisting the gas line.
- Remove the old unit. A full 10-gallon tank is heavier than it looks. Have a second person handy.
- Connect the new unit's water lines. Apply white Teflon tape to all threaded water fittings. Hand-tighten first, then snug with a wrench — do not overtighten or you'll crack the plastic fittings on entry-level units.
- Connect the propane line. Use yellow gas-rated Teflon tape on all gas fittings. Never use white plumber's tape on gas connections.
- Run the 12V power wire. Most tankless units need a small 12V DC feed for the electronic igniter and control board. Consult your unit's wiring diagram.
Pro tip: Before opening the propane valve, spray every gas fitting with leak detector solution and watch for bubbles for a full 30 seconds — this single habit is what separates experienced installers from the ones who end up with a propane smell in the rig.
Installing and Testing the Unit
With all connections made, mount the unit and run your first live test:
- Mount securely. Use the provided brackets or fabricate a mount that matches your rig's existing fastening points. The unit must not vibrate loose on rough roads.
- Restore water pressure. Turn on the water pump and inspect every water fitting you touched for drips. Fix any leaks before touching the propane.
- Open propane slowly. Open the main valve and re-check all gas fittings one more time with leak detector solution.
- Test ignition. Open a hot tap inside. You should hear the electronic igniter click and the burner fire within 2–3 seconds of water flowing.
- Set the output temperature. Start at 110–115°F. Higher settings burn more propane and raise scalding risk — 120°F is the practical maximum for household use.
- Test every fixture. Run the kitchen sink, bathroom sink, and shower individually to confirm consistent delivery throughout the rig.
Tank vs. Tankless: Side-by-Side Breakdown
| Feature | Traditional Tank Heater | Tankless On-Demand Heater |
|---|---|---|
| Hot water supply | Limited (6–10 gallons per fill) | Unlimited (continuous flow) |
| Standby propane use | High — burner cycles continuously | Zero — fires on demand only |
| Reheat wait time | 20–30 minutes after tank empties | None |
| Physical footprint | Large — tank takes significant space | Compact — fits original opening |
| Installation difficulty | Simple OEM swap | Moderate (direct-fit) to advanced |
| Upfront cost | $200–$400 | $300–$900+ |
| Expected lifespan | 8–12 years | 15–20 years |
| Cold weather operation | Straightforward drain-and-blow | Requires careful winterization |
| Hard water sensitivity | Moderate | High — scale builds in heat exchanger |
The table tells the story clearly: tankless wins decisively on efficiency and supply. Where it asks more of you is upfront cost, installation effort, and water quality management. A quality RV water filter system is the smart companion investment here — mineral scale inside the heat exchanger is the number-one cause of premature tankless failure.
What RV Owners Discover After Making the Switch
The numbers on paper are one thing. The lived experience is another. Here's what actually happens once you make the conversion:
- Families with kids report the biggest quality-of-life shift. No more scheduling showers around a 6-gallon tank or listening to complaints about cold water. Unlimited supply changes the daily rhythm of the rig entirely.
- Weekend campers feel it most in the propane budget. A family that previously burned through a 20-lb tank every three camping weekends routinely stretches that same tank to five or six trips after switching.
- Off-grid boondockers find that pairing a tankless heater with a solid solar panel setup dramatically cuts their dependence on campground hookups. Lower propane use and self-generated electricity is a genuinely self-sufficient combination.
- Full-timers transitioning from apartments — consistently the most surprised group — say the on-demand experience actually feels more like home than the tank system ever managed.
One honest caveat worth naming: in very cold conditions, tankless units work harder when incoming water is near freezing. The burner has to bridge a larger temperature gap. The fix is simple — slightly reduce flow rate at the tap — but it's a real operational adjustment, not a dealbreaker.
Keeping Your Tankless Unit Running Like New
Seasonal Maintenance Tips
Tankless heaters are lower-maintenance than tanks overall. But lower maintenance is not zero maintenance. Run through this checklist at least once per season:
- Flush the heat exchanger annually. Use a descaling solution — white vinegar works, or a dedicated RV flush kit. Hard water areas demand this every 6 months without exception.
- Inspect igniter and burner assembly. Check for spider webs or insect nests inside the combustion chamber. This is especially important for rigs that sit unused for extended periods.
- Check all propane fittings. Reapply leak detector solution each season and look for any sign of corrosion at threaded connections.
- Winterize the water lines. Blow out lines with compressed air or use RV antifreeze rated for potable water systems. Our full guide on how to winterize an RV step by step walks through the complete process for the entire rig.
- Test the T&P relief valve if equipped. This temperature and pressure relief valve is a safety device — it should open and reseat cleanly when tested.
Troubleshooting Common Issues
Most tankless problems trace back to a short list of causes. Work through these before calling a technician:
- No ignition click. Check your 12V power feed to the unit. A blown fuse in the ignition circuit is the most common culprit — and the easiest fix.
- Igniter clicks but won't light. Check propane supply. When your tank drops below roughly 20% capacity, low line pressure can prevent ignition. This is the same dynamic behind RV furnace ignition failures — the gas pressure physics are identical.
- Water is warm but not hot. You're drawing more flow than the unit's BTU rating can fully heat. Slow the flow rate slightly at the tap or check that your pressure regulator isn't undersized.
- Hot water cuts out mid-shower. Classic sign of a clogged heat exchanger. Time for a descale flush — don't delay, as extended scale buildup can permanently narrow the flow passages.
- Error codes on the display. Most codes are self-diagnosing. Consult the manual, fix the root cause, then reset the unit. Avoid repeatedly resetting without addressing the underlying issue.
Frequently Asked Questions
How long does it take to convert an RV water heater to tankless?
For a direct-replacement unit, plan on 2–4 hours for your first install. If you're relocating the unit or running new water lines, budget a full day. Having all parts and tools staged before you begin cuts that time significantly.
Can I run a tankless water heater on a standard RV propane tank?
Yes. Most RV tankless units draw 40,000–60,000 BTUs — comparable to a standard tank heater. Because the burner fires only while water flows, your total daily propane consumption is typically lower than with a conventional tank model.
What size tankless heater do I need for my RV?
For a single-bathroom rig with one or two occupants, a 6–10 liter-per-minute (LPM) unit covers your needs comfortably. Families or rigs with two bathrooms should target 10–16 LPM. Match the unit's rated flow to your shower head's actual GPM (gallons per minute) output.
Do tankless RV water heaters work in cold weather?
They do, with one practical adjustment: when incoming water is very cold, reduce the flow rate slightly so the burner has time to raise the water temperature across the larger gap. Below freezing, winterize the unit properly — any water left inside the heat exchanger will expand and crack it.
Can I do this conversion myself, or do I need a professional?
Most RVers with basic mechanical confidence complete this without professional help. The propane connections are the only genuinely safety-critical step. If you have no prior experience working with gas fittings, having a certified RV technician inspect your gas work after installation is a worthwhile precaution.
What should I do with the old tank water heater after removal?
Drain it fully and allow it to dry completely before storing or disposing of it. Many RV dealers accept used units for parts. A functional unit can often sell for $50–$150 through RV owner communities and online forums.
Does a tankless heater require special venting in an RV?
Outdoor-rated models are typically open combustion — they draw fresh air through the exterior access panel and exhaust through the same opening. Indoor-rated models require a dedicated exhaust vent run to the outside. Never install an indoor-rated unit inside a sealed cabinet without proper venting.
How does hard water damage a tankless RV water heater?
Mineral deposits — primarily calcium and magnesium — accumulate inside the heat exchanger over time. This layer of scale reduces heat transfer efficiency and gradually restricts flow. Annual descaling with white vinegar or a commercial RV flush kit prevents buildup. Adding a whole-rig inline water filter upstream of the heater extends the heat exchanger's service life considerably.
Convert your RV water heater to tankless once, set it up right, and every shower for the next two decades costs you nothing but the propane you actually use.


About Jake Mercer
Jake Mercer spent twelve years behind the wheel as a long-haul trucker, covering routes across the continental United States and logging well over a million miles. That career gave him an unusually thorough education in CB radio equipment — he has tested base station antennas, magnetic mounts, coax cables, and handheld units in real-world conditions where reliable communication actually matters. After leaving trucking, Jake transitioned to full-time RV travel and has since put hundreds of RV accessories through their paces across national parks, boondocking sites, and full-hookup campgrounds from Montana to Florida. At PalmGear, he covers RV gear and accessories, CB radios, shortwave receivers, and handheld radio equipment.
You can get FREE Gifts. Or latest Free phones here.
Disable Ad block to reveal all the info. Once done, hit a button below