How to Clean Your Sewing Machine: Easy but Effective Methods
by Alice Davis
A thread jam in the middle of an intricate quilt project is one of the most disruptive experiences a sewing enthusiast can encounter. In many cases, the culprit is not a mechanical failure or a defective spool — it is accumulated lint and thread fragments that have settled inside the machine housing over weeks of regular use. Knowing how to clean your sewing machine easy but effective ways can prevent these frustrating interruptions and extend the service life of the equipment considerably. Sewing machines are precision instruments that reward consistent upkeep. Whether the project involves decorative stitching, fabric crafts, or everyday garment repairs, a clean machine produces more reliable results. For more crafting guides, explore the full collection in the sewing crafts category.

Contents

A sewing machine contains dozens of moving components that work in precise coordination. The feed dogs (serrated metal teeth that advance the fabric), the bobbin mechanism, tension discs, and the hook assembly all generate fine lint particles with every stitch cycle. According to the Wikipedia overview of sewing machines, modern domestic machines rely on a complex interplay of mechanical timing that is easily disrupted by debris accumulation. Skipped stitches, uneven tension, and sudden thread breaks are all classic signs that a cleaning session is overdue.
Step-by-Step: How to Clean Your Sewing Machine the Easy but Effective Way
The process does not require professional training or specialized equipment. With the right tools and a methodical approach, most users can complete a thorough cleaning in under an hour. The steps below demonstrate how to clean your sewing machine easy but effective ways — from initial preparation through final testing.
Step 1 — Review the Instruction Manual
Before removing a single screw or reaching for a brush, consult the manufacturer's instruction manual. Different machine models have different disassembly procedures, lubrication requirements, and restricted access points. Key items to note from the manual include:
- Which panels and plates can be safely removed by the user
- Whether and where sewing machine oil should be applied
- Specific warnings about water or solvent use near electronic components
- Recommended cleaning intervals for that particular model
If the original manual is no longer available, most manufacturers provide digital copies through their official support pages or customer service channels.
Step 2 — Disassemble the Machine

Power off the machine and unplug it from the wall before touching any internal component. Then proceed in this order:
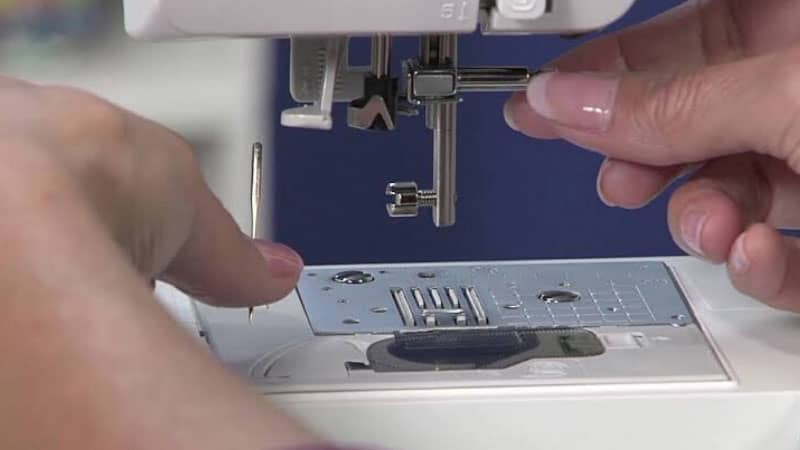
- Remove the needle and set it safely in a pincushion or needle case
- Detach the presser foot and place it with other small hardware
- Open the needle plate cover — usually secured by a small screw or sliding latch
- Remove the bobbin and bobbin case together, keeping them as a pair
- If the design permits, lift out the throat plate (the flat metal plate beneath the needle area)
Lay all parts on a clean, well-lit surface. A small tray or shallow bowl prevents tiny components from rolling out of reach during the process.
Step 3 — Remove Loose Debris
With the machine open, use a soft-bristled cleaning brush — typically included with the machine or sold separately — to sweep lint from all visible cavities. Work from the needle bar area downward. Primary focus areas include:
- The area surrounding the feed dogs and throat plate slot
- The tension disc housing, located near the top of the machine
- The hook race (the circular track inside which the bobbin case sits)
- Any visible grooves or recesses within the bobbin compartment
A handheld vacuum with a narrow nozzle attachment can assist with extracting debris from deep cavities. Compressed air from a canister is not recommended — it tends to push lint further into the mechanism rather than drawing it out.
Step 4 — Clean the Bobbin Area

The bobbin area accumulates the highest concentration of lint and thread residue and deserves particular attention:
- Use the cleaning brush to clear all visible lint from the bobbin case slot and hook race
- Wipe the bobbin case with a dry, lint-free cloth — avoid water or solvents unless the manual explicitly permits them
- Inspect the hook race for any nicks or rough spots that could snag thread during operation
- If the manual recommends lubrication at this stage, apply a single drop of sewing machine oil to the hook race only — no more
The bobbin case itself should be examined carefully for signs of damage. A cracked or warped bobbin case will cause thread tension problems regardless of how thoroughly the rest of the machine has been cleaned.
Step 5 — Reassemble and Test
Reinsert all components in reverse order: bobbin case, bobbin, throat plate, presser foot, and finally the needle. Ensure every part is correctly seated before tightening any screws. Then:
- Re-thread the machine from scratch using the threading diagram in the manual
- Wind a fresh bobbin if the existing one is more than half depleted
- Run a test stitch on a scrap piece of fabric at medium speed
- Check for consistent stitch length, balanced tension, and smooth fabric movement
If the machine performs correctly on the test fabric, the cleaning was successful. Any persistent issues should be diagnosed before resuming project work.
Cleaning Supplies and Budget Breakdown
Essential Tools for the Job
Most cleaning sessions require only a small set of inexpensive, purpose-made tools. Many are included with new machines at the time of purchase:
- Cleaning brush — a small stiff-bristled brush designed for sweeping lint from tight spaces
- Lint-free cloths — for wiping surfaces without depositing loose fibers
- Sewing machine oil — a clear, odorless mineral oil formulated for mechanical sewing components (general-purpose household oils are not a suitable substitute)
- Small screwdrivers — both flathead and Phillips, for removing access panels and throat plates
- Tweezers — for extracting thread fragments from narrow channels
- Soft cotton swabs — useful for cleaning tension mechanisms and other confined areas
Estimated Costs at a Glance
| Item | Average Cost (USD) | Typical Replacement Frequency |
|---|---|---|
| Cleaning brush (pack of 3) | $4 – $8 | Every 1–2 years |
| Lint-free cloths (10-pack) | $5 – $10 | As needed |
| Sewing machine oil (1 oz bottle) | $5 – $12 | Every 6–12 months |
| Precision screwdriver set | $8 – $20 | Once (multi-year use) |
| Cotton swabs (100-pack) | $2 – $5 | Every 3–6 months |
| Tweezers | $3 – $10 | Once (multi-year use) |
A complete cleaning kit can typically be assembled for under $30. For users who already own a basic sewing kit, the incremental outlay is often below $15. Compared to professional servicing fees — which range from $50 to $150 per visit — routine self-cleaning delivers substantial long-term savings.
Expert Tips for a More Thorough Clean
Recommended Cleaning Frequency
Cleaning frequency depends on how intensively the machine is used and what type of fabric is being worked with. General guidelines include:
- Light use (occasional home projects): Clean every 8–10 bobbins or approximately once every three months
- Moderate use (weekly sewing sessions): Clean after every 3–5 bobbins or once per month
- Heavy use (daily sewing, quilting, or upholstery work): Clean after every 1–2 bobbins or once per week
- Fleece, flannel, and felt fabrics: These materials shed heavily — clean after every project session regardless of bobbin count
Those who work across multiple craft disciplines will recognize that consistent equipment care is a theme that applies broadly. For instance, the techniques covered in the guide on applying heat transfer vinyl with an iron involve different tool types, yet the underlying principle — clean equipment yields better results — is identical.
What to Avoid During the Cleaning Process
Pro Tip: Never blow directly into the machine interior with a compressed air canister — this widely used shortcut forces lint deeper into the mechanism and can dislodge precisely calibrated timing components.
Several well-intentioned cleaning habits can cause damage rather than prevent it. The following practices should be avoided:
- Do not use water, glass cleaners, or multi-surface spray solutions on any internal components
- Avoid over-oiling — a single drop per lubrication point is sufficient; excess oil attracts lint and can stain light-colored fabrics
- Do not use cotton balls, which leave loose fibers behind inside cavities
- Never clean the machine while it remains plugged in
- Do not attempt to clean the motor housing, circuit boards, or any electrical components — those areas require qualified technician attention
Troubleshooting Issues That Arise After Cleaning
Even a careful cleaning session can occasionally introduce new symptoms, typically the result of improper reassembly or a displaced component. The subsections below address the most common post-cleaning complaints and their most likely resolutions.
Thread Tension and Stitch Problems
If tension problems appear immediately after a cleaning session, the most probable causes are:
- The bobbin was inserted in the wrong orientation — consult the threading diagram in the manual and reinsert it correctly
- The upper thread path was disturbed during cleaning — remove the thread entirely and re-thread the machine from scratch
- The tension discs were inadvertently adjusted — run test stitches at different tension settings to identify and restore the correct calibration
- The needle is bent, dull, or not fully seated — replace it and confirm it is locked at the correct height
Consistent tension is especially critical for complex stitching projects. The guide on how to appliqué with an embroidery machine offers additional detail on managing thread tension when executing layered or decorative stitch patterns.
Unusual Noises or Mechanical Resistance
Grinding, clicking, or physical resistance during operation after a cleaning session usually points to one of the following:
- A component was not fully reseated — power off immediately and inspect each part systematically
- The hook race received insufficient lubrication — a single drop of oil to the appropriate point typically resolves this
- A thread fragment is lodged in the hook race — remove the bobbin case and clear any obstruction with tweezers
- The throat plate is slightly misaligned — loosen the retaining screw, reseat the plate flush, and re-tighten
If unusual noise persists after addressing these points, discontinue use and seek professional assessment. Running a machine that is producing grinding sounds risks compounding internal damage.
Ongoing Maintenance to Protect the Investment
Cleaning is one element within a broader maintenance routine. A sewing machine that receives consistent care can remain in reliable service for decades with only modest professional attention. The habits below complement regular cleaning and help sustain performance over the long term.
Building a Consistent Cleaning Schedule
Consistency matters more than the thoroughness of any single cleaning session. A practical maintenance routine might follow this structure:
- After every session: Remove the needle plate and brush visible lint from the bobbin compartment
- Monthly: Perform the full five-step cleaning process described in this guide
- Every six months: Apply lubrication to all designated points listed in the manual
- Annually: Schedule a professional inspection for timing calibration and comprehensive internal checks
Storing the machine under a dust cover when not in active use significantly reduces the rate at which lint accumulates between sessions. Basic fabric covers are often included with the original purchase; replacement covers typically cost between $10 and $25.
When Professional Servicing Is Warranted
Certain maintenance tasks fall outside the scope of routine user cleaning. Professional servicing is the appropriate course of action in the following situations:
- The machine skips stitches or produces irregular tension despite thorough cleaning and complete re-threading
- The handwheel (the large wheel on the right side used to manually advance the needle position) feels stiff or catches during rotation
- Stitch formation appears misaligned with the fabric feed — a sign of potential timing displacement
- The machine has not received professional attention in more than two years of regular use
- Any component shows visible signs of corrosion, physical damage, or unusual wear
Professional servicing typically costs between $50 and $150, depending on the technician and the scope of work required. For high-end models or well-maintained vintage machines, the investment consistently proves worthwhile.
Frequently Asked Questions
How often should a sewing machine be cleaned?
Cleaning frequency depends on usage intensity and fabric type. Light users should clean every three months or after every 8–10 bobbins. Heavy users or those working with lint-prone materials such as fleece and flannel should clean after every one to two bobbins or approximately once per week.
What tools are needed to clean a sewing machine?
The essential toolkit includes a lint-removing brush, lint-free cloths, sewing machine oil, small precision screwdrivers, tweezers, and cotton swabs. A complete set of these items can typically be assembled for under $30 and is available at most fabric or craft retailers.
Can compressed air be used to clean a sewing machine?
Compressed air from a canister is generally not recommended for cleaning machine interiors. Rather than extracting lint, it tends to force debris further into the mechanism and can dislodge timing-sensitive components. A soft-bristled brush paired with a narrow vacuum attachment provides a more controlled and effective alternative.
Should sewing machine oil be applied after every cleaning?
Lubrication should only be applied according to the manufacturer's instructions. Not every model requires oil after every cleaning session, and some modern machines are factory-lubricated for the life of the machine. When oil is called for, apply a single small drop to each designated lubrication point — excess oil attracts lint and may stain fabric.
What parts should never be cleaned with water or liquid cleaners?
No internal metal components, electronic modules, circuit boards, or motor housing should ever be exposed to water or solvent-based cleaning agents. Internal surfaces should be cleaned exclusively with dry cloths, soft brushes, or dry cotton swabs. The exterior casing may be wiped with a lightly dampened cloth only if the manufacturer's manual explicitly permits it.
Is it necessary to remove the needle before beginning a cleaning session?
Yes, the needle must always be removed before any cleaning work begins. Doing so eliminates the risk of puncture injuries while working inside the machine and ensures unobstructed access to the needle bar area. The needle should also be inspected upon removal and replaced if it appears bent, blunt, or damaged in any way.
How is the feed dog area cleaned properly?
After removing the throat plate, use a stiff-bristled brush to sweep lint from the ridges of the feed dogs (the serrated teeth that advance the fabric) using short outward strokes. For stubborn buildup, a cotton swab moistened with a small amount of isopropyl alcohol may be used — provided the manual does not prohibit solvent contact with that area of the machine.
When should a sewing machine be taken to a professional for servicing?
Professional servicing is warranted when the machine exhibits persistent tension problems, timing irregularities, stiff mechanical operation, or unusual noises that do not resolve after thorough cleaning and complete re-threading. Any machine that has not received professional attention in over two years of regular use should also be scheduled for an inspection, regardless of its apparent performance.
Final Thoughts
Keeping a sewing machine clean is one of the most cost-effective ways to protect a valuable piece of crafting equipment. Start with the five-step process outlined above, assemble a basic cleaning kit, and establish a maintenance schedule that reflects actual usage patterns. A well-maintained machine not only delivers more consistent stitch quality but lasts considerably longer — making the modest time investment in regular cleaning an easy decision for any serious sewing enthusiast.


About Alice Davis
Alice Davis is a crafts educator and DIY enthusiast based in Long Beach, California. She spent six years teaching textile design and applied arts at a community college, where she introduced students to everything from basic sewing techniques to vinyl cutting machines and heat press printing as practical, production-ready tools. That classroom experience means she has put more sewing machines, embroidery setups, Cricut systems, and heat press units through real project work than most reviewers ever will. At PalmGear, she covers sewing machines and embroidery tools, vinyl cutters, heat press gear, Cricut accessories, and T-shirt printing guides.
You can get FREE Gifts. Or latest Free phones here.
Disable Ad block to reveal all the info. Once done, hit a button below