How to Thread a Brother Sewing Machine
by Alice Davis
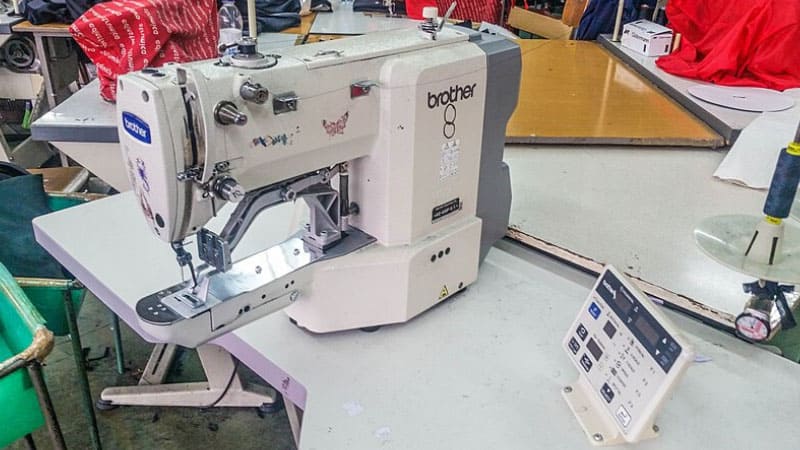
Studies from the sewing industry suggest that nearly 40 percent of all machine sewing errors trace back to improper threading — a striking figure given how methodical the process appears when viewed step by step. Learning how to thread a Brother sewing machine correctly stands as one of the most foundational skills anyone can develop before beginning a project, and our team has observed that even minor missteps in the thread path consistently produce skipped stitches, thread breakage, and fabric puckering. Brother machines rank among the most widely used in home studios globally, in large part because their threading systems follow a logical numbered sequence once that sequence is understood. For anyone expanding a textile and crafting skill set, our sewing and crafts category covers a wide range of complementary techniques alongside this guide.

Contents
- When to Thread Your Brother Machine (and When to Pause)
- How Beginners and Experienced Sewers Approach Threading Differently
- Tools and Supplies That Support Proper Threading
- The Complete Step-by-Step Threading Sequence for Brother Machines
- Shortcuts and Problem-Solving Strategies for Better Threading
- Threading in Practice: Lessons from Common Sewing Projects
When to Thread Your Brother Machine (and When to Pause)
Situations That Call for a Fresh Thread
The most obvious threading scenario arises when switching thread color or weight between project stages, since carrying over mismatched thread produces inconsistent stitch results on visible seams. After cleaning the machine or replacing the needle, re-threading from the beginning ensures the path seats correctly in every guide and tension component. Our team also treats any significant machine movement — such as transporting a machine or storing it in a bag — as a reason to re-thread before the next sewing session begins.
Additional situations that call for a complete re-thread include:
- Thread snapping mid-seam and pulling all the way through the needle or tension assembly
- A tangled bird's nest appearing on the underside of the fabric during stitching
- Installing a different needle size, since needle eye diameter directly affects how thread moves through the path
- Replacing an empty bobbin with a spool of different thread weight or fiber content
- Beginning a new project after the machine has sat unused for an extended period
Signs That Threading Should Wait
Attempting to thread a Brother machine directly after oiling creates a specific problem, since fresh lubricant transfers onto the thread and then deposits onto fabric — particularly damaging on delicate materials like silk or white cotton. The bobbin race and tension discs should be cleared of lint debris before threading begins, because built-up fiber residue mimics tension problems and makes accurate diagnosis significantly harder. Our team also considers a bent or damaged needle a reason to replace it first, since a compromised needle eye distorts the thread path regardless of technique.
Pro tip: Our team always cleans the bobbin race and inspects the needle before any re-threading session — skipping either step produces stitch problems that look like threading errors but aren't.
How Beginners and Experienced Sewers Approach Threading Differently
The Beginner's Path Through the Thread Guides
For those new to sewing, threading a Brother machine often feels like following a diagram that doesn't immediately translate into physical action, and our team considers that a normal part of the learning curve. Brother prints a numbered threading sequence on the arm of most models, and our team considers it the best starting resource for newcomers learning without a manual close by. The path moves from spool to top guide, down through the tension channel, up around the take-up lever, and down to the needle eye itself.
Beginners benefit most from establishing these habits early in their practice:
- Always raise the presser foot lever before threading, since lowering it closes the tension discs and prevents the thread from seating properly between them
- Turn the handwheel toward the front of the machine until the needle reaches its highest position before threading the needle eye
- Wind the bobbin before starting the upper thread sequence, completing both tasks in the order the machine expects
- Use the built-in automatic needle threader when the model includes one, since manual needle threading adds friction before the skill develops naturally
Our team finds that resources covering sewing machine mechanics help beginners understand why each threading step contributes to stitch formation, rather than simply memorizing a sequence without context. That understanding accelerates the transition from deliberate step-following to intuitive threading.
What Changes at an Advanced Level
Experienced sewers who have learned how to thread a Brother sewing machine across multiple models move through the thread path with fluency that comes from repetition rather than conscious thought. The most significant difference at an advanced level is the ability to detect threading problems by feel — slight resistance in a specific section of the path indicates a missed guide or an improperly engaged tension disc. This sensitivity allows targeted corrections without unthreading the entire path, which saves meaningful time during long sewing sessions with multiple thread changes.
Advanced users also pay closer attention to thread-to-needle compatibility, since the interplay between thread weight, needle size, and upper tension affects stitch quality in ways that correct threading alone cannot fully resolve. Those who work regularly on quilting — a process our team covers in our guide on how to quilt with a sewing machine — develop particular sensitivity to thread tension because layered quilt fabric amplifies minor threading inconsistencies into visible seam puckering across long runs.
Tools and Supplies That Support Proper Threading
Essential Accessories to Keep Nearby
Threading a Brother machine reliably across different project types benefits from having a small set of well-chosen accessories within arm's reach, and our team considers certain items indispensable regardless of model or fabric type. The most overlooked items tend to be the simplest — a correct spool cap size for the thread being used can prevent inconsistent thread feed that often gets misattributed to tension settings rather than spool behavior. Investing in a few inexpensive accessories before problems arise is considerably easier than diagnosing them mid-project.
- Needle threader tool — a small wire loop device that simplifies hand-threading fine or specialty needles that the built-in threader cannot handle
- Thread net or spool cap — controls the thread release rate from slippery or specialty spools during high-speed sewing
- Bobbin organizer — keeps pre-wound bobbins labeled, separated, and tangle-free between sessions
- Lint brush or small vacuum — clears fiber debris from the bobbin race before every re-threading session begins
- Machine oil — maintains smooth thread movement through metal guides and reduces wear on guide surfaces over time
Comparing Common Threading Aids
The threading accessories available to home sewers vary considerably in practical value depending on experience level and the specific Brother model in use. Our team finds a side-by-side comparison useful for deciding where to invest before purchasing items that may not match the workflow at hand.
| Tool | Best For | Skill Level | Approximate Cost | Notable Limitation |
|---|---|---|---|---|
| Built-in needle threader | Standard thread weights (40–50 wt) | All levels | Included with machine | Does not work with very fine or heavy specialty thread |
| Manual wire needle threader | Fine thread, hand-threading thin needles | Beginner | $1–$5 | Fragile wire loop breaks easily; buy in multiples |
| Spool cap set | Cross-wound and parallel-wound spools | All levels | $3–$10 | Different spool shapes feed at different rates without the proper cap |
| Thread net | Metallic and slippery specialty threads | Intermediate | $2–$6 | Can overtighten feed if the net is too small for the spool |
| Separate bobbin winder stand | Pre-winding multiple bobbins before a long session | Advanced | $10–$25 | Requires storage space; most valuable for high-volume work |
The Complete Step-by-Step Threading Sequence for Brother Machines
Setting Up the Upper Thread Path
The upper threading sequence on Brother machines is consistent across most of the brand's home and semi-professional models, meaning skills developed on one machine transfer well to others within the Brother lineup. The sequence begins by placing the thread spool on the spool pin — vertical or horizontal depending on the model — and drawing the thread through the first guide located at the top of the machine arm. From there, the thread travels downward through the tension guide channel on the left side of the machine face, where it wraps into the tension disc assembly housed inside that channel.
The thread then travels back upward to pass through the take-up lever — the moving metal hook that rises and falls with each stitch cycle — before heading downward again through the remaining guides toward the needle. Proper engagement of the take-up lever is critical, since a thread that bypasses this component produces loose upper thread and irregular stitch loops on the fabric underside throughout the entire session. After the take-up lever, the thread passes through the needle bar clamp guide before threading through the needle eye from front to back — a directional detail that matters more than most sewers initially expect.
Threading the Bobbin Correctly
The bobbin threading step receives less attention than the upper path in most guides, but our team's experience confirms it is equally responsible for stitch quality and equally prone to subtle errors. On Brother drop-in bobbin models, the bobbin installs into the horizontal case with thread unwinding counterclockwise, then routes under the bobbin tension spring and through the guide slot in the needle plate. Inserting the bobbin with thread unwinding in the wrong direction is one of the most common errors our team encounters, and it produces immediate stitch problems that are difficult to attribute correctly without re-examining the bobbin.
Once the cover plate is closed, drawing up the bobbin thread requires holding the upper thread and turning the handwheel through one complete cycle to lower and raise the needle, which catches the bobbin thread and pulls it up as a loop through the needle plate opening. Both thread tails are then drawn to the back or side of the presser foot, leaving at least three to four inches free, before a test stitch on scrap fabric confirms that stitch balance is correct before the actual project begins.
Warning: Threading the needle eye from back to front is among the most common beginner errors our team encounters — it prevents the needle from catching the bobbin thread on the downstroke and causes immediate stitch failure that requires full re-threading.
Shortcuts and Problem-Solving Strategies for Better Threading
Where the Thread Path Goes Wrong Most Often
Even with careful attention to the threading sequence, certain points in the Brother machine's thread path generate problems more reliably than others, and identifying those weak spots makes troubleshooting noticeably faster. The tension discs represent the most frequently implicated component — when the presser foot is down during threading, the discs close and the thread cannot seat properly between their faces, producing upper tension that is tighter than the dial setting suggests regardless of how carefully the rest of the path was threaded.
Other consistently problematic points in the thread path include:
- The take-up lever — easy to miss when threading quickly, leading to loose thread loops visible on the fabric underside after the first few stitches
- The needle bar thread guide — a small metal clip just above the needle clamp that is less prominent than other guides and frequently skipped during a rushed re-thread
- The bobbin tension spring — thread that passes over rather than under this spring produces bobbin tension that bears no predictable relationship to the upper tension setting
- The needle eye direction — back-to-front threading prevents the needle from picking up the bobbin thread loop on the downward stroke, causing immediate stitch failure
- Spool orientation — cross-wound spools perform better on a horizontal spool pin while parallel-wound spools prefer a vertical pin, affecting how evenly thread unwinds under tension
Efficient Fixes That Work Mid-Project
When a machine begins producing inconsistent stitches mid-project, the fastest and most reliable diagnostic step our team recommends is a complete upper-path re-thread before any tension adjustments are attempted. This approach resolves the majority of stitch quality issues in under two minutes and eliminates threading error as a variable before more complex adjustments become necessary. The habit of re-threading first and adjusting second saves considerable time over the course of a long session compared to chasing a tension setting around an underlying path problem.
For those working on embroidery or decorative stitching, understanding how thread tension connects to stitch appearance has practical implications beyond the machine itself — our guide on removing embroidery from shirts, jackets, and hats notes that tight thread tension during original stitching makes subsequent removal significantly more difficult and time-consuming. Similarly, anyone developing a broader fabric craft skill set may find our overview of screen printing T-shirts at home a useful complement, since it addresses a technique that shares the need for deliberate setup and testing before a project begins.
Threading in Practice: Lessons from Common Sewing Projects
Long-Form Projects Like Quilting and Garment Construction
Large projects that involve multiple thread colors and repeated re-threading sessions expose the practical cost of inconsistent threading habits more clearly than any single short task. Quilting represents one of the most demanding real-world tests of threading precision, since long seams through thick layered fabric amplify minor tension inconsistencies into visible puckering that is difficult to correct after the fact. Our team observes that sewers who re-thread correctly at each color change invest under two minutes per transition and recover that investment many times over in reduced seam ripping and correction work.
For those developing a quilting practice more broadly, our detailed guide on how to quilt with a sewing machine addresses thread selection, stitch length recommendations, and machine setup for working through batting layers — all of which connect directly to threading correctness as a foundational prerequisite. The thread path must be set up precisely before any of those other variables can be optimized toward a clean finished result.
Decorative Work and Specialty Thread Challenges
Decorative sewing and embroidery work places the most demanding requirements on threading precision because the thread types involved — metallic, rayon, and variegated options — behave differently from standard polyester or cotton through the tension discs. Our team finds that these threads benefit from a slightly loosened upper tension setting after threading, along with reduced machine speed, since metallic thread is particularly prone to shredding and breakage when the tension assembly grips it at the same pressure used for standard thread. The thread path itself remains identical to normal threading, but the handling through guides requires a lighter touch to avoid friction-related breakage early in the stitch sequence.
Projects that involve repurposing or modifying existing fabric items also depend heavily on threading quality at the outset, since worn fabric is less forgiving of stitch irregularities produced by an incorrect thread path. Our guide on reusing torn-up cotton T-shirts covers how degraded fabric responds to machine sewing and the thread tension considerations that come with it. For anyone managing fabric items through their full lifecycle, our article on removing odors from clothes without washing covers fabric care techniques that complement an active sewing practice between projects.
Frequently Asked Questions
Why does a Brother sewing machine keep unthreading during use?
The most frequent cause is thread that was not drawn through the take-up lever during the initial threading sequence, which causes the lever to pull the thread free on the very first stitch cycle. Drawing the thread fully through the take-up lever and leaving a thread tail of at least four inches behind the needle before beginning to sew resolves this problem in the majority of cases our team has encountered.
Is it possible to thread a Brother machine correctly without the printed diagram?
Once the general sequence is understood — spool pin to top guide, downward through the tension channel, upward through the take-up lever, downward through the needle bar guide, and through the needle eye from front to back — most Brother models follow this same path with only minor variations in guide count and placement. Our team still recommends consulting the model-specific manual when working on an unfamiliar machine, as some models include additional thread guides not present on others.
What upper tension setting is most appropriate immediately after threading?
The factory default tension setting of 4 on most Brother machines is the recommended starting point after threading, and our team advises running a test stitch on a scrap of the actual project fabric before making any adjustments to that setting. If the upper thread appears on the fabric underside, the upper tension is too loose relative to the bobbin; if the bobbin thread pulls to the top surface, the upper tension is set too tight.
Does the threading procedure differ significantly between Brother models?
The fundamental threading path remains consistent across most Brother home sewing machine models, with practical differences limited to the number and placement of thread guides and whether the machine uses a front-loading or top-loading drop-in bobbin system. Our team's experience across multiple models confirms that understanding the principle behind each threading step — rather than memorizing a single specific diagram — makes adapting to any Brother machine relatively straightforward over time.
How often should the thread path and bobbin area be cleaned to prevent threading problems?
Our team recommends clearing lint and fiber debris from the bobbin race and checking the tension disc area after every eight to ten hours of active sewing, or after completing any project that involved a large volume of thread. Regular cleaning prevents buildup from creating friction in the thread path that produces tension inconsistencies incorrectly attributed to threading errors rather than to routine maintenance gaps.
Threading a Brother machine correctly is less about memorizing a diagram and more about understanding why each step exists — once that understanding takes hold, every problem in the thread path becomes easier to find and faster to fix.


About Alice Davis
Alice Davis is a crafts educator and DIY enthusiast based in Long Beach, California. She spent six years teaching textile design and applied arts at a community college, where she introduced students to everything from basic sewing techniques to vinyl cutting machines and heat press printing as practical, production-ready tools. That classroom experience means she has put more sewing machines, embroidery setups, Cricut systems, and heat press units through real project work than most reviewers ever will. At PalmGear, she covers sewing machines and embroidery tools, vinyl cutters, heat press gear, Cricut accessories, and T-shirt printing guides.
You can get FREE Gifts. Or latest Free phones here.
Disable Ad block to reveal all the info. Once done, hit a button below