How to Remove Spray Paint from Brass
by Sandra Holt
The fastest way to remove spray paint from brass is with acetone or nail polish remover. Dab it on a soft cloth, press it against the paint for 60 seconds, and wipe. Most fresh spray paint lifts off cleanly. For older, dried layers, a dedicated paint stripper gets the job done without harming the metal underneath.
Knowing how to remove spray paint from brass is a genuinely useful skill for any hands-on homeowner. Brass fixtures show up everywhere — faucets, door handles, cabinet hardware, light fixtures, stair railings. One accidental overspray during a painting project can ruin a piece that costs serious money to replace. If you're working through home improvement projects room by room, the home appliances section has practical guides for every corner of the house. But right now, let's get that paint off your brass cleanly and safely.

Contents
- Why Spray Paint Bonds to Brass — and How It Affects Your Approach
- Common Situations Where You'll Find Spray-Painted Brass
- The Right Tools and Supplies for the Job
- When to Remove Spray Paint — and When to Leave It Alone
- How to Remove Spray Paint from Brass: Beginner vs. Advanced Techniques
- Keeping Your Brass Looking Great After Paint Removal
Why Spray Paint Bonds to Brass — and How It Affects Your Approach
Before you grab any solvent, take a moment to understand what you're actually up against. Spray paint doesn't just sit on top of brass. It bonds to the metal surface in ways that vary dramatically based on paint type, age, and surface condition. That understanding drives every decision in the removal process.
The Science of Paint Adhesion on Metal
When spray paint hits brass, it seeps into microscopic surface pores and cures into them. The bond is both mechanical and chemical. Here's what determines how hard the paint fights back:
- Paint type: Lacquer and enamel spray paints bond most aggressively. Chalk paint and water-based acrylics are far easier to remove.
- Cure time: Fresh paint (under 24 hours) is dramatically easier to remove than paint that's been curing for days or weeks.
- Surface prep: If the brass was sanded, primed, or degreased before painting, the paint has a deeper mechanical grip.
- Number of coats: Each additional layer multiplies the difficulty. Two coats are more than twice as hard to remove as one.
- Existing lacquer: Factory-lacquered brass creates a barrier between the metal and the spray paint. Counterintuitively, this can make removal slightly easier — you're lifting paint off lacquer, not bare brass.
What Makes Brass Different from Other Metals
Brass is a copper-zinc alloy. According to Wikipedia, zinc content in brass typically ranges from 5% to 45%, which affects hardness and chemical reactivity. That chemistry has direct implications for paint removal:
- Softer than steel: Abrasive scrubbing scratches brass permanently. You need gentler tools than you'd use on iron or steel.
- Reacts to harsh chemicals: Strong caustic strippers discolor or pit brass. Stick to citrus-based or solvent-based options.
- Tarnishes fast when exposed: Once you strip the paint, bare brass begins oxidizing quickly. You need to polish and seal the same day you strip.
- Often plated, not solid: Many "brass" fixtures are zinc or steel with a thin brass coating. Aggressive stripping eats through the plating in seconds.
The takeaway: use a lighter touch on brass than you would on other metals. Gentle is faster here — it lets you avoid damage that adds extra repair steps.
Common Situations Where You'll Find Spray-Painted Brass
Most searches for how to remove spray paint from brass fall into two clear categories. Knowing which one you're dealing with shapes your approach before you even open a solvent bottle.
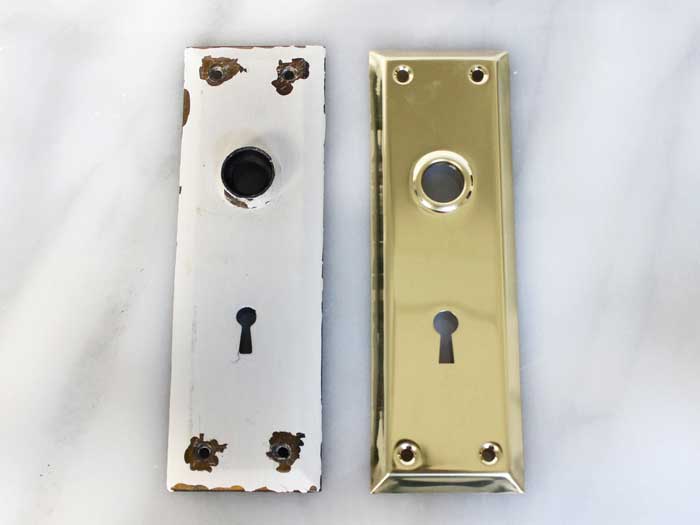
Household Brass Fixtures and Hardware
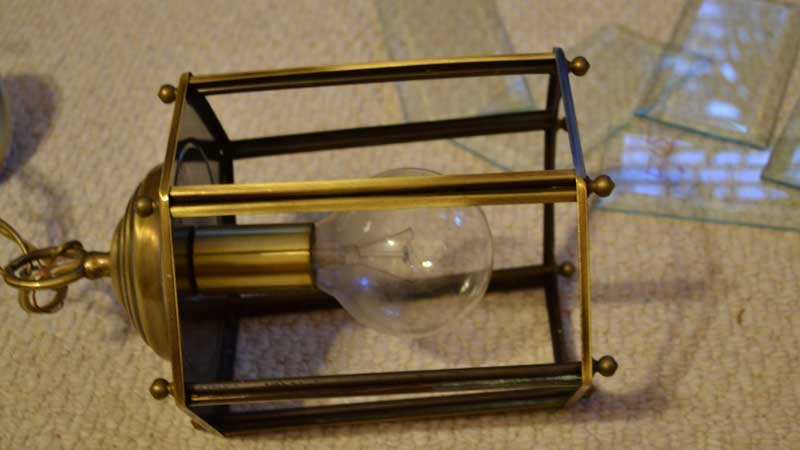
This is the most common scenario by far. Either overspray from a nearby project landed on brass hardware, or someone deliberately painted fixtures to update their look and now regrets it. The items involved are usually:
- Kitchen and bathroom faucets and handles
- Door knobs, levers, and deadbolts
- Cabinet pulls, drawer handles, and hinges
- Light switch plates and outlet covers
- Towel bars, toilet paper holders, and shower fixtures
- Stair rail connectors and balusters
- Exterior door knockers and kick plates
These pieces are functional and frequently touched, so the finish matters practically — not just aesthetically. If you've recently worked on any plumbing fixtures, you know how easily overspray gets onto hardware. Our guide on installing a kitchen faucet yourself walks through how to work around brass hardware carefully during any project involving tools and spray products.
Decorative and Vintage Brass Items
The second category involves decorative or antique pieces — thrift finds, inherited items, vintage hardware, or outdoor decor. These bring extra complications:
- Unknown paint history: You can't tell how many layers exist or what type of paint was used. Start gentle and work up.
- Patina value: An antique brass piece often has a rich patina built over decades. Aggressive stripping destroys it permanently.
- Intricate designs: Ornamental pieces have crevices that trap paint. Solvent application requires patience and small tools.
- Mixed materials: Decorative brass often combines wood, leather, stone, or enamel accents. Your solvent choice needs to be compatible with all materials present.
For anything decorative or antique, slow down. The patience you exercise upfront saves you from damage you can't undo.
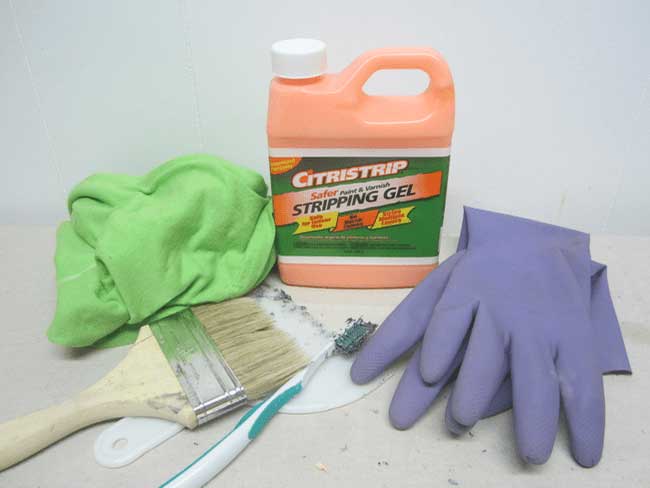
The Right Tools and Supplies for the Job
Having everything on hand before you start makes the whole process cleaner and faster. Don't improvise mid-job with whatever is under the sink.
Chemical Solvents That Work on Brass
Your solvent choice is the most important decision you'll make. Match it to your paint type and the condition of the brass:
- Acetone / nail polish remover: The go-to for fresh lacquer and enamel spray paints. Fast-acting and widely available. Evaporates quickly so it doesn't over-saturate the surface.
- Mineral spirits: Gentler than acetone. Excellent for oil-based spray paints. Won't attack factory lacquer finishes on brass hardware.
- Denatured alcohol: Works well on water-based and latex spray paints. A safer choice for lacquered or plated brass where acetone might be too aggressive.
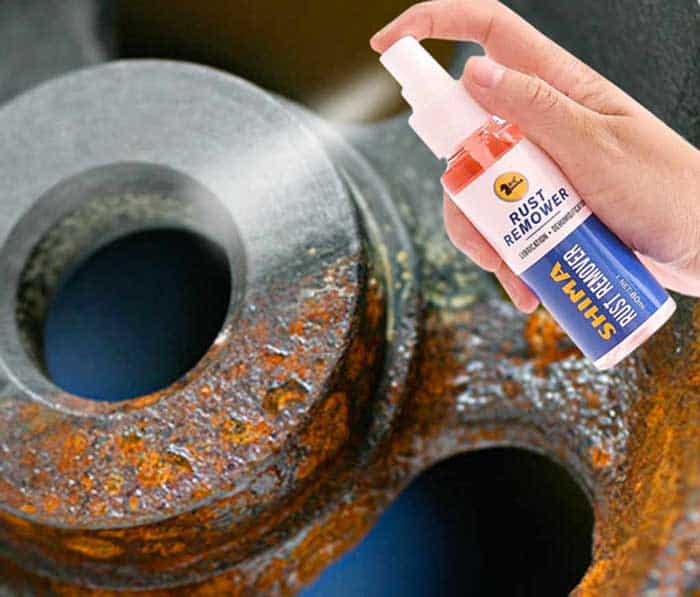
- Citrus-based gel paint stripper: The heavy hitter for thick, multi-layer, or fully cured paint. Safer for brass than solvent-based or caustic strippers.
- WD-40: Surprisingly effective on light, fresh overspray. It lubricates and lifts paint without any chemical bite. A great first attempt before reaching for stronger solvents.
- White vinegar: A fully chemical-free option for light residue. Much slower than acetone, but completely safe on any brass finish. The same vinegar-based cleaning logic covered in our guide on cleaning with vinegar applies just as well to metal surfaces.
Mechanical Tools and Abrasives
These work alongside solvents — they remove what the chemical has already loosened:
- Soft-bristle toothbrush: Essential for getting into engraved designs, knurling, and tight corners.
- Plastic scraper or old credit card: Lifts softened paint flaps without any risk of scratching brass.
- 0000-grade steel wool: Extra-fine steel wool polishes as it removes residue. Go no coarser than 000 — anything rougher leaves scratches.
- Brass brush: Safe on textured or knurled brass surfaces. Brass-on-brass contact won't cause damage.
- Microfiber cloths: For applying solvents and buffing without abrasion.
Safety Gear You Cannot Skip
Solvents are not soap and water. Protect yourself:
- Nitrile gloves (not latex — acetone dissolves latex)
- Safety glasses or goggles
- Ventilation — open windows, run a fan, or work outside
- Old clothes or an apron — acetone and strippers ruin fabric instantly
Method Comparison at a Glance
| Method | Best For | Brass-Safe? | Difficulty | Time Needed |
|---|---|---|---|---|
| Acetone / Nail Polish Remover | Fresh lacquer or enamel paint | Yes — use quickly | Easy | 5–15 min |
| Mineral Spirits | Oil-based spray paint | Yes | Easy | 10–20 min |
| Denatured Alcohol | Water-based / latex paint | Yes | Easy | 10–20 min |
| WD-40 | Light fresh overspray | Yes | Easy | 5–10 min |
| White Vinegar (heated) | Light residue, delicate pieces | Yes | Easy | 30–60 min |
| Citrus Gel Paint Stripper | Heavy, multi-layer, old paint | Use with care | Moderate | 30–60 min |
| 0000 Steel Wool | Surface residue after solvent | Yes — careful pressure | Moderate | 10–20 min |
When to Remove Spray Paint — and When to Leave It Alone
Not every painted brass surface needs stripping. The decision to proceed should be deliberate — going in unnecessarily risks damaging something that was perfectly fine.
Green Light: Go Ahead and Strip It
These situations clearly call for removal:
- The paint was accidental overspray from a nearby project
- You're restoring a vintage or antique piece to its original condition
- The painted finish is peeling, cracking, or flaking — it looks worse than bare brass would
- You want to repaint or re-lacquer with a different finish color
- The item is a functional fixture that looks obviously mismatched in its space
- You're selling, gifting, or donating the item and need to restore its value
Red Light: Think Twice Before Starting
These situations call for caution — or a professional:
- The item has serious sentimental or monetary value. A wrong solvent choice can destroy an irreplaceable patina in seconds.
- You don't know the paint type. Without knowing what's on the surface, you're guessing on solvent selection. Do a small test first.
- You're not sure it's solid brass. Test with a magnet. Brass is non-magnetic. If the magnet sticks, you're likely dealing with steel or zinc plating — and the calculus changes completely.
- The item has mixed materials nearby. Solvents destroy wood, fabric, and many stone inlays. If those materials are present and inseparable, proceed only with the mildest options.
- The paint is in good condition and you can live with it. Stripped brass needs immediate polishing and sealing. If you're not ready for follow-through, leave it painted until you are.
Pro tip: Always test your chosen solvent on a hidden spot first — the underside of a hinge or inside a door handle. Wait five minutes and check for discoloration or surface dulling before moving to any visible area.
How to Remove Spray Paint from Brass: Beginner vs. Advanced Techniques
Your experience level and the paint's condition should determine where you start. Don't skip straight to chemical strippers just because the paint looks stubborn. Start gentle, escalate only if needed. You'll avoid damage and often be surprised by how much the simple methods can handle.
Start Here If You're New to This
These three methods are low-risk and effective for fresh or lightly dried spray paint.
Method 1: Acetone and a Soft Cloth
- Put on nitrile gloves and eye protection before opening the acetone.
- Dampen a microfiber cloth with acetone — wet it, don't soak it.
- Press the cloth firmly against the painted area for 30–60 seconds.
- Wipe in one direction. Avoid circular scrubbing — it smears paint into fresh areas.
- Flip to a clean section of cloth as paint transfers over.
- Repeat until the paint is gone.
- Rinse the brass with warm water and dry it immediately with a clean towel.
Method 2: WD-40 Soak
- Spray WD-40 generously over the painted surface.
- Let it sit undisturbed for 10 minutes.
- Wipe off with a rag — the paint should lift along with the WD-40.
- Wash off the WD-40 residue with warm dish soap and water.
- Dry thoroughly.
Method 3: Warm Soapy Water (for very fresh paint only)
- If the paint hit within the last 30–60 minutes, try warm soapy water first.
- Scrub gently with a soft-bristle brush.
- Rinse and assess. If any paint remains, move to acetone immediately.
Pro-Level Methods for Stubborn, Dried Paint
For thick, multi-layer, or fully cured spray paint, you need to escalate. These methods take more time but they work on paint that solvents alone won't touch.
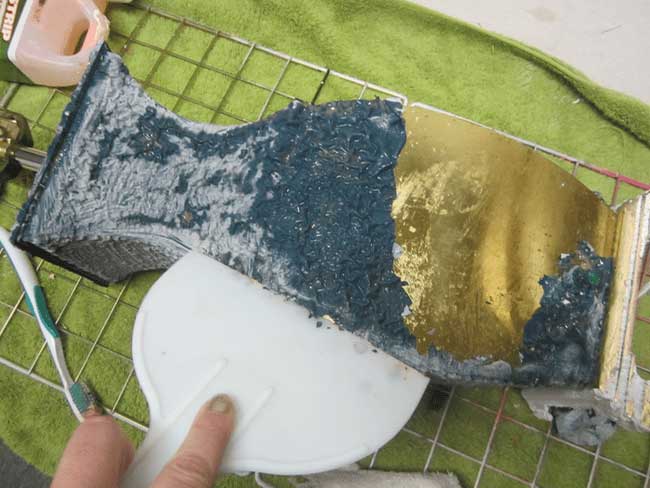
Method 4: Citrus Gel Paint Stripper
- Choose a citrus-based gel formula — gentler on brass than petroleum-solvent or caustic strippers.
- Apply a thick, even layer over all painted surfaces using an old brush.
- Cover the piece loosely with plastic wrap to slow the stripper from evaporating.
- Let it sit for 20–40 minutes. Check the product label for exact dwell time.
- Use a plastic scraper to lift the softened paint off flat surfaces.
- Use a brass brush or soft toothbrush to work stripper into engraved areas and corners.
- Rinse thoroughly with warm water. All stripper residue must be fully removed.
- Dry completely, then polish and seal the same day.
Method 5: Hot Vinegar Soak (Chemical-Free)
This works best for smaller brass items you can fully submerge — cabinet pulls, drawer hardware, decorative pieces, small fixtures. It's completely chemical-free and brass-safe.
- Pour white vinegar into a pot and heat it to just below boiling. Don't let it boil — hot vinegar fumes are irritating in enclosed spaces.
- Submerge the brass item completely.
- Let it soak for 30–60 minutes.
- Remove and scrub with a soft toothbrush to dislodge loosened paint.
- Repeat the soak if paint remains — two shorter soaks often outperform one long one.
- Rinse with warm water and dry completely before the surface has a chance to tarnish.
The same principle that makes vinegar effective on grease and mineral deposits also works on spray paint residue. If you use vinegar for household cleaning already — the way our range hood filter cleaning guide describes — you'll feel right at home with this method.
Keeping Your Brass Looking Great After Paint Removal
Stripping paint is only half the job. Bare brass oxidizes fast. If you don't polish and seal the surface the same day you strip it, you'll be dealing with tarnish on top of whatever paint residue remains. The follow-through is what separates a clean restoration from a half-finished mess.
Polishing and Restoring the Surface
After paint removal, your brass will look dull, streaky, or slightly discolored — that's normal. Polishing brings it back. Here are your best options ranked by effectiveness:
- Commercial brass polish (Brasso, Wright's Brass Polish): The most reliable choice. Apply a small amount to a microfiber cloth and rub in circular motions. Buff with a clean cloth until the surface shines. Best for medium to heavy tarnish or discoloration.
- Lemon juice and salt paste: Mix equal parts and apply with a soft cloth. Let it sit for 5 minutes, then rinse and dry. Works well on light tarnish and surface oxidation from the stripping process.
- Ketchup: The combination of vinegar and salt in ketchup actually removes tarnish effectively. Apply, wait 10 minutes, wipe off. It sounds strange, but it genuinely works on solid brass.
- Non-gel toothpaste: A mild abrasive that polishes small pieces or handles touch-up work on specific spots.
No matter which polish you use, buff completely dry before any moisture has a chance to sit on the surface. Standing water on bare brass accelerates tarnishing dramatically — you'll undo your work in hours.
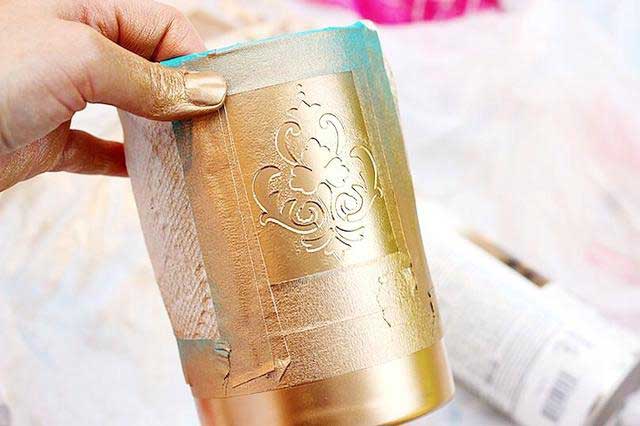
Sealing and Protecting Your Brass Long-Term
Unless you enjoy re-polishing every few months, apply a sealant once you've got the brass looking its best. Your options:
- Clear lacquer spray: The most durable protection for high-touch hardware. Apply 2–3 thin coats, letting each dry fully between applications. This is the same finish that comes from the factory on most brass hardware.
- Paste wax (carnauba or Renaissance wax): Rubs on easily, buffs to a soft sheen. Easier to apply than lacquer. Needs reapplication every 6–12 months depending on use and exposure.
- Microcrystalline wax: The preferred choice for antiques and valuable decorative pieces. It's stable, reversible, and used by professional conservators. Doesn't build up or yellow over time.
For outdoor brass — door knockers, house numbers, mailbox hardware, or exterior fixtures — use marine-grade lacquer or an outdoor-rated clear coat. Standard interior lacquer won't hold up to UV exposure and seasonal temperature swings. It'll peel within months.
Going forward, a drop cloth over brass hardware before any spray work takes under a minute and saves you hours of removal work later. Build that habit now.
Frequently Asked Questions
What is the fastest way to remove spray paint from brass?
Acetone or nail polish remover is the fastest method for fresh spray paint. Apply it to a soft cloth, press it against the painted area for 60 seconds, and wipe. Most fresh lacquer and enamel spray paint comes off in one or two passes. For paint that has fully cured, a citrus-based gel paint stripper left on for 30 minutes will do the job.
Will acetone damage brass?
Used correctly, acetone won't damage solid brass. The key is to work quickly — apply, dwell briefly, and wipe. Don't let it pool on the surface for extended periods. Acetone can strip factory lacquer if overused, which is why mineral spirits or denatured alcohol are better choices when you want to preserve the original finish.
Can I use paint thinner on brass?
Yes, standard paint thinner (mineral spirits) is safe on brass and works well on oil-based spray paints. It's gentler than acetone and less likely to disturb an existing lacquer finish. Apply with a cloth, let it work for a couple of minutes, then wipe. It may take a few passes for thicker paint.
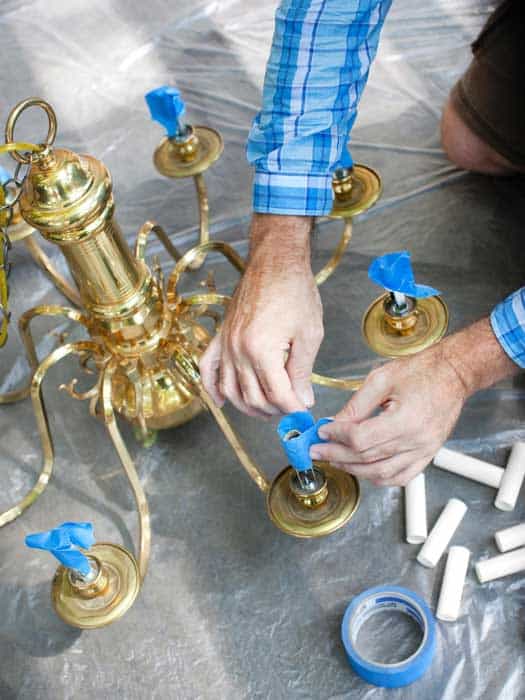
How do I remove spray paint from a brass faucet without removing it?
If you can't remove the fixture, work in place with a solvent-dampened cloth and a soft toothbrush for crevices. Protect surrounding surfaces — countertops, tile, and caulk — with painter's tape before applying any solvent. Work in small sections and rinse with a damp cloth as you go. Avoid letting solvent run down into drain fittings.
Is there a chemical-free way to remove spray paint from brass?
Yes — a hot vinegar soak works well for smaller pieces. Heat white vinegar to just below boiling, submerge the brass item, and let it soak for 30–60 minutes. Scrub with a soft toothbrush to remove loosened paint, then rinse and dry. WD-40 is another chemical-free option for light overspray — spray on, wait 10 minutes, wipe off.
How do I know if my fixture is solid brass or just brass-plated?
Test it with a magnet. Solid brass is non-magnetic — a magnet won't stick. If the magnet clings, the piece is likely steel or zinc with a brass coating. This matters enormously for paint removal: aggressive solvents or strippers can eat through plating in seconds, exposing the bare base metal underneath.
Will spray paint come off with just soap and water?
Only if the paint hit within the last 30–60 minutes and hasn't begun to cure. Warm soapy water and a soft brush can remove very fresh water-based spray paint. For anything that has dried even partially, you need acetone or a stronger solvent. Soap and water won't touch enamel or lacquer spray paint once it starts curing.
How do I prevent tarnishing after removing paint from brass?
Polish immediately after removal — don't leave bare brass exposed overnight. Once polished, apply a protective sealant: clear lacquer spray for durable high-touch hardware, paste wax for decorative pieces, or microcrystalline wax for antiques. For outdoor brass, use marine-grade lacquer. The goal is to seal the surface before it reacts with air and moisture.
Final Thoughts
Removing spray paint from brass is a straightforward job when you match the right solvent to the paint type and act without hesitation. Grab your acetone, your nitrile gloves, and a microfiber cloth — start there, escalate to gel stripper only if needed, then polish and seal the same day. Don't leave restored brass unprotected overnight. Head to the home appliances section for more hands-on guides to keeping every part of your home in top shape.


About Sandra Holt
Sandra Holt spent eight years as a project manager for a residential renovation company in Portland, Oregon, overseeing kitchen and bathroom remodels from initial estimate through final walkthrough. That work exposed her to an unusually wide range of home equipment — from HVLP spray guns and paint sprayers on the tools side to range hoods, kitchen faucets, and countertop appliances on the appliance side. After leaving the trades, she moved into consumer product writing, bringing the same methodical, hands-on approach she used to evaluate contractor-grade tools to everyday home gear. At PalmGear, she covers kitchen appliances, home tools, paint and finishing equipment, and cleaning gear.
You can get FREE Gifts. Or latest Free phones here.
Disable Ad block to reveal all the info. Once done, hit a button below