How to Applique with an Embroidery Machine
by Alice Davis
What separates a crisp, professionally finished fabric accent from a hand-stitched result that frays or distorts after several washes? The answer lies in understanding precisely how to applique with embroidery machine techniques, which combine digital design precision with mechanical repeatability to produce results that manual methods cannot consistently match. Machine appliqué has transformed a centuries-old decorative textile art into a streamlined, production-capable workflow that serves both dedicated hobbyists and small business operators with equal effectiveness. According to the textile history documented on Wikipedia's appliqué entry, this method of sewing one piece of fabric onto a larger base to create layered decorative effects dates back to ancient civilizations, yet modern machine execution elevates it to a new standard of precision. This guide covers every critical stage of the machine appliqué process, from selecting appropriate equipment to executing stitch sequences correctly, and addresses the most common errors that compromise finished work. Those interested in related fabric arts will find the sewing and crafts category an excellent reference for further exploration.
Contents
Essential Tools and Materials for Machine Appliqué
Before the first stitch is ever placed, assembling the proper toolkit determines whether the final result is polished or problematic. Machine appliqué demands a specific combination of hardware, consumables, and fabric choices that work in coordination with one another, and substituting inferior materials at any stage of preparation produces compounding errors that are difficult to correct once the machine is running.
Selecting the Right Embroidery Machine

The embroidery machine itself is the central instrument of the entire process, and choosing an appropriate model significantly affects both design clarity and overall production efficiency. Machines with a minimum hoop capacity of 5×7 inches accommodate the majority of standard appliqué designs without requiring mid-project repositioning, which introduces alignment risk that degrades precision on every subsequent stitch sequence. Multi-needle machines offer the most efficient workflow for operators running more than occasional batches, eliminating the manual thread changes that slow single-needle production to a crawl. Single-needle machines remain capable for hobbyist applications, provided the operator maintains strict needle alignment protocols between every thread change. For those evaluating machine categories before committing to a purchase, understanding how industrial and domestic sewing machines differ in their mechanical construction provides useful framing for the buying decision and clarifies why embroidery-specific models outperform converted domestic machines for appliqué work.
Stabilizers, Needles, and Thread

Stabilizer selection is arguably the most consequential variable in machine appliqué beyond the machine itself, and selecting the wrong type produces puckering, distortion, and registration failures that no amount of post-processing can correct. Cut-away stabilizer provides the most durable long-term support for stretchy or loosely woven base fabrics, with the backing remaining permanently attached beneath the finished piece. Tear-away stabilizer suits stable woven fabrics where minimal residue on the back surface is a priority, and water-soluble topping placed over the appliqué fabric layer prevents the embroidery needle from sinking into raised fibers — a critical step when working with fleece, terry cloth, or any textured material.
Needle and thread choices follow equally strict rules:
- Embroidery needles in the 75/11 range handle most standard appliqué fabrics without introducing distortion into the stitch pattern.
- A 90/14 needle is the correct choice when stitching through heavier layered materials, denim appliqué pieces, or canvases with multiple stabilizer layers.
- Rayon thread produces superior sheen and drape compared to polyester, though polyester outperforms rayon decisively for wash durability in frequently laundered garments and household items.
- Bobbin thread should remain at 60 or 90 weight to prevent thread buildup beneath the fabric layers, which otherwise creates unwanted texture on the reverse side.
| Material | Recommended Type | Primary Use Case |
|---|---|---|
| Stabilizer | Cut-away (stretch/knit fabrics), Tear-away (stable wovens) | Preventing distortion and puckering during stitching |
| Topping | Water-soluble film | Fleece, toweling, and high-pile textured surfaces |
| Embroidery Needle | 75/11 (standard), 90/14 (heavy layers or denim) | Matching needle weight to combined fabric and stabilizer thickness |
| Upper Thread | Rayon (visual sheen), Polyester (wash durability) | Thread type matched to end-use requirements of the finished piece |
| Bobbin Thread | 60 or 90 weight embroidery bobbin thread | Maintaining tension balance and a clean reverse surface |
| Appliqué Fabric | Tightly woven cotton, felt, or fleece | Design edge clarity and resistance to fraying under the border stitch |
How to Applique with Embroidery Machine: The Complete Process
Executing a successful machine appliqué project requires following a specific sequence of steps without deviation, as each phase depends directly on the accuracy of the one that precedes it. The process is highly repeatable once mastered, and operators who follow the sequence consistently can expect predictable, high-quality results across a wide range of fabric types and design complexities.
Preparing the Design and Fabric

The process begins with selecting or creating an appliqué design file formatted specifically for machine embroidery, typically in DST, PES, or EXP formats depending on the machine brand in use. Designs built with distinct stitch types for each sequential phase — a placement stitch, a tack-down stitch, and a final satin or blanket border stitch — provide the clearest workflow structure during execution, and commercially digitized files from reputable sources always include this three-phase architecture.
Fabric selection for the appliqué piece itself demands equally careful consideration before any cutting begins:
- Tightly woven cotton produces clean-cut edges with minimal fraying and is the standard choice for intermediate and advanced operators.
- Felt eliminates fraying entirely and is the single best fabric choice for beginners learning the placement and trimming process for the first time.
- Pre-washing the base fabric before hooping prevents post-stitch shrinkage from distorting the finished design after the first laundry cycle.
- Fusible webbing applied to the back of the appliqué fabric before cutting adds stability and keeps the piece flat during placement, reducing the risk of shifting before the tack-down stitch secures it permanently.
Hooping, Stitching, and Finishing

Hooping the base fabric with the stabilizer attached beneath it is the most mechanically critical step in the entire process, because an improperly tensioned hoop produces puckering that cannot be reversed after stitching is complete. The fabric surface must be taut without being stretched, and the hoop tension should feel firm and even across all edges before the machine is engaged.
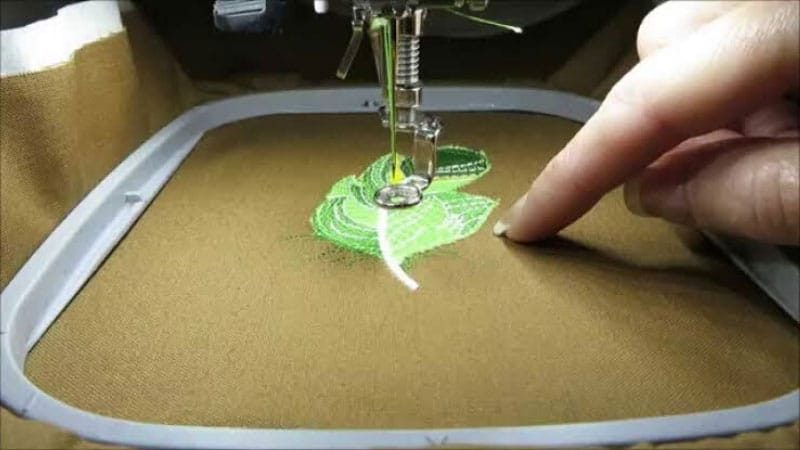
The standard machine appliqué stitch sequence proceeds as follows:
- The machine stitches the placement outline onto the base fabric, indicating exactly where the appliqué fabric piece must be positioned.
- The operator removes the hoop from the machine, positions the pre-cut appliqué piece precisely over the placement outline, and returns the hoop to the machine.
- The machine stitches the tack-down stitch, securing the appliqué piece across its interior surface and holding it firmly against the base fabric.
- The operator trims the excess appliqué fabric as close to the tack-down stitch line as possible, using sharp embroidery scissors or a curved-blade trimmer to achieve a clean edge.
- The machine completes the final border stitch — typically a dense satin stitch or blanket stitch — which seals the trimmed edge and produces the finished visual outline of the design.
Mistakes That Undermine Machine Appliqué Results

Even operators working with correct equipment and properly formatted design files produce substandard results when fundamental procedural errors accumulate across a project. The most damaging mistakes in machine appliqué share a common cause: they are almost always the product of decisions made before the machine is turned on, not errors introduced during the stitching sequence itself.
Stabilizer and Thread Errors
Using insufficient stabilizer is the single most reported cause of distorted appliqué results, and the fix is straightforward. A single layer of tear-away stabilizer beneath a medium-weight woven fabric provides adequate support for standard designs, but operators who attempt the same approach on knit or stretch fabrics should expect registration failures and fabric bunching around the stitching area. Doubling stabilizer layers or switching to cut-away backing resolves the problem definitively and adds negligible cost to the overall project.
Thread tension imbalance produces loops on the fabric surface or visible pulling on the underside, both of which indicate that the upper tension setting or bobbin tension requires adjustment before production continues. Running a complete test stitch on scrap material before committing to the finished hoop is not an optional precaution — it is the minimum quality control standard that every experienced operator follows without exception, regardless of how familiar the fabric combination may be.
Design and Placement Pitfalls
Selecting designs with insufficient compensation between the placement stitch and the final border stitch produces misaligned edges where the satin stitch does not fully cover the raw fabric edge of the appliqué piece. Reputable commercially digitized design files include adequate pull compensation built into the file structure, but operators who digitize their own designs must account for fabric draw-in when setting the final border stitch width, or the raw edge will be exposed in the finished piece.
Placing the appliqué fabric piece without verifying its grain line alignment introduces unwanted diagonal distortion in the finished design, which is particularly visible in striped or geometric fabrics. The grain of the appliqué piece should run parallel to the grain of the base fabric in all applications except intentionally designed bias-cut projects, and skipping this verification step is a reliable source of results that cannot be corrected after stitching is complete.
Appliqué in Practice: Creative Projects and Finished Results

Machine appliqué projects range from simple single-layer shapes applied to garments to complex multi-color layered designs produced in batch quantities. Understanding what finished projects look like in practice helps operators calibrate their skill development path and identify which application areas align best with their current capability level and available equipment.
Home Décor and Textile Applications
Decorative pillows, table runners, quilted wall hangings, and seasonal decorations represent the most common home décor applications for machine appliqué, and these projects benefit directly from the technique's ability to introduce bold color contrast and dimensional texture that standard embroidery fills cannot achieve. Felt appliqué on linen pillowcases produces a particularly striking visual result because the matte surface texture of felt against the natural weave of the linen creates dimensional depth without requiring dense thread fills that would stiffen the fabric. Quilted projects that incorporate machine appliqué as a primary design element allow operators to combine piecing and surface decoration within a single cohesive workflow.
Garments and Wearable Projects
Appliqué on garments presents more technical demands than home décor applications, primarily because wearable items must withstand repeated mechanical washing cycles and the physical stress of regular movement. Selecting cut-away stabilizer for all garment appliqué work is the correct standard approach because it maintains structural integrity through wash cycles that would progressively degrade tear-away backing over time. T-shirts, denim jackets, athletic uniforms, and tote bags are among the most frequently appliquéd wearable categories, with custom athletic wear benefiting most visibly from the technique's ability to produce durable, high-contrast graphics without the stiffness associated with screen printing or heat transfer vinyl applications.
Where Machine Appliqué Delivers the Greatest Value
Understanding where machine appliqué generates the most practical and commercial value helps operators decide whether to invest in building the skill for personal use, professional production, or both simultaneously. The technique occupies a distinct and defensible position in the craft-to-commerce pipeline that few other fabric embellishment methods can replicate at the same quality level and per-unit cost.
Small Businesses and Production Runs
Machine appliqué is a commercially viable technique for small textile businesses because it can be produced with relatively low per-unit material cost while commanding premium pricing for finished goods in the marketplace. Custom monogrammed items, branded apparel, personalized children's garments, and specialty event merchandise represent the highest-revenue product categories for appliqué operators. Those evaluating the financial potential of custom fabric-based businesses should review detailed data on how much profit a custom apparel business generates annually, as the margin structure for appliqué products is comparable to — and frequently exceeds — that of competing decorating methods at similar price points. The initial investment in a multi-needle embroidery machine is recovered quickly at consistent production volume, making this one of the most capital-efficient entry points available in the custom garment space.
Hobbyists and Personalization Projects
For hobbyists, machine appliqué offers an unusually direct pathway from concept to finished product, without the lengthy skill accumulation that many comparable textile techniques demand. The ability to produce personalized fabric gifts, customized clothing, and distinctive home décor items at a higher quality threshold than hand-sewing methods allows hobbyists to achieve professional-grade results without professional-grade training investment. The learning curve for the core technique is genuinely achievable over the course of several practice sessions on scrap material, and operators who invest in quality pre-digitized commercial design files bypass the most technically demanding aspect of the skill — digitization — entirely, concentrating their development on machine operation and material handling instead.
Frequently Asked Questions
What type of stabilizer is best for machine appliqué on knit or stretch fabrics?
Cut-away stabilizer is the correct choice for knit and stretch fabrics because it maintains structural integrity permanently, preventing the distortion and registration failures that tear-away backing cannot resist under the lateral fabric stress present in stretchy materials.
How does machine appliqué differ from standard machine embroidery?
Standard machine embroidery builds imagery entirely through thread fills and outline stitches placed directly into the base fabric. Machine appliqué incorporates a separate piece of fabric as the primary visual element, using stitches primarily to secure and outline that fabric piece rather than to construct the design from thread alone.
Can any embroidery machine perform appliqué without special accessories?
Any embroidery machine that accepts multi-step design files can perform appliqué. No specialized accessories are required beyond standard embroidery consumables — the technique is a design and workflow method, not a hardware capability exclusive to specific machine models.
What is the purpose of the tack-down stitch in machine appliqué?
The tack-down stitch secures the appliqué fabric piece to the base fabric across its interior surface, preventing shifting before the final border stitch is applied. It runs slightly inside the placement outline and holds the fabric piece firmly in position during the trimming step.
How should appliqué fabric be cut before placement in the hoop?
The appliqué fabric should be cut slightly larger than the placement outline — approximately 3 to 5 millimeters of excess on all sides — so that precise positioning is achievable during the placement step. Final trimming to the exact edge is performed after the tack-down stitch is complete and the hoop is returned to the machine.
Which thread type produces the most durable results for frequently washed appliqué items?
Polyester embroidery thread outperforms rayon for items that will be machine washed with regularity. Polyester resists color fading, thread breakage, and moisture degradation better than rayon across repeated wash cycles, making it the preferred choice for garments and household textiles subject to routine laundering.
Is machine appliqué suitable for beginners with no prior embroidery experience?
Machine appliqué is accessible to beginners who start with simple single-color designs on stable fabrics such as felt or tightly woven cotton. The fundamental technique is learnable within several practice sessions on scrap material, and using pre-digitized commercial design files removes the most technically advanced requirement — digitization — from the beginner learning path entirely.
Final Thoughts
Machine appliqué stands as one of the most rewarding techniques available to hobbyists and small business operators who work with fabric, and the investment in learning the correct process pays dividends across every project that follows. Those new to the technique are encouraged to begin with a single-color felt design on a stable cotton base, using a quality pre-digitized file and a properly tensioned cut-away stabilizer, and to run a complete test hoop on scrap material before committing to finished goods. Starting with that disciplined, methodical approach establishes the foundational habits that consistently produce excellent results from the very first completed piece onward.


About Alice Davis
Alice Davis is a crafts educator and DIY enthusiast based in Long Beach, California. She spent six years teaching textile design and applied arts at a community college, where she introduced students to everything from basic sewing techniques to vinyl cutting machines and heat press printing as practical, production-ready tools. That classroom experience means she has put more sewing machines, embroidery setups, Cricut systems, and heat press units through real project work than most reviewers ever will. At PalmGear, she covers sewing machines and embroidery tools, vinyl cutters, heat press gear, Cricut accessories, and T-shirt printing guides.
You can get FREE Gifts. Or latest Free phones here.
Disable Ad block to reveal all the info. Once done, hit a button below