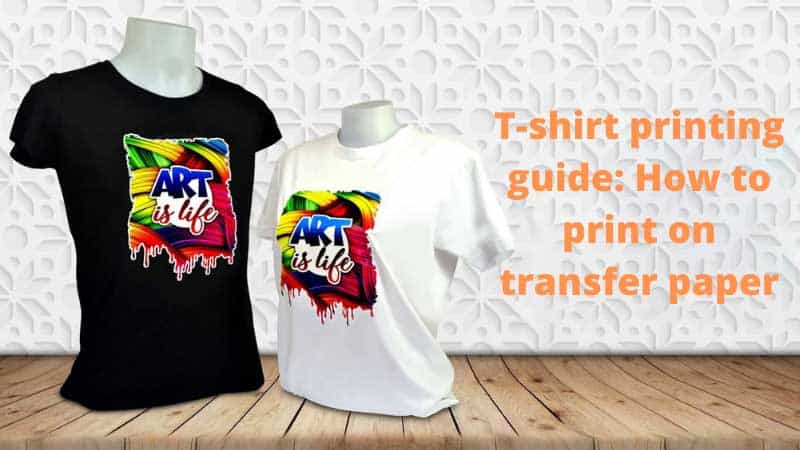
T-shirt Printing Guide: How to Print on Transfer Paper
by Alice Davis
Have you ever wondered why some transfer-printed shirts look vibrant after dozens of washes while others fade almost immediately? The answer lies in how you print on transfer paper and apply it to the fabric. Each step — from printer selection to peel technique — determines the final result. This guide addresses common myths, best-use scenarios, essential equipment, application techniques, troubleshooting, and long-term garment care. For a broader look at heat-based decoration methods, explore the heat press and vinyl crafts category on PalmGear.
Transfer paper printing offers a cost-effective entry point for custom apparel. When executed correctly, results rival professional screen printing. When rushed or mismanaged, even the best design fails. Understanding the process thoroughly is the foundation of consistent output.

Contents
Common Misconceptions About Transfer Paper
Several persistent myths circulate in the crafting community about how to print on transfer paper. These misconceptions lead to wasted supplies and disappointing results. Clarifying what is accurate — and what is not — will save you time, money, and frustration before your first press.
The "Any Printer Will Work" Myth
Many beginners assume any household printer is suitable for transfer paper. This is incorrect. Inkjet and laser printers use fundamentally different technologies. Each type requires a specific category of transfer paper. Using laser transfer paper in an inkjet printer — or vice versa — produces unusable results. The ink either fails to adhere to the paper's coating or fuses incorrectly during heat application. Verify your printer type before purchasing any transfer media.
The "All Fabrics Are Compatible" Myth
Transfer paper performs well on high-cotton fabrics. However, it struggles significantly with synthetic blends containing more than 50 percent polyester. The high heat required for proper adhesion can damage synthetic fibers. Some crafters also assume that dark-fabric and light-fabric transfer papers are interchangeable. They are not. Using light-fabric paper on a dark shirt produces invisible or washed-out designs. For a detailed comparison, review the guide on dark vs light transfer paper differences before purchasing your supplies.
Always match your transfer paper type to both your printer model and your fabric color. Using the wrong combination is the single most common cause of failed transfers.
Choosing the Right Moment to Print on Transfer Paper
Transfer paper is not the optimal solution for every project. Knowing when to use it — and when to choose an alternative — is a mark of an experienced crafter. Consider your project's scale, fabric content, and durability expectations before committing to this method.
When Transfer Paper Excels
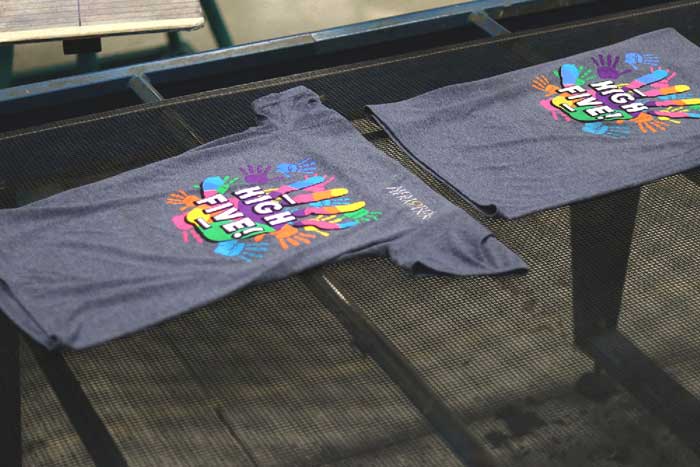
Transfer paper is ideal for small-batch, custom orders. If you are printing one to twelve shirts with complex, full-color designs, it is an excellent choice. It accommodates photographic images with gradients and fine detail. Home-based businesses and hobbyists benefit most from its low startup cost. You do not need specialty equipment beyond a standard printer and a heat press. It also suits one-time novelty items — event shirts, personalized gifts, or sample prototypes.
Another strong use case is design validation. Before committing to a full production run, designers often press a transfer proof to evaluate scale and color on an actual garment. This avoids costly production mistakes early. Transfer paper also works well when applying designs to hoodies and sweatshirts for limited-edition seasonal runs.
When to Consider Other Methods
For production runs exceeding fifty units, transfer paper becomes inefficient. Unit cost remains high and application time does not scale well. In those cases, screen printing or direct-to-garment printing offers better economics. Transfer paper also underperforms on heavily textured fabrics — waffle-knit, ribbed, or canvas materials trap air beneath the transfer and create incomplete bonding. If your design requires extreme wash durability, such as for workwear or athletic uniforms, consider sublimation or heat transfer vinyl instead. According to Wikipedia's overview of transfer printing, sublimation produces a dye bond within the fiber itself — a fundamentally more durable bond than a surface-level transfer adhesive.
Essential Tools and Materials
Success depends on having the correct equipment at each stage of the process. Cutting corners on tools produces inconsistent results, even when your technique is sound. Invest in the right components before starting your first project.
Printers and Ink Types
Your printer type determines which transfer paper you can use. Inkjet printers use water-based dye or pigment ink and require inkjet-specific transfer paper with a special polymer coating. Laser printers use heat-fused toner and require laser transfer paper designed to release toner under secondary heat. Pigment-based inkjet ink produces more durable prints than dye-based ink. If wash durability is a priority, consider upgrading your ink system before addressing your paper selection.
| Printer Type | Transfer Paper Type | Best For | Estimated Wash Durability |
|---|---|---|---|
| Inkjet (dye ink) | Inkjet transfer paper | Light-colored fabrics, photographic images | Moderate (10–20 washes) |
| Inkjet (pigment ink) | Inkjet transfer paper | Light-colored fabrics, fine detail artwork | Good (20–40 washes) |
| Laser printer | Laser transfer paper | Light or dark fabrics, sharp graphics | Very Good (30–50 washes) |
| Laser printer (dark paper) | Dark-fabric laser paper | Black and dark-colored garments | Good (25–40 washes) |
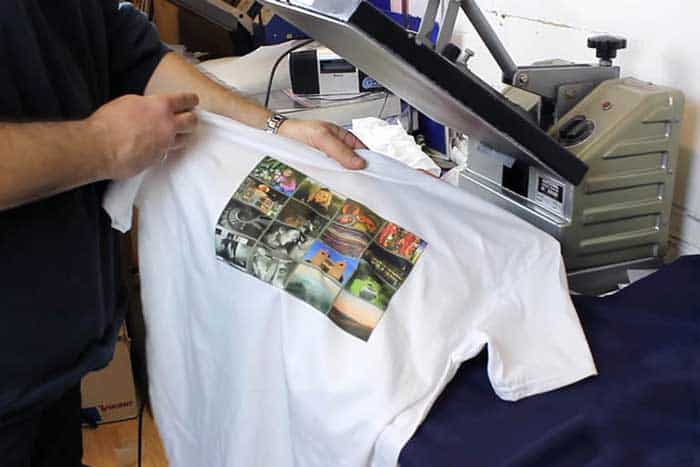
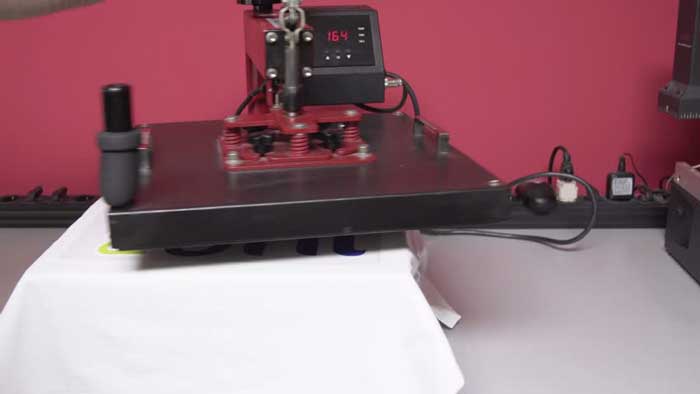
Heat Press Machines
A heat press is the preferred application tool. It delivers consistent temperature and pressure across the entire design area — something a household iron cannot replicate. Pressure variation causes partial transfers and edge lifting almost immediately. If you are new to this equipment, review the guide on how to use a heat press machine before your first session. Understanding pressure is equally important — consult the heat press pressure guide to calibrate correctly for your fabric weight.

A Teflon sheet is an essential accessory. It protects both your transfer and the heat press platen, distributes heat evenly, and prevents scorching on delicate fabrics. Learn proper technique in this dedicated article on using a Teflon sheet with a heat press. Do not press without one.
Proven Techniques When You Print on Transfer Paper
Technique matters as much as equipment. Small oversights during preparation or application produce visible defects in the finished garment. Following established practices consistently will maximize your success rate across every project.
Preparing Your Design
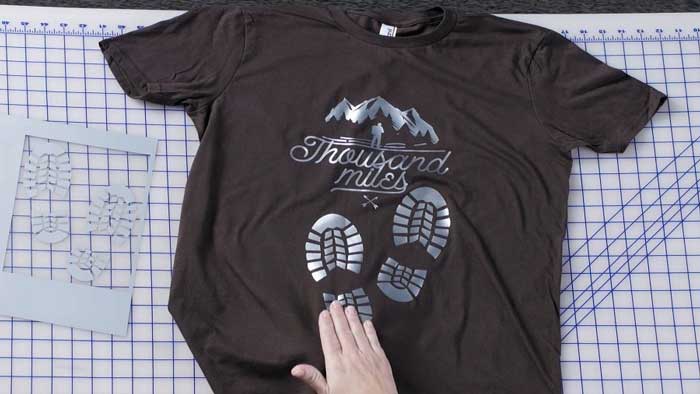
Mirror your image before printing. Inkjet transfer paper requires a horizontally flipped image. When you press the transfer face-down onto the shirt, the mirrored design corrects itself. Text that is not mirrored will appear backward on the finished garment. Most image editing applications include a flip or mirror function. Verify this step every time — it is easy to skip when you are deep in a workflow.
Print at the highest quality setting your printer supports. Lower resolution settings reduce ink density. Sparse ink coverage results in dull, faded transfers on the finished garment. Set your printer's media type to "photo paper" or "specialty paper" to maximize ink deposition on the transfer coating. Allow the printed sheet to dry completely before cutting or handling. Wet ink smears under contact pressure and creates uneven ink deposits that affect transfer clarity.
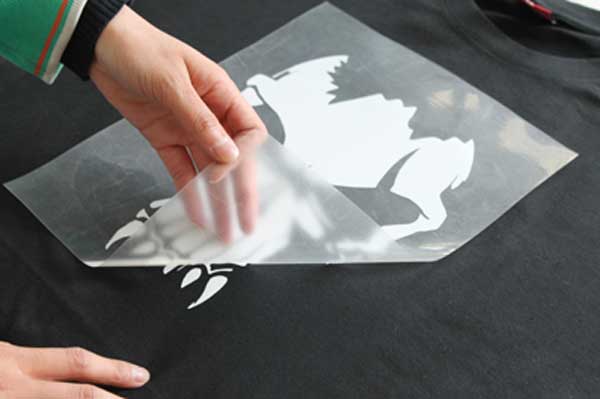
Cut your design as closely as possible to the artwork edges. Excess transfer paper background leaves a visible, glossy border on the finished shirt — a telltale sign of a rushed application.
Applying Heat Correctly
Pre-press your shirt for five to ten seconds before applying the transfer. This removes residual moisture and wrinkles, creating a flat, dry surface for bonding. Moisture trapped beneath a transfer creates steam during pressing, which actively disrupts adhesion. Position your design precisely before lowering the platen. Once the transfer contacts the heated fabric, repositioning damages the artwork.

Press at the temperature specified by your paper manufacturer — typically between 350°F and 375°F for inkjet transfers. Maintain firm, even pressure for the full recommended duration. After pressing, peel the backing according to your paper's instructions. Cold peel and hot peel papers have distinct requirements and peeling at the wrong temperature causes tearing or design lifting. For a detailed comparison of these two approaches, consult the guide on cold peel vs hot peel transfer paper.
Diagnosing and Fixing Transfer Problems
Even experienced crafters encounter transfer failures. Most problems have identifiable causes. Diagnosing the root issue correctly prevents repeated mistakes and unnecessary material waste.
Fading and Peeling
Fading after the first wash typically indicates insufficient heat or pressure during application. The transfer did not bond fully to the fabric fibers. Increase temperature in 5°F increments and test on a scrap shirt before retrying your final garment. Peeling at the edges points to inadequate pressure at the perimeter of the platen. Check your heat press for uneven pressure distribution across its surface area and adjust the pressure knob accordingly. Many of the same root causes that affect transfer paper also affect vinyl — the guide on fixing heat transfer vinyl peeling provides relevant diagnostic steps.
Incomplete Transfers
Incomplete transfers — where sections of the design remain on the backing paper — typically result from moisture in the fabric or insufficient pressing duration. Always pre-press. If the problem persists, increase press time by five-second increments until the full design releases cleanly. Uneven transfers across a large design area suggest platen irregularity or shirt seams creating raised surfaces beneath the design. A heat press pillow or foam leveling pad corrects this problem by compensating for surface variation during pressing.
Always test every new batch of transfer paper on an inexpensive scrap shirt before committing to your final garment. Paper formulations vary between brands and even between production runs from the same manufacturer.
Washing and Maintaining Transfer-Printed Garments
Proper post-press care extends the life of your transfer-printed shirts significantly. Neglecting care instructions is the fastest way to degrade an otherwise well-applied design. Establish a consistent routine from the first wash onward.
Laundry Best Practices
Wait at least 24 hours after pressing before washing. This allows the adhesive polymer layer to cure fully. Turn the shirt inside out before placing it in the machine. Direct agitation against the transfer surface accelerates wear and causes premature edge lifting. Use cold water on a gentle cycle. Hot water softens the polymer layer and promotes adhesive failure. Avoid fabric softeners — they coat fibers with a lubricating film that weakens the bond between the transfer and the fabric over time.
- Wash inside out, cold water, gentle cycle only
- Line dry or tumble dry on low heat — high dryer heat degrades the transfer layer progressively
- Never iron directly over the design; iron on the reverse side or use a pressing cloth as a barrier
Long-Term Storage Tips
Store printed shirts flat or folded with the transfer surface facing inward. Hanging shirts with heat-bonded transfers for extended periods can introduce subtle distortion over time, particularly in heavier designs. Unused transfer paper should be stored flat in a sealed plastic bag away from humidity. Moisture absorption alters the paper's polymer coating, reducing transfer quality in ways that are not visible until after pressing. Keep stored paper at stable room temperature. Extreme cold changes adhesive viscosity; extreme heat causes pre-activation of the polymer layer before you ever print a design.
Frequently Asked Questions
Can I use a regular household iron instead of a heat press to apply transfer paper?
A household iron can apply transfer paper, but results are inconsistent. Irons deliver uneven heat distribution and variable pressure, which frequently causes partial transfers and edge lifting. A dedicated heat press is strongly recommended for reliable, repeatable output across multiple shirts.
Do I need to mirror my image before printing on transfer paper?
Yes, for most inkjet transfer papers, mirroring is required. The design is placed face-down onto the fabric, so a mirrored print corrects itself during transfer. Some laser papers for dark fabrics do not require mirroring — always follow the instructions provided by the paper manufacturer for your specific product.
How long does a transfer-printed shirt last through washing?
Longevity depends on ink type, paper quality, fabric content, and care habits. A well-applied inkjet pigment transfer on 100% cotton, washed correctly in cold water inside out, typically holds for 20 to 40 washes. Laser transfers tend to last longer. Consistent cold-water washing extends the lifespan considerably.
What fabric content works best with transfer paper?
Fabrics with at least 80% cotton content yield the best adhesion and color vibrancy. Higher polyester content reduces adhesion strength and may cause the transfer to crack or peel prematurely. Pre-washed cotton fabrics accept transfers more evenly than unwashed ones because pre-washing removes sizing chemicals that interfere with bonding.
What is the difference between printable HTV and regular transfer paper?
They are distinct products with different application methods. Printable heat transfer vinyl is a vinyl film with a printable coating — it uses a carrier sheet, is printed and then cut before application. Transfer paper transfers the entire printed image directly to the fabric without cutting. For a detailed breakdown, see the guide on printable HTV vs regular HTV.
Final Thoughts
Learning to print on transfer paper correctly rewards patience and attention to detail at every stage — from selecting the right paper and printer to calibrating your heat press and caring for the finished garment. Start with a small test batch, document your temperature and pressure settings, and refine your process with each run. Visit the heat press and vinyl crafts section on PalmGear for additional guides, equipment comparisons, and technique breakdowns to support your work at every skill level.


About Alice Davis
Alice Davis is a crafts educator and DIY enthusiast based in Long Beach, California. She spent six years teaching textile design and applied arts at a community college, where she introduced students to everything from basic sewing techniques to vinyl cutting machines and heat press printing as practical, production-ready tools. That classroom experience means she has put more sewing machines, embroidery setups, Cricut systems, and heat press units through real project work than most reviewers ever will. At PalmGear, she covers sewing machines and embroidery tools, vinyl cutters, heat press gear, Cricut accessories, and T-shirt printing guides.
You can get FREE Gifts. Or latest Free phones here.
Disable Ad block to reveal all the info. Once done, hit a button below